
Snowflake
Overview
The Snowflake connector enables your AI Colleagues to integrate with your organization's Snowflake data warehouse, facilitating automated SQL query execution, data insertion, and data warehouse operations.
Snowflake is a cloud-based data warehousing platform that provides scalable storage and compute resources for analytics and data processing. The Snowflake connector allows Leena AI to automate data warehouse workflows, execute queries, and manage data operations seamlessly.
API Details
Leena AI integrates with Snowflake via the Snowflake Node.js Driver.
Documentation link: https://docs.snowflake.com/en/developer-guide/node-js/nodejs-driver
Setup
The Snowflake connector supports two authentication methods: Username & Password authentication and Key Pair (JWT) authentication.
Prerequisites
Before setting up the Snowflake connector, ensure you have:
- Access to a Snowflake account
- Administrator or user creation privileges in Snowflake
- Access to your Leena AI workspace with connector management permissions
- For Key Pair authentication: ability to generate and manage RSA key pairs
Authentication Methods
Method 1: Username & Password Authentication
This method uses standard password-based authentication with Snowflake credentials.
Get credentials
Here is how to create a user with password:
- Log in to Snowflake web interface
- Click on User Profile in bottom left → Account → View Account Details
- Note the Account Identifier
- Switch to ACCOUNTADMIN or USERADMIN role
- Navigate to Governance & Security
- Click on Create User from top-right
- Fill in the form with username and password
- Click Create User (Remember the Username and Password)
- Use the Account Identifier, Username, and Password for creating the connector
Add connection
Here is how to add a connection on Leena AI:
- Log in to your Leena AI workspace
- Navigate to Settings > Integrations
- Search for "Snowflake" and select it from the list to add its new connector
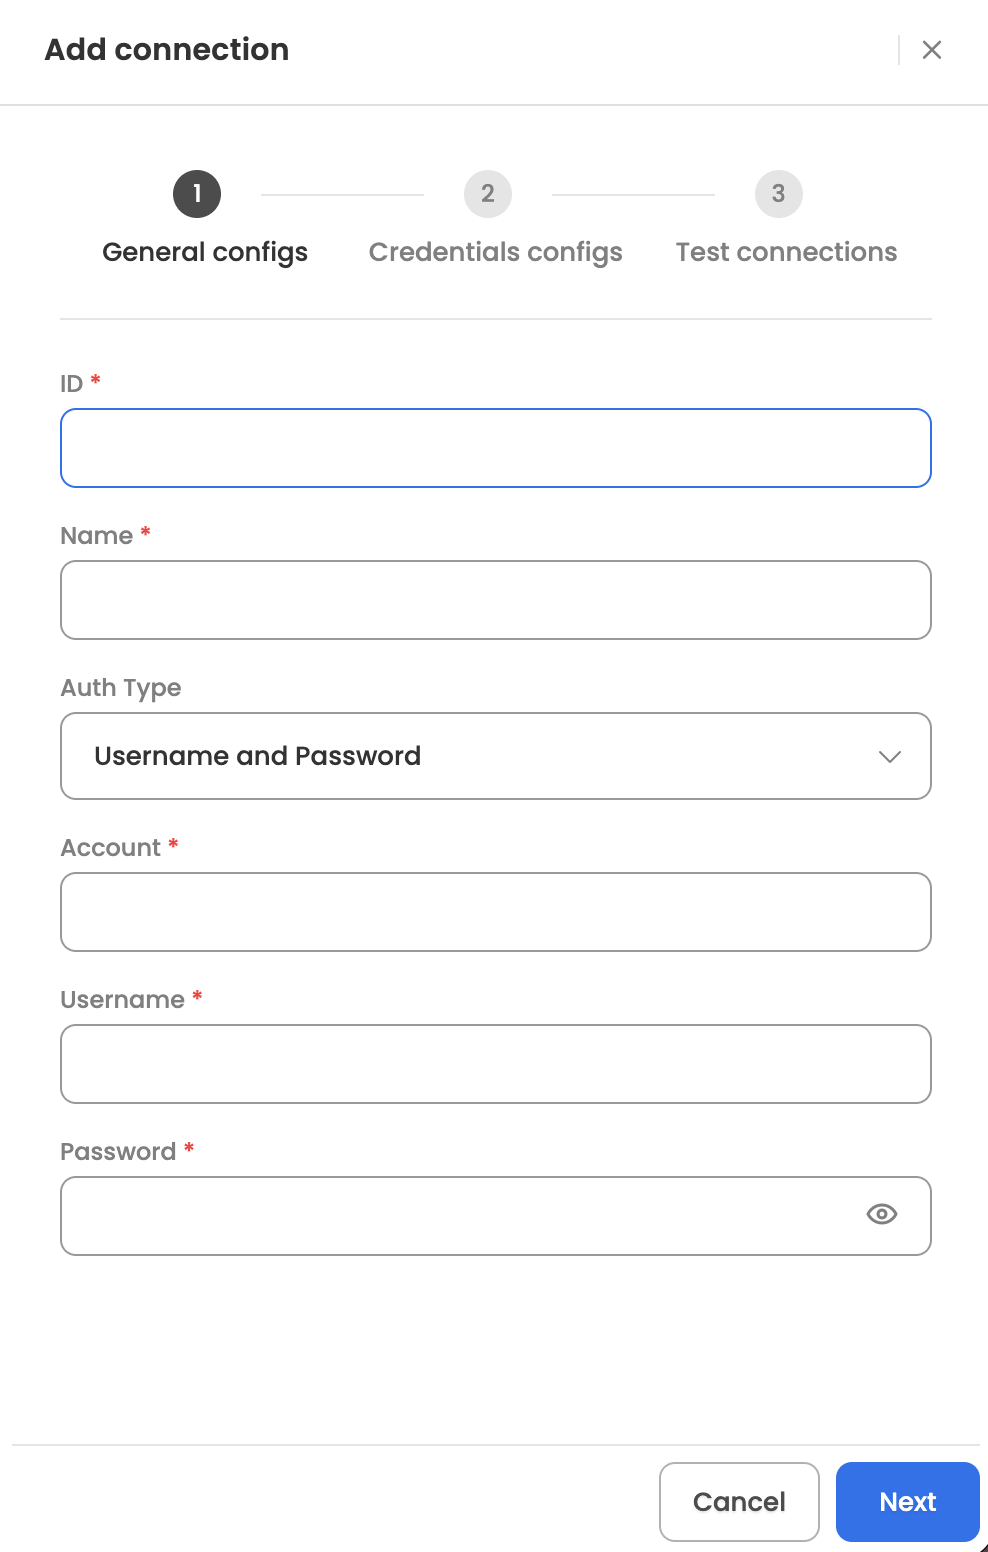
- Start configuring the connector with Username & Password authentication
- Account: Snowflake account identifier (e.g., myorg-account_name)
- Username: Snowflake username
- Password: Account password
- Complete the configuration and save
- Test the connection to verify successful setup
Method 2: Key Pair (JWT) Authentication
This method uses certificate-based authentication with RSA private key for enhanced security.
Get credentials
Here is how to set up Key Pair authentication:
- Generate RSA Key Pair
- Generate a private key using OpenSSL or similar tool
- Generate corresponding public key
- Convert private key to PKCS#8 format if needed
- Configure Snowflake User
- Log in to Snowflake web interface
- Click on User Profile in bottom left → Account → View Account Details
- Note the Account Identifier
- Execute SQL command to set public key for user:
ALTER USER <username> SET RSA_PUBLIC_KEY='<public_key_value>'; - Verify the public key is set correctly
- For detailed instructions, refer to: Key-pair authentication and key-pair rotation
Add connection
Here is how to add a connection on Leena AI:
- Log in to your Leena AI workspace
- Navigate to Settings > Integrations
- Search for "Snowflake" and select it from the list to add its new connector
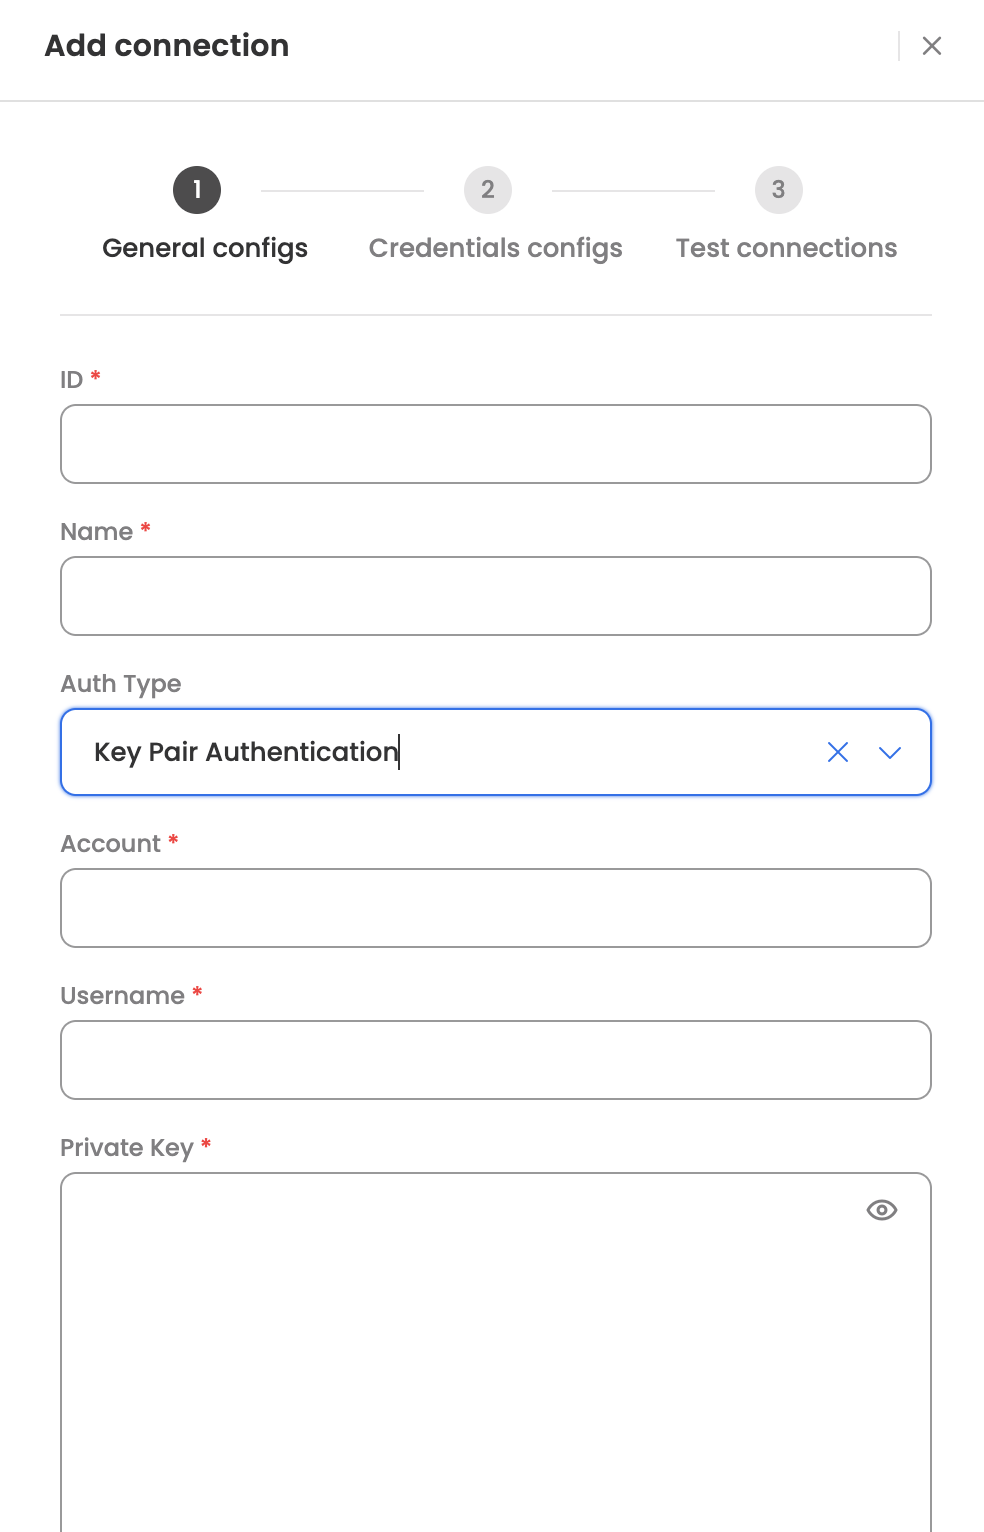
- Start configuring the connector with Key Pair authentication
- Account: Snowflake account identifier (e.g., myorg-account_name)
- Username: Snowflake username
- Private Key: Private key in PKCS#8 format
- Passphrase: Passphrase for encrypted key (if applicable)
- Complete the configuration and save
- Test the connection to verify successful setup
Actions
The following actions are supported for the Snowflake connector:
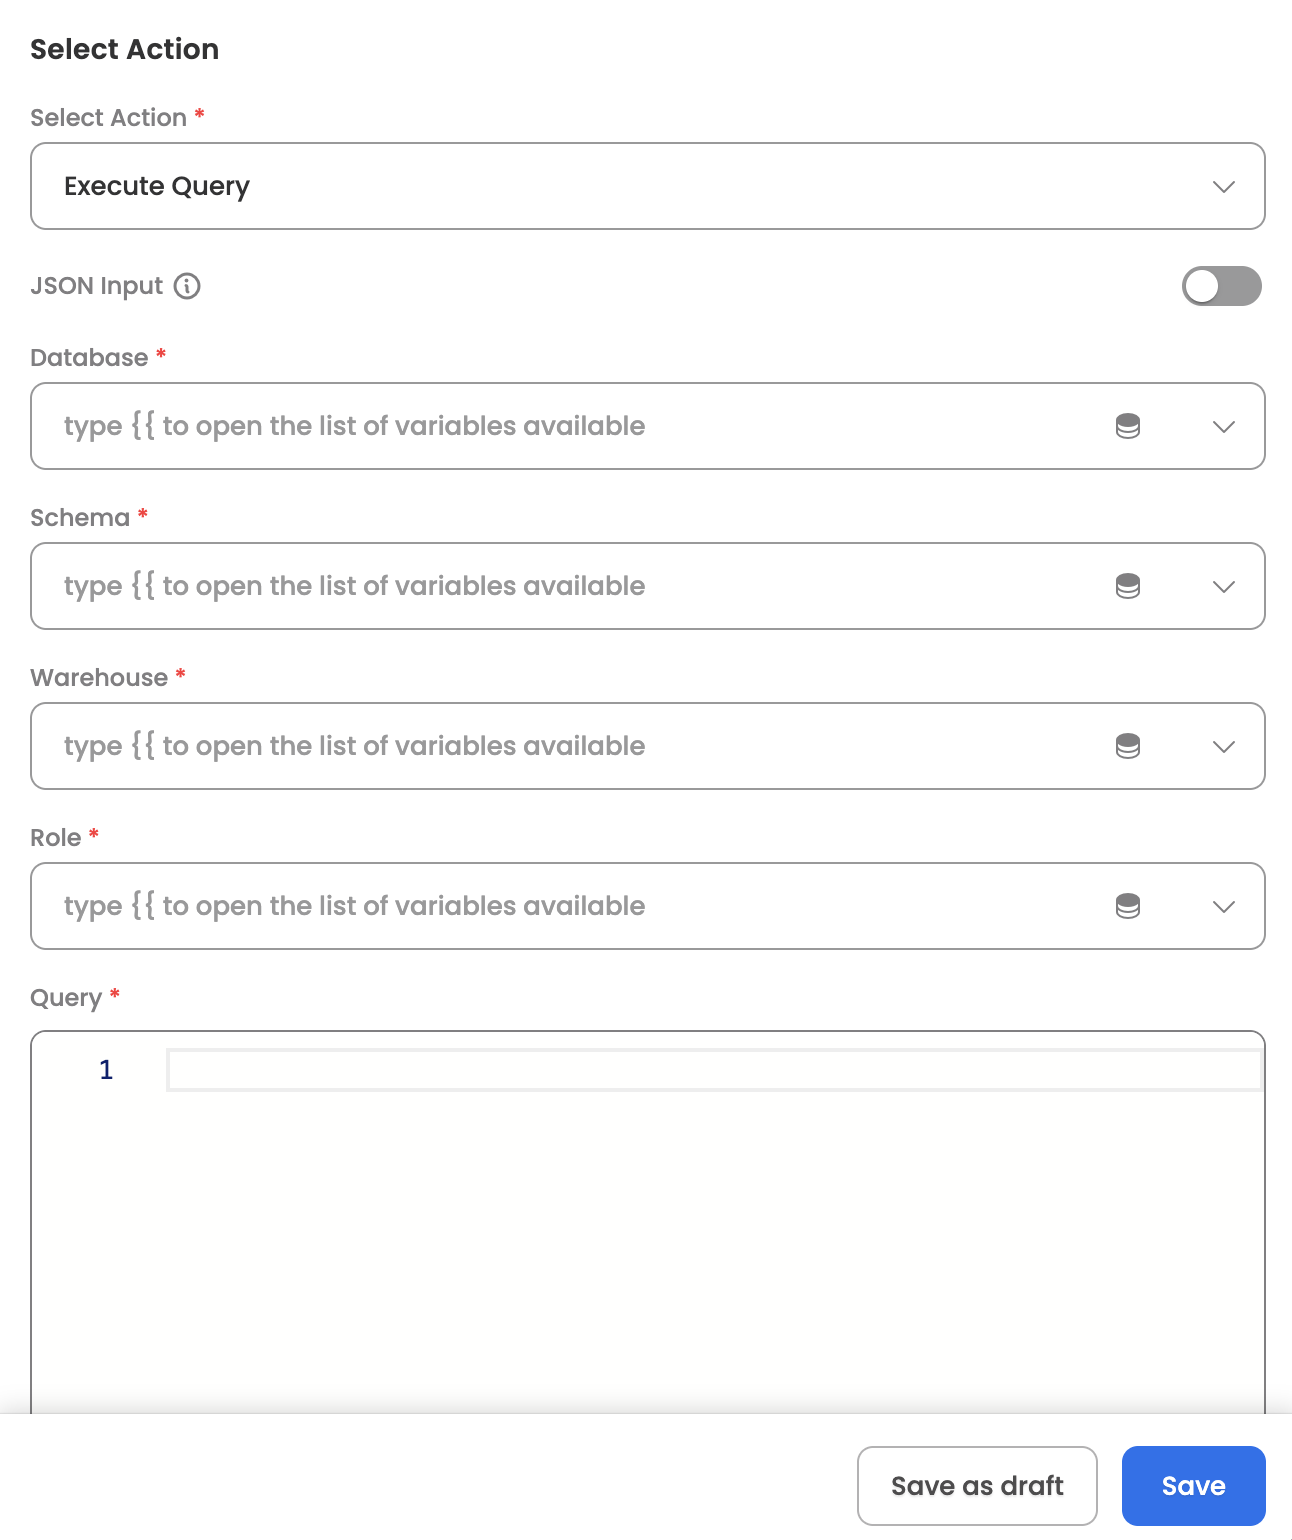
Execute Query
Executes custom SQL queries on Snowflake data warehouse including SELECT, INSERT, UPDATE, DELETE, and DDL statements. The Agent can leverage the tool (workflow), which has been designed to execute SQL queries in Snowflake, once the user raises a query to do so.
Input Parameters
Here are the input parameters required to set up this action:
Mandatory
| Name | Description |
|---|---|
| Database | Target database name in Snowflake |
| Schema | Target schema name within the database |
| Warehouse | Compute warehouse to use for query execution |
| Role | Role for query execution |
| Query | SQL query to execute |
Use Cases
Use Case 1: Execute Simple SELECT Query
Retrieve data from a Snowflake table to analyze or display results.
Input Example:
{
  "database": "MY_DATABASE",
  "schema": "PUBLIC",
  "warehouse": "COMPUTE_WH",
  "role": "ACCOUNTADMIN",
  "query": "SELECT * FROM users LIMIT 10"
}
Response:
{
  "status": 200,
  "data": [
    {
      "ID": "1",
      "NAME": "John Doe",
      "EMAIL": "[email protected]",
      "CREATED_AT": "2025-01-15"
    },
    {
      "ID": "2",
      "NAME": "Jane Smith",
      "EMAIL": "[email protected]",
      "CREATED_AT": "2025-02-20"
    }
  ]
}
Use Case 2: Execute UPDATE Query
Update existing records in a Snowflake table based on specific conditions.
Input Example:
{
  "database": "MY_DATABASE",
  "schema": "PUBLIC",
  "warehouse": "COMPUTE_WH",
  "role": "ACCOUNTADMIN",
  "query": "UPDATE users SET status = 'active' WHERE last_login > DATEADD(day, -30, CURRENT_DATE())"
}
Use Case 3: Execute DDL Statement (Create Table)
Create a new table structure in Snowflake for storing data.
Input Example:
{
  "database": "MY_DATABASE",
  "schema": "PUBLIC",
  "warehouse": "COMPUTE_WH",
  "role": "ACCOUNTADMIN",
  "query": "CREATE TABLE employees (id INT, name VARCHAR(100), email VARCHAR(255), hire_date DATE)"
}
Response
Upon successful execution, the action returns:
- Query execution status
- Result data (for SELECT queries)
- Number of rows affected (for INSERT, UPDATE, DELETE)
- Execution metadata
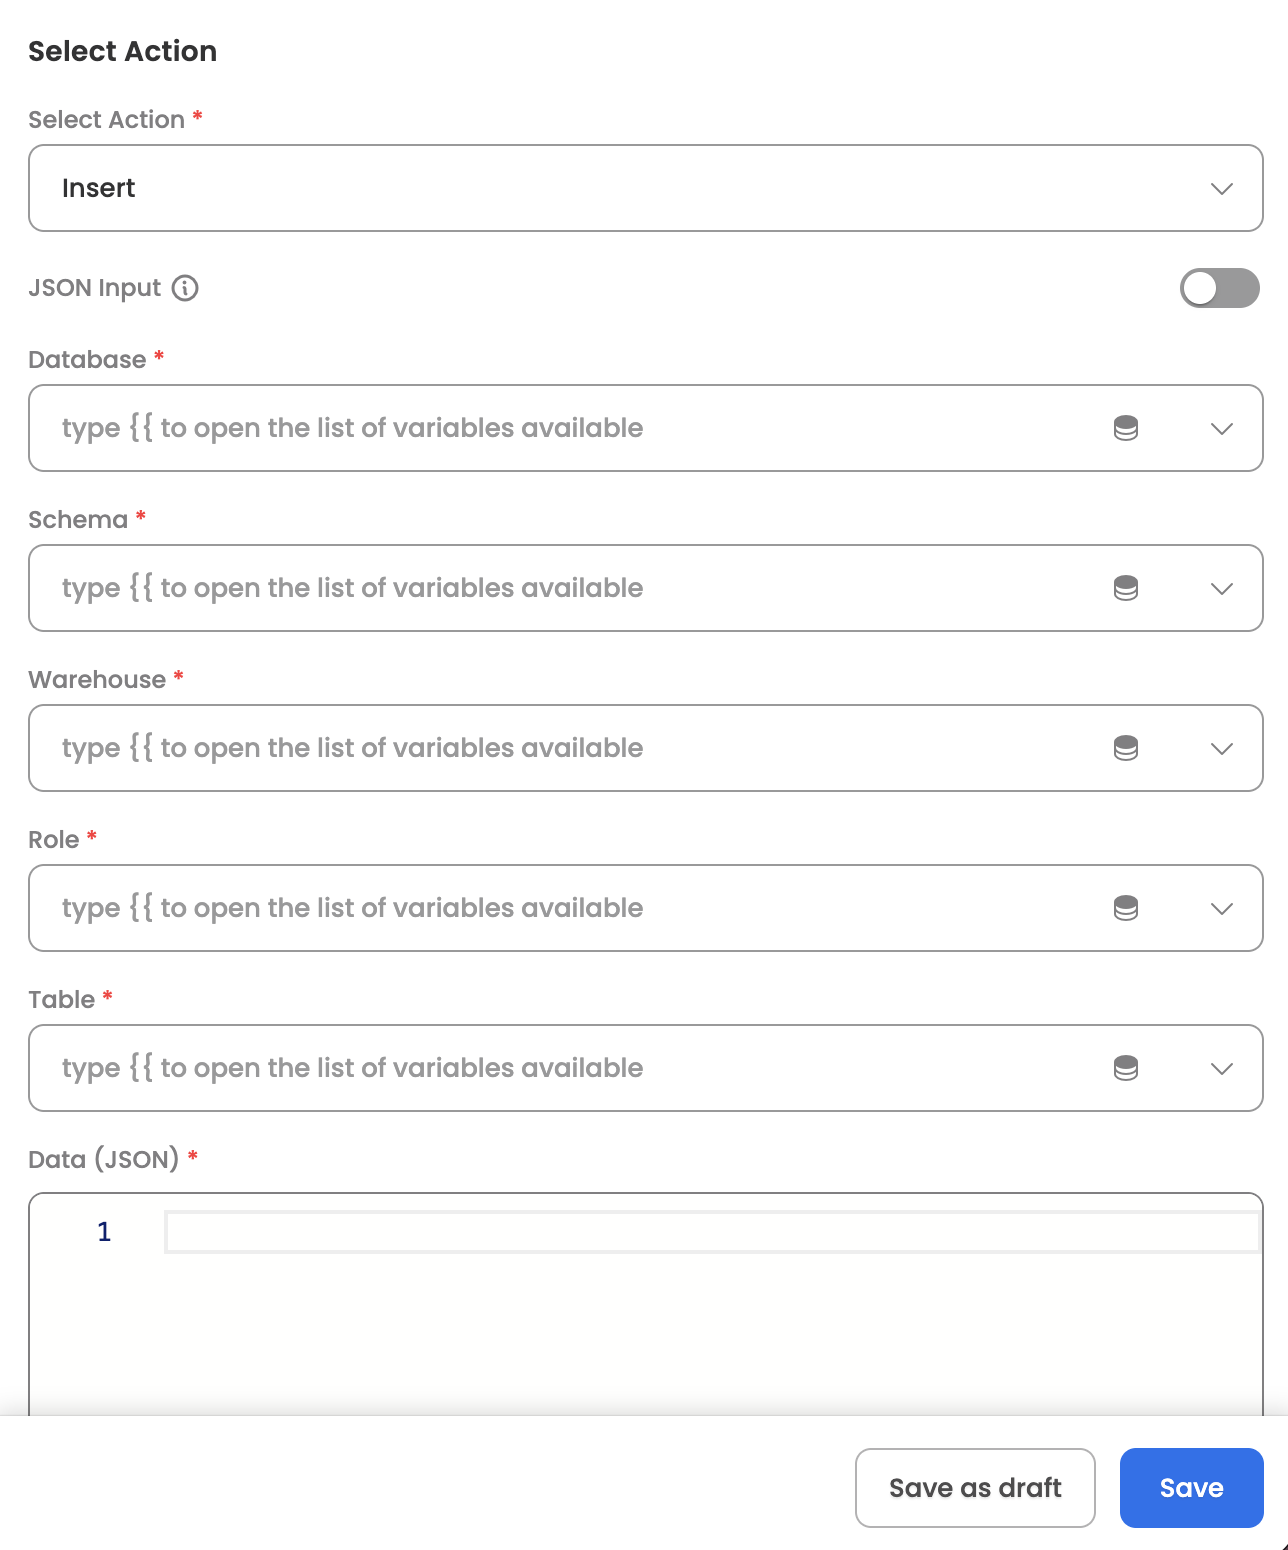
Insert Data
Inserts single or multiple rows into a Snowflake table with automatic column detection from JSON data. The Agent can leverage the tool (workflow), which has been designed to insert data into Snowflake tables, once the user provides the data to be inserted.
Input Parameters
Here are the input parameters required to set up this action:
Mandatory
| Name | Description |
|---|---|
| Database | Target database name in Snowflake |
| Schema | Target schema name within the database |
| Warehouse | Compute warehouse to use for insert operation |
| Role | Role for insert operation |
| Table | Target table name where data will be inserted |
| Data | Array of objects to insert |
Use Cases
Use Case 1: Insert Single Row
Insert a single record into a table for individual data entry operations.
Input Example:
{
  "database": "MY_DATABASE",
  "schema": "PUBLIC",
  "warehouse": "COMPUTE_WH",
  "role": "ACCOUNTADMIN",
  "table": "users",
  "data": [
    {
      "id": 101,
      "name": "Alice Williams",
      "email": "[email protected]",
      "created_at": "2025-11-12"
    }
  ]
}
Response:
{
  "status": 200,
  "data": {
    "message": "Successfully inserted 1 row(s) into users",
    "rowsInserted": 1,
    "table": "users"
  }
}
Use Case 2: Bulk Insert Multiple Rows
Insert multiple records in a single operation for improved performance and efficiency.
Input Example:
{
  "database": "MY_DATABASE",
  "schema": "PUBLIC",
  "warehouse": "COMPUTE_WH",
  "role": "ACCOUNTADMIN",
  "table": "users",
  "data": [
    {
      "id": 201,
      "name": "John Smith",
      "email": "[email protected]",
      "department": "Engineering"
    },
    {
      "id": 202,
      "name": "Sarah Jones",
      "email": "[email protected]",
      "department": "Marketing"
    },
    {
      "id": 203,
      "name": "Mike Brown",
      "email": "[email protected]",
      "department": "Sales"
    }
  ]
}
Response:
{
  "status": 200,
  "data": {
    "message": "Successfully inserted 3 row(s) into users",
    "rowsInserted": 3,
    "table": "users"
  }
}
Response
Upon successful insertion, the action returns:
- Insertion status
- Number of rows inserted
- Target table name
- Success or error message
Error Handling
The connector provides detailed error messages for troubleshooting common issues:
Error Response Example:
{
  "status": 500,
  "data": {
    "message": "Object 'MY_DATABASE.PUBLIC.NONEXISTENT_TABLE' does not exist or not authorized."
  }
}
Common error scenarios include:
- Table or database does not exist
- Insufficient permissions for the specified role
- Invalid SQL syntax
- Connection timeout or network issues
- Authentication failures