
Forms
Introduction
Forms allow you to capture relevant employee information, such as personal or bank details, along with necessary documents.
Form creation
Here’s how to add a new form:
-
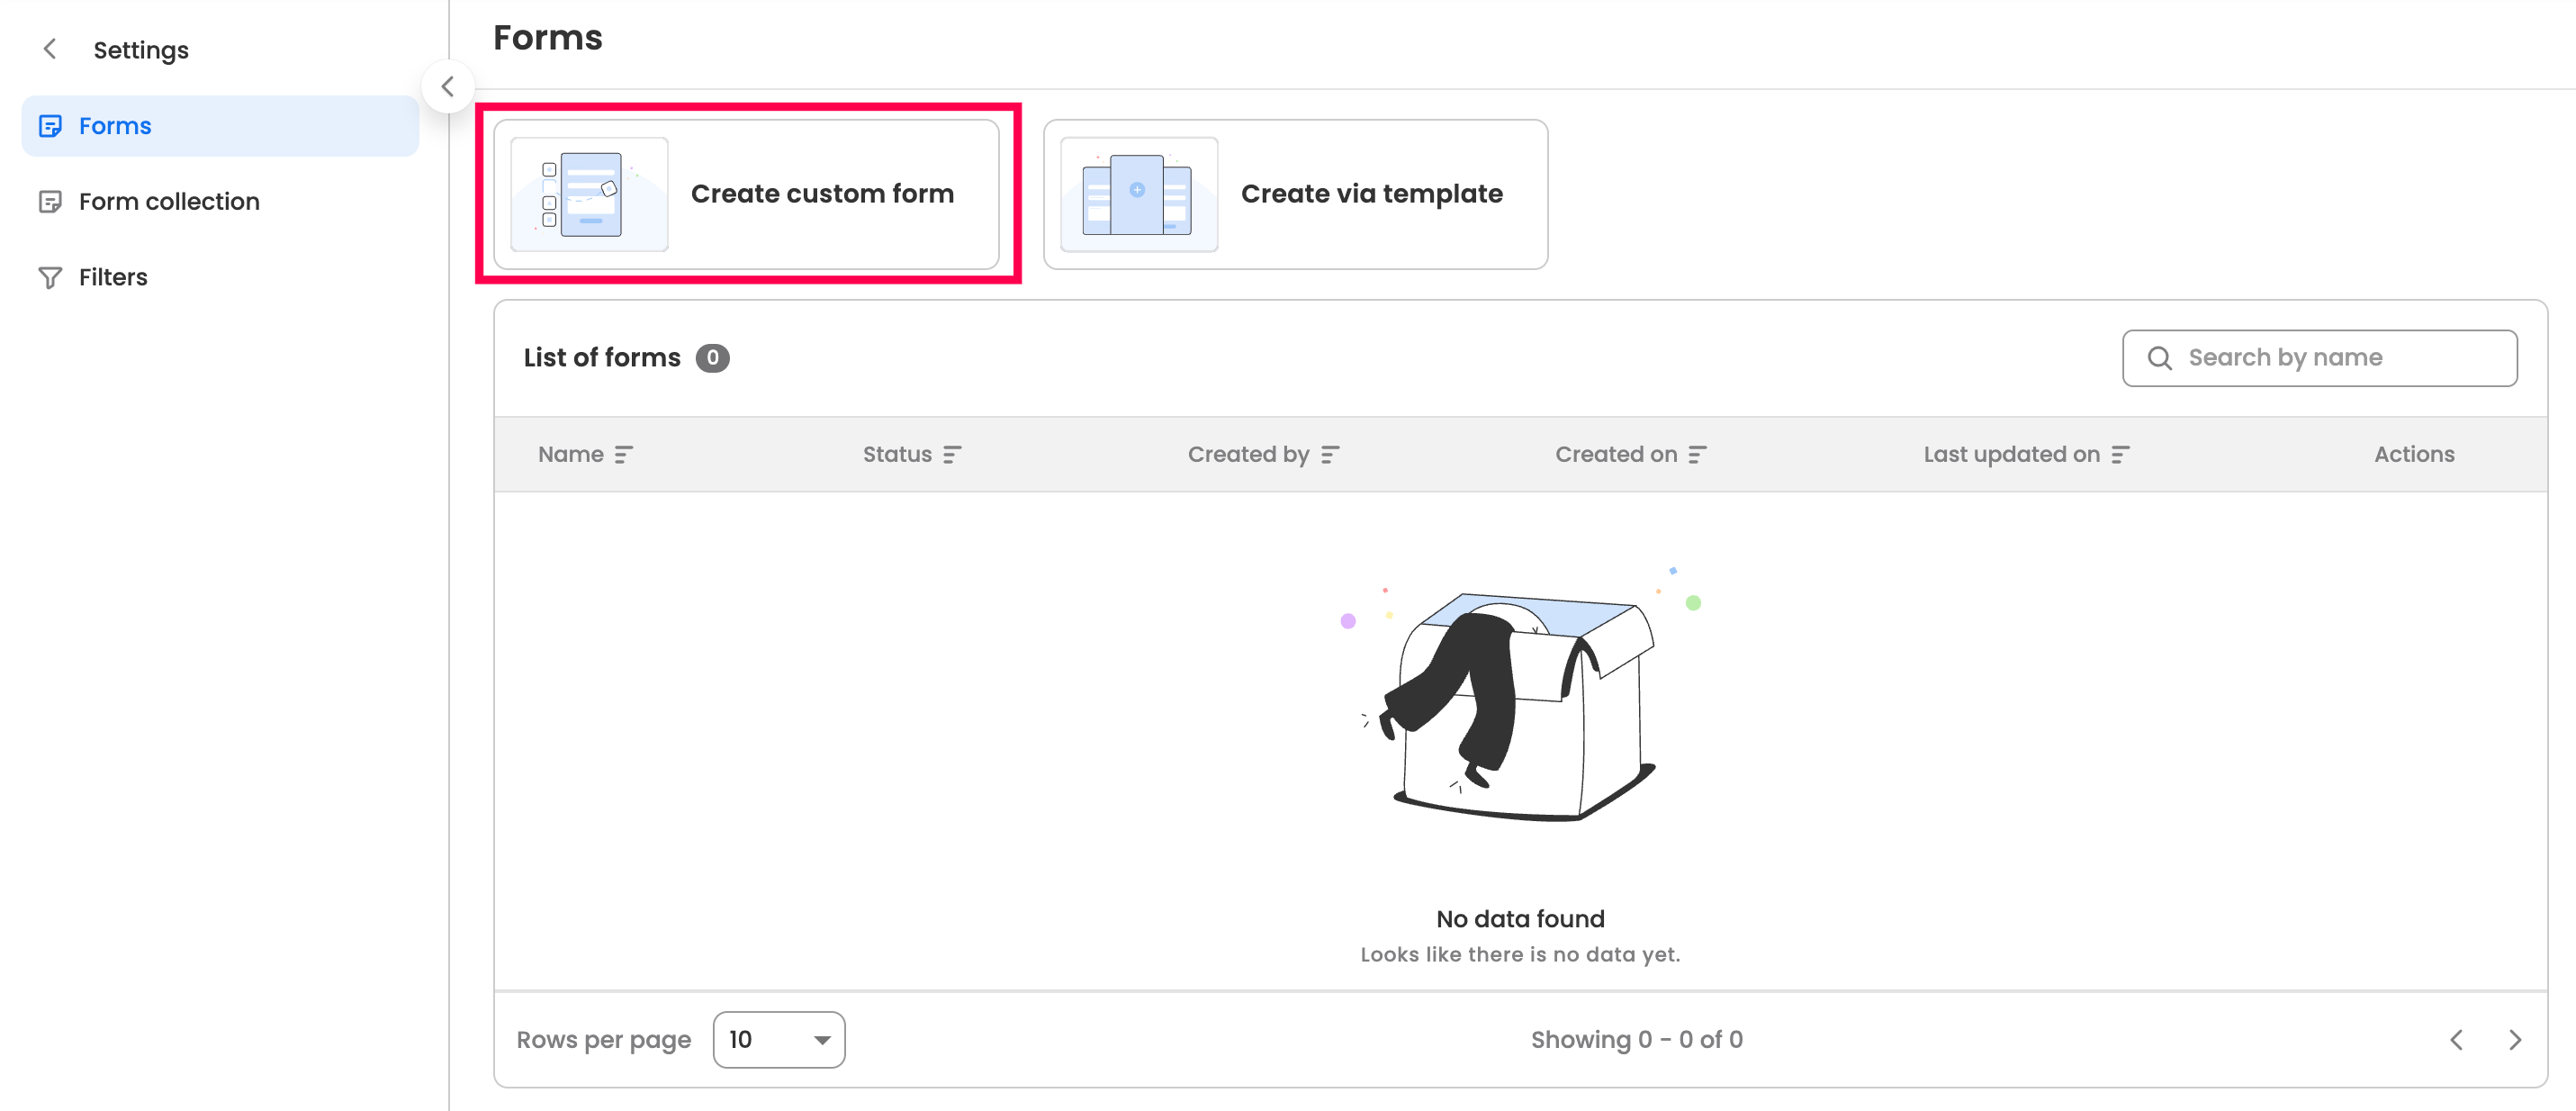
Go to the forms within the onboarding settings.
-
Click “Create Custom Form” to build a new form, or use an existing template to create one quickly.
-
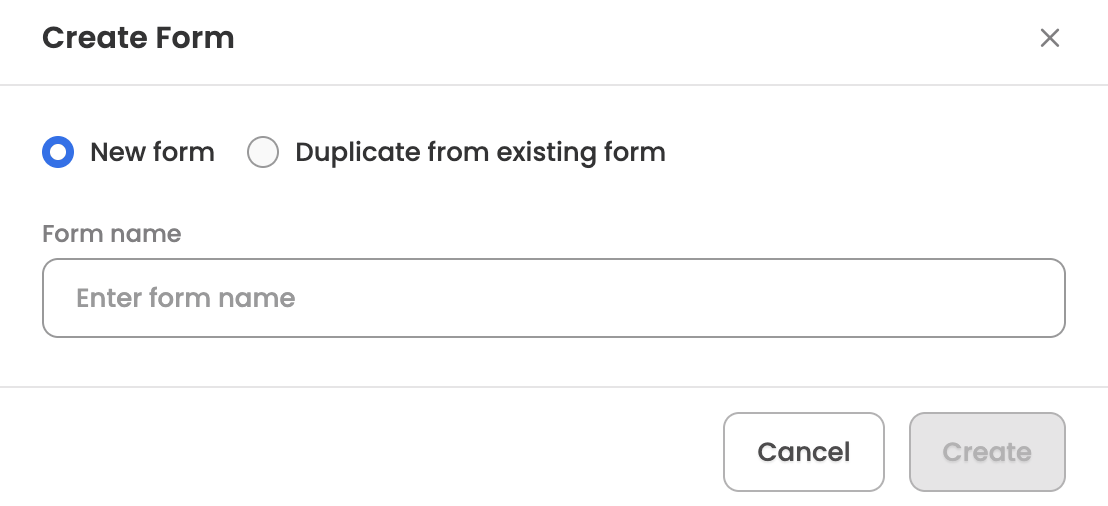
Enter a name for the new form. You can also choose to duplicate an existing form if needed.
-
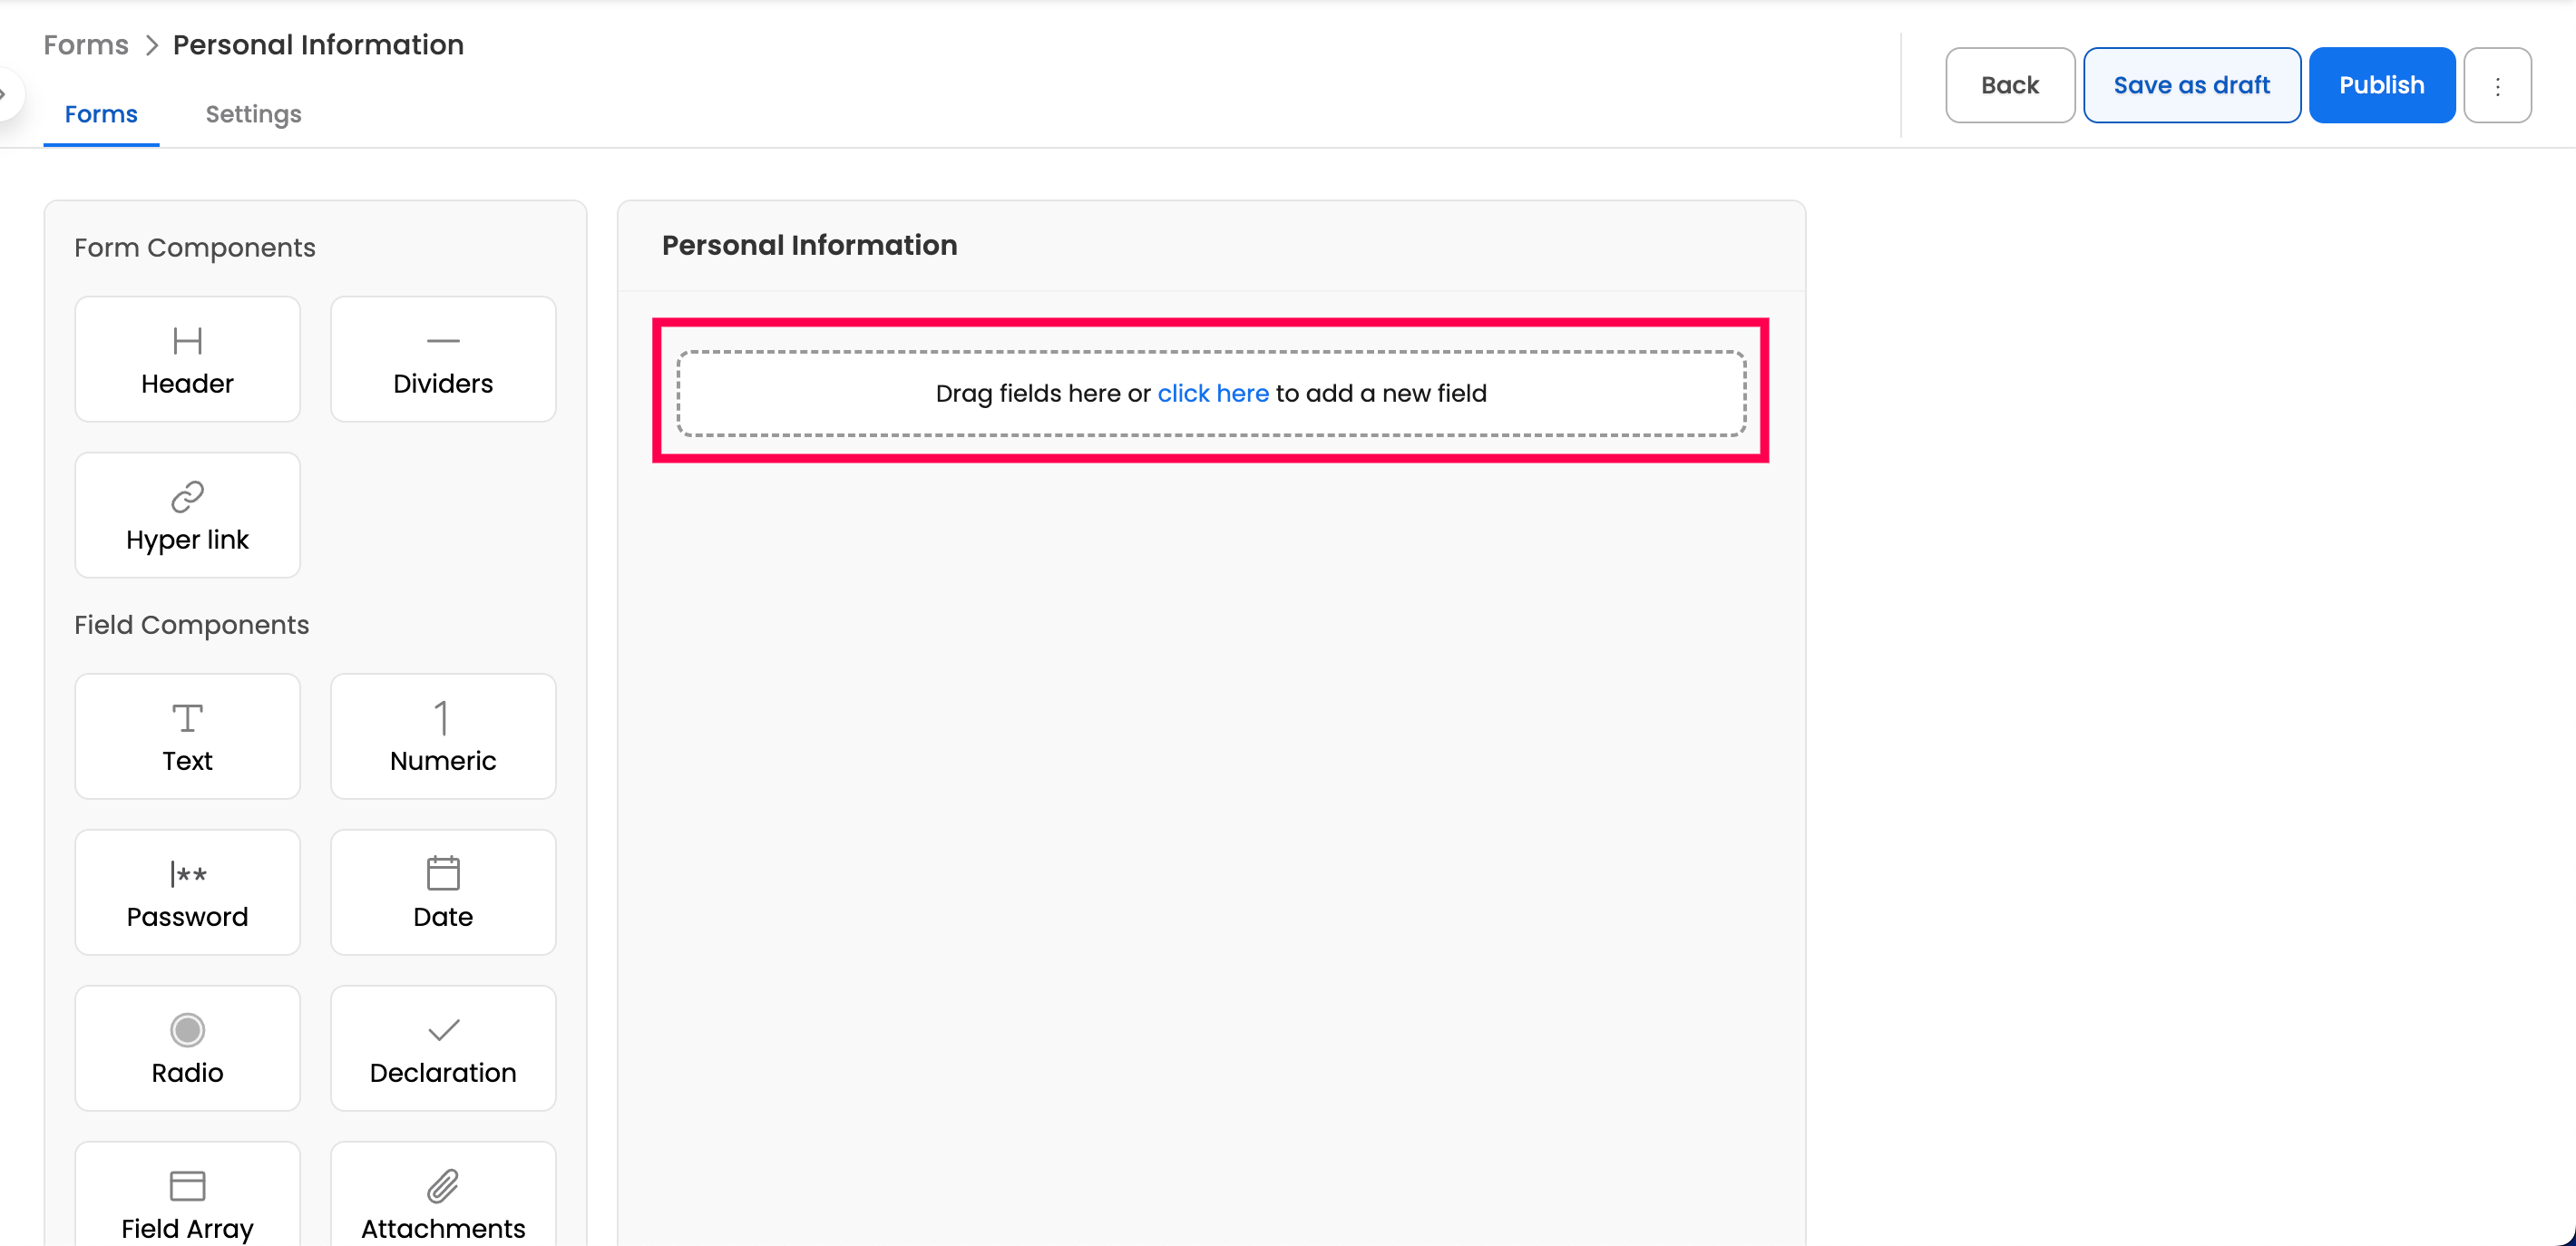
You’ll now be taken to the form builder screen, where you can drag or click to add two types of components to your form:
-
Form components: Add static content to your form to provide additional information, such as headers, descriptions, or hyperlinks.
-
Field components: Add fields you want to include in the form—these can be auto-filled or manually completed by the user.
-
-
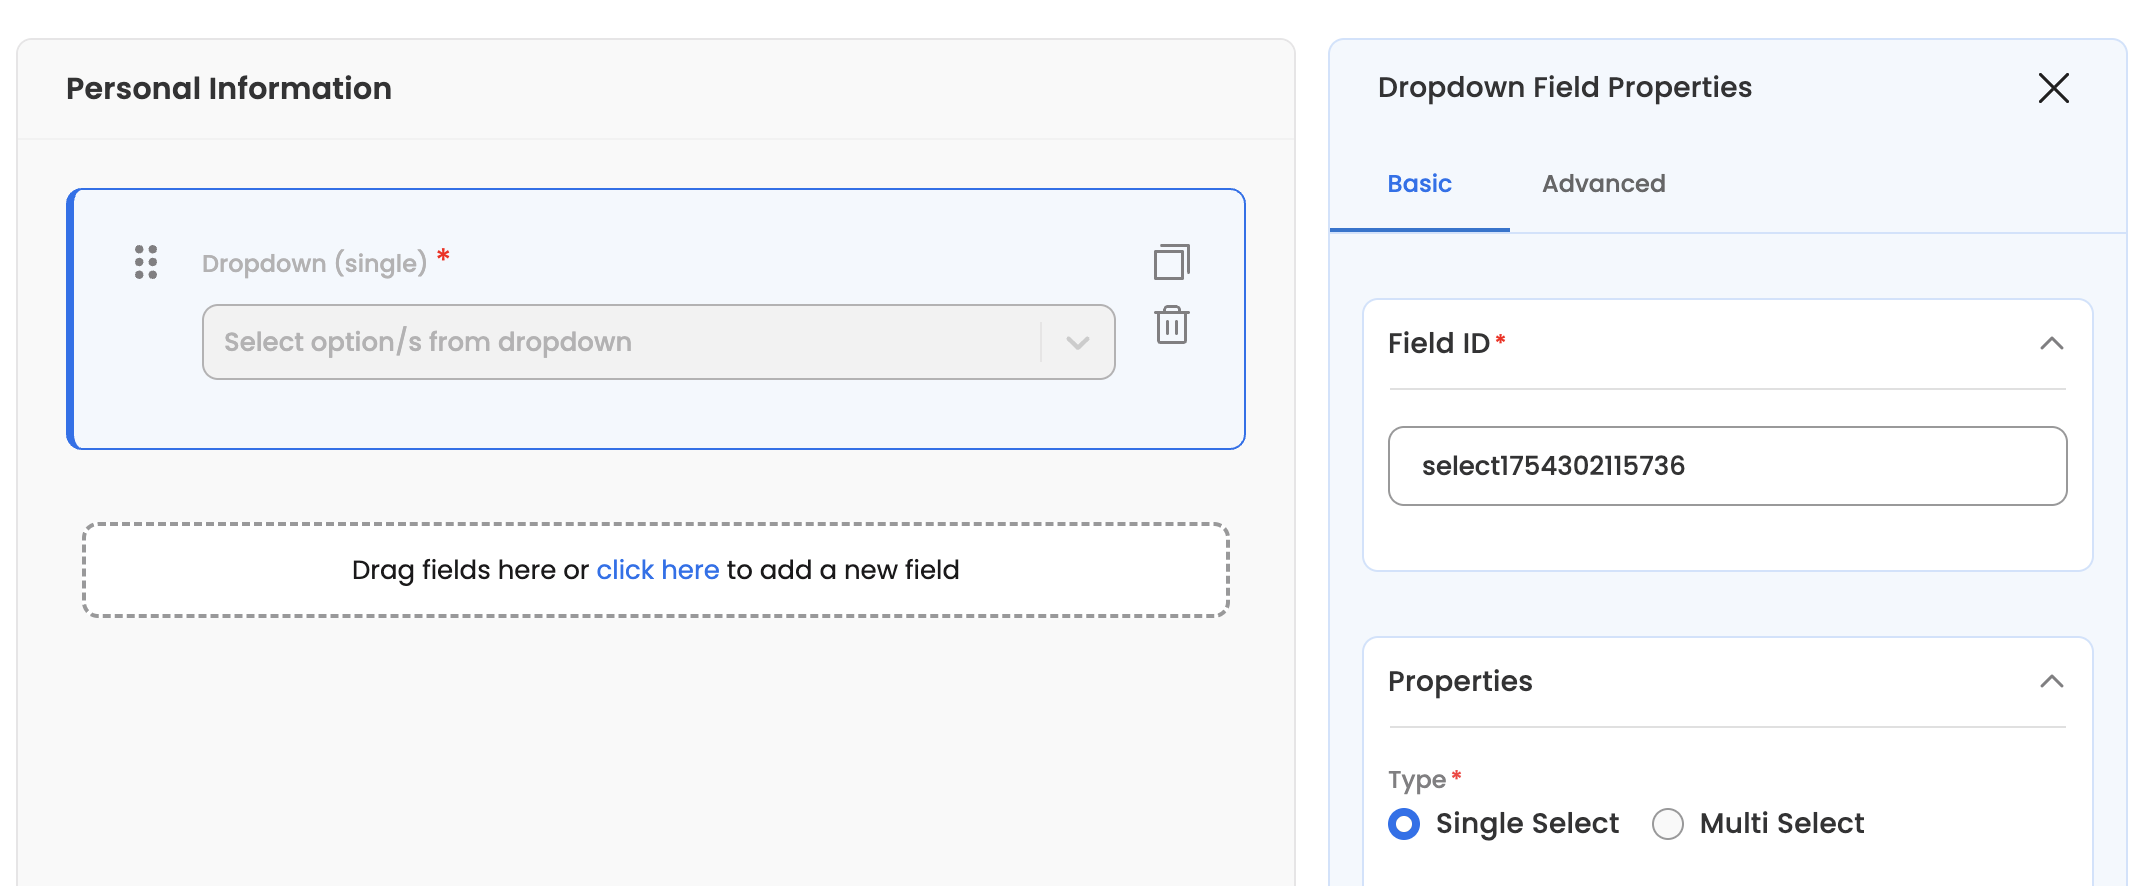
After adding a field, you can define its properties. Some fields may have specific properties, but here are some common ones available for all fields:
- Field ID (Basic): Unique identifier for the field.
- Label (Basic): Display name of the field.
- Placeholder (Basic): Placeholder text displayed in the empty input field.
- Helptext (Basic): Additional information to guide the user, displayed below the input field.
- Default Value (Advanced): Default value of the field displayed before user input.
- Visibility (Advanced): Define the field’s visibility based on other fields or their values.
- Editable (Advanced): Allow candidate to modify the field.
- Mandatory (Advanced): Mark field as required for submission.
-
Once you’re done, save the form and proceed to the settings section.
Form settings
Here are the various settings you can adjust within the form settings.
The form settings are organized into three tabs:
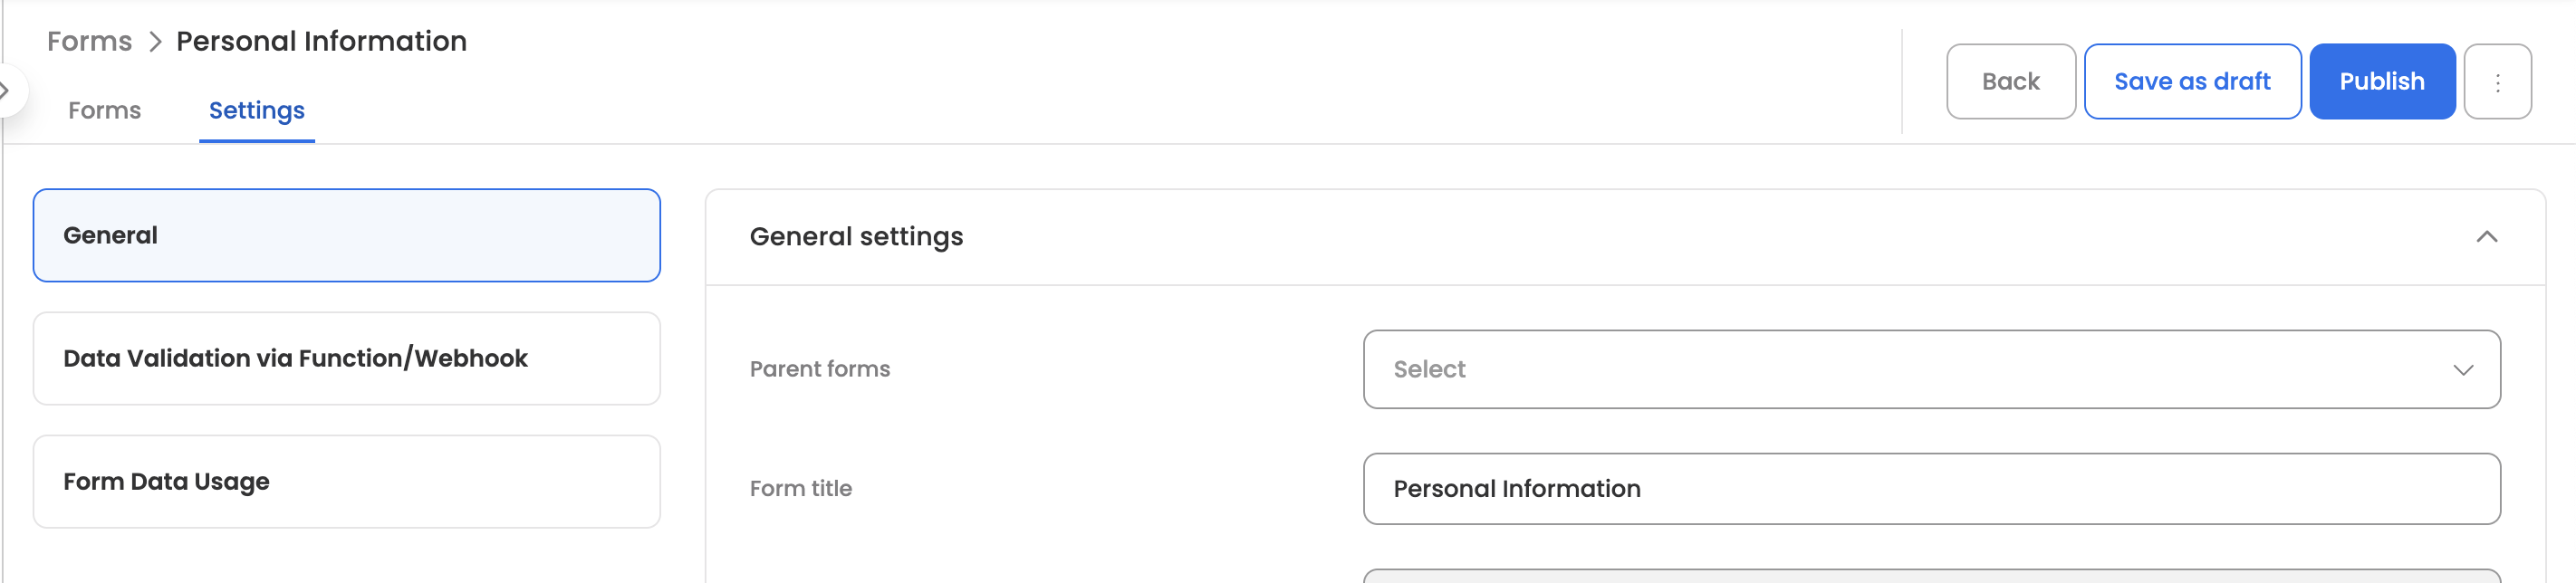
General Settings
This section contains the basic configuration options for your form.
| Setting | Description |
|---|---|
| Parent Forms | Select one or more forms that must be completed before this form becomes available to the candidate. Useful for creating sequential form flows. |
| Form Title | The display name of the form shown to candidates and in the dashboard. |
| Form Identifier | A unique system identifier for the form (non-editable). Used for internal references and integrations. |
| Analytics Title | Custom title used for reporting and analytics purposes. Helps in identifying the form in reports. |
| Auto Approve Forms | When enabled, submitted forms are automatically approved without requiring manual review by an admin or approver. |
| Prefill Automation | Define logic to pre-populate form fields with existing data before the form is displayed to the candidate. |
| Postfill Automation | Define logic to populate or transform field values after the form is submitted. |
| Filter Function | Define logic to dynamically show or hide form fields based on specific conditions or candidate attributes. |
Prefill Automation
Use this to auto-fill form fields with data from the candidate's master record or previously submitted forms. The function must define a getPrefillData method.
Available Parameters:
| Parameter | Description |
|---|---|
formData | Data from previously submitted forms |
masterData | Candidate's master record (profile data like name, email, department, etc.) |
form | Current form configuration |
Example: Auto-fill basic details from master record
function getPrefillData({ formData, masterData, form }) {
  return {
    employeeName: masterData?.name || '',
    email: masterData?.email || '',
    department: masterData?.department || '',
    joiningDate: masterData?.dateOfJoining || ''
  };
}
Example: Copy address from a previously submitted form
function getPrefillData({ formData, masterData, form }) {
  // Find data from the 'personal_details' form
  const personalDetails = formData?.find(f => f.identifier === 'personal_details');

  return {
    permanentAddress: personalDetails?.data?.currentAddress || '',
    city: personalDetails?.data?.city || '',
    pincode: personalDetails?.data?.pincode || ''
  };
}
Postfill Automation
Use this to transform or calculate field values after the form is submitted but before it is saved. The function must define a fillData method and return the updated data object.
Available Parameters:
| Parameter | Description |
|---|---|
data | Submitted form data |
form | Current form configuration |
formsData | Data from parent/related forms |
masterData | Candidate's master record |
options | Additional context options |
Example: Format phone number and calculate full name
function fillData({ data, form, formsData, masterData, options }) {
  // Format phone number with country code
  if (data.phoneNumber && !data.phoneNumber.startsWith('+')) {
    data.phoneNumber = '+91' + data.phoneNumber;
  }

  // Calculate full name from first and last name
  data.fullName = `${data.firstName || ''} ${data.lastName || ''}`.trim();

  return data;
}
Example: Set submission timestamp and convert date format
function fillData({ data, form, formsData, masterData, options }) {
  // Add submission timestamp
  data.submittedAt = moment().format('YYYY-MM-DD HH:mm:ss');

  // Convert date of birth to standard format
  if (data.dateOfBirth) {
    data.dateOfBirth = moment(data.dateOfBirth, 'DD/MM/YYYY').format('YYYY-MM-DD');
  }

  return data;
}
Filter Function
Use this to dynamically show or hide form fields based on conditions like employee type, department, or location. The function must define a filterFields method and return the filtered fields array.
Available Parameters:
| Parameter | Description |
|---|---|
fields | Array of all form fields |
userData | Previously submitted form data |
forms | Related forms data |
masterData | Candidate's master record |
userId | Current user's ID |
botId | Bot identifier |
Example: Show bank fields only for full-time employees
function filterFields({ fields, userData, masterData }) {
  const employeeType = masterData?.employeeType;

  // Hide bank details for contractors
  if (employeeType === 'contractor') {
    return fields.filter(field =>
      !['bankName', 'accountNumber', 'ifscCode'].includes(field.name)
    );
  }

  return fields;
}
Example: Show location-specific fields
function filterFields({ fields, userData, masterData }) {
  const country = masterData?.country;

  return fields.filter(field => {
    // Show SSN field only for US employees
    if (field.name === 'ssn' && country !== 'USA') {
      return false;
    }
    // Show Aadhaar field only for India employees
    if (field.name === 'aadhaarNumber' && country !== 'India') {
      return false;
    }
    return true;
  });
}
Data Validation via Function/Webhook
This section allows you to set up advanced validation rules that run when a candidate submits the form.
Validation Function
Write custom validation logic that executes on form submission. The function must define a validateData method and return an array of error objects (empty array if validation passes).
Available Parameters:
| Parameter | Description |
|---|---|
data | Submitted form data |
form | Current form configuration |
formsData | Data from parent/related forms |
masterData | Candidate's master record |
Error Object Format:
{ field: 'fieldName', message: 'Error message to display' }Example: Validate age is 18 or above
function validateData({ data, form, formsData, masterData }) {
  const errors = [];

  if (data.dateOfBirth) {
    const age = moment().diff(moment(data.dateOfBirth), 'years');
    if (age < 18) {
      errors.push({
        field: 'dateOfBirth',
        message: 'Candidate must be at least 18 years old'
      });
    }
  }

  return errors;
}
Example: Cross-field validation
function validateData({ data, form, formsData, masterData }) {
  const errors = [];

  // Ensure end date is after start date
  if (data.startDate && data.endDate) {
    if (moment(data.endDate).isBefore(moment(data.startDate))) {
      errors.push({
        field: 'endDate',
        message: 'End date must be after start date'
      });
    }
  }

  // Validate emergency contact is different from personal phone
  if (data.phoneNumber && data.emergencyContact) {
    if (data.phoneNumber === data.emergencyContact) {
      errors.push({
        field: 'emergencyContact',
        message: 'Emergency contact must be different from personal phone'
      });
    }
  }

  return errors;
}
Example: Validate against data from another form
function validateData({ data, form, formsData, masterData }) {
  const errors = [];

  // Find data from personal details form
  const personalForm = formsData?.find(f => f.identifier === 'personal_details');

  // Ensure current address matches if "same as permanent" is checked
  if (data.sameAsPermanent && personalForm?.data?.permanentAddress) {
    if (data.currentAddress !== personalForm.data.permanentAddress) {
      errors.push({
        field: 'currentAddress',
        message: 'Current address should match permanent address when checkbox is selected'
      });
    }
  }

  return errors;
}
Validation via Webhook
For validations that require external data (e.g., verifying PAN number, checking employee ID in HRMS), configure a webhook to call an external API during submission.
| Setting | Description |
|---|---|
| Method | HTTP method for the webhook call (GET, POST, PUT, DELETE) |
| Request URL | The endpoint URL to call for validation |
| Headers | Custom headers to include in the request (e.g., authorization tokens) |
| Params | Query parameters to append to the request URL |
| Body | Request body content for POST/PUT requests |
| Webhook Function | Custom logic to generate the request body dynamically from form data |
| Ignore Failure | When enabled, form submission proceeds even if the webhook call fails |
| Validation Name | A descriptive name for this validation rule |
Webhook Function Example: Prepare payload for PAN validation API
function getWebhookBody({ data, form, formsData, masterData }) {
  return {
    panNumber: data.panNumber,
    name: data.fullName,
    dateOfBirth: data.dateOfBirth
  };
}
Form Data Usage
This section defines what happens to the collected data after successful form submission.
Data Extract
Configure how form field values are mapped and stored in the candidate's profile.
| Setting | Description |
|---|---|
| Reference Form Field | The form field whose value should be extracted |
| Section Key to Update | The target location in the system where the value should be stored |
| Fallback Keys | Alternative fields to check if the primary field is empty |
| Component Type | Data type of the value (String or Date) |
| Date Format | Specify the format for date values (e.g., YYYY-MM-DD) |
| Default Value | Value to use if the field and all fallbacks are empty |
Webhook (Post Submission)
Trigger an external workflow or integration after the form is successfully submitted.
| Setting | Description |
|---|---|
| Method | HTTP method for the webhook (GET, POST, PUT, DELETE) |
| Request URL | The endpoint URL to call after submission |
| Headers | Custom headers for the request |
| Params | Query parameters for the request |
| Body | Request body content |
| Webhook Function | Custom logic to construct the webhook payload from form data |
| Enable Webhooks on Dashboard Submission | When enabled, the webhook triggers for submissions made through the admin dashboard as well |
Webhook Function Example: Send data to HRMS
function getWebhookBody({ data, form, formsData, masterData }) {
  return {
    employeeId: masterData?.employeeId,
    formName: form.identifier,
    submittedData: {
      bankName: data.bankName,
      accountNumber: data.accountNumber,
      ifscCode: data.ifscCode
    },
    submittedAt: moment().toISOString()
  };
}
Webhook Function Example: Create user in external system
function getWebhookBody({ data, form, formsData, masterData }) {
  return {
    action: 'CREATE_USER',
    payload: {
      email: data.officialEmail,
      firstName: data.firstName,
      lastName: data.lastName,
      department: masterData?.department,
      manager: masterData?.reportingManager,
      startDate: masterData?.dateOfJoining
    }
  };
}
Managing existing forms
The configured actions will be visible in the forms settings, here are the actions which can be performed for each configured form:
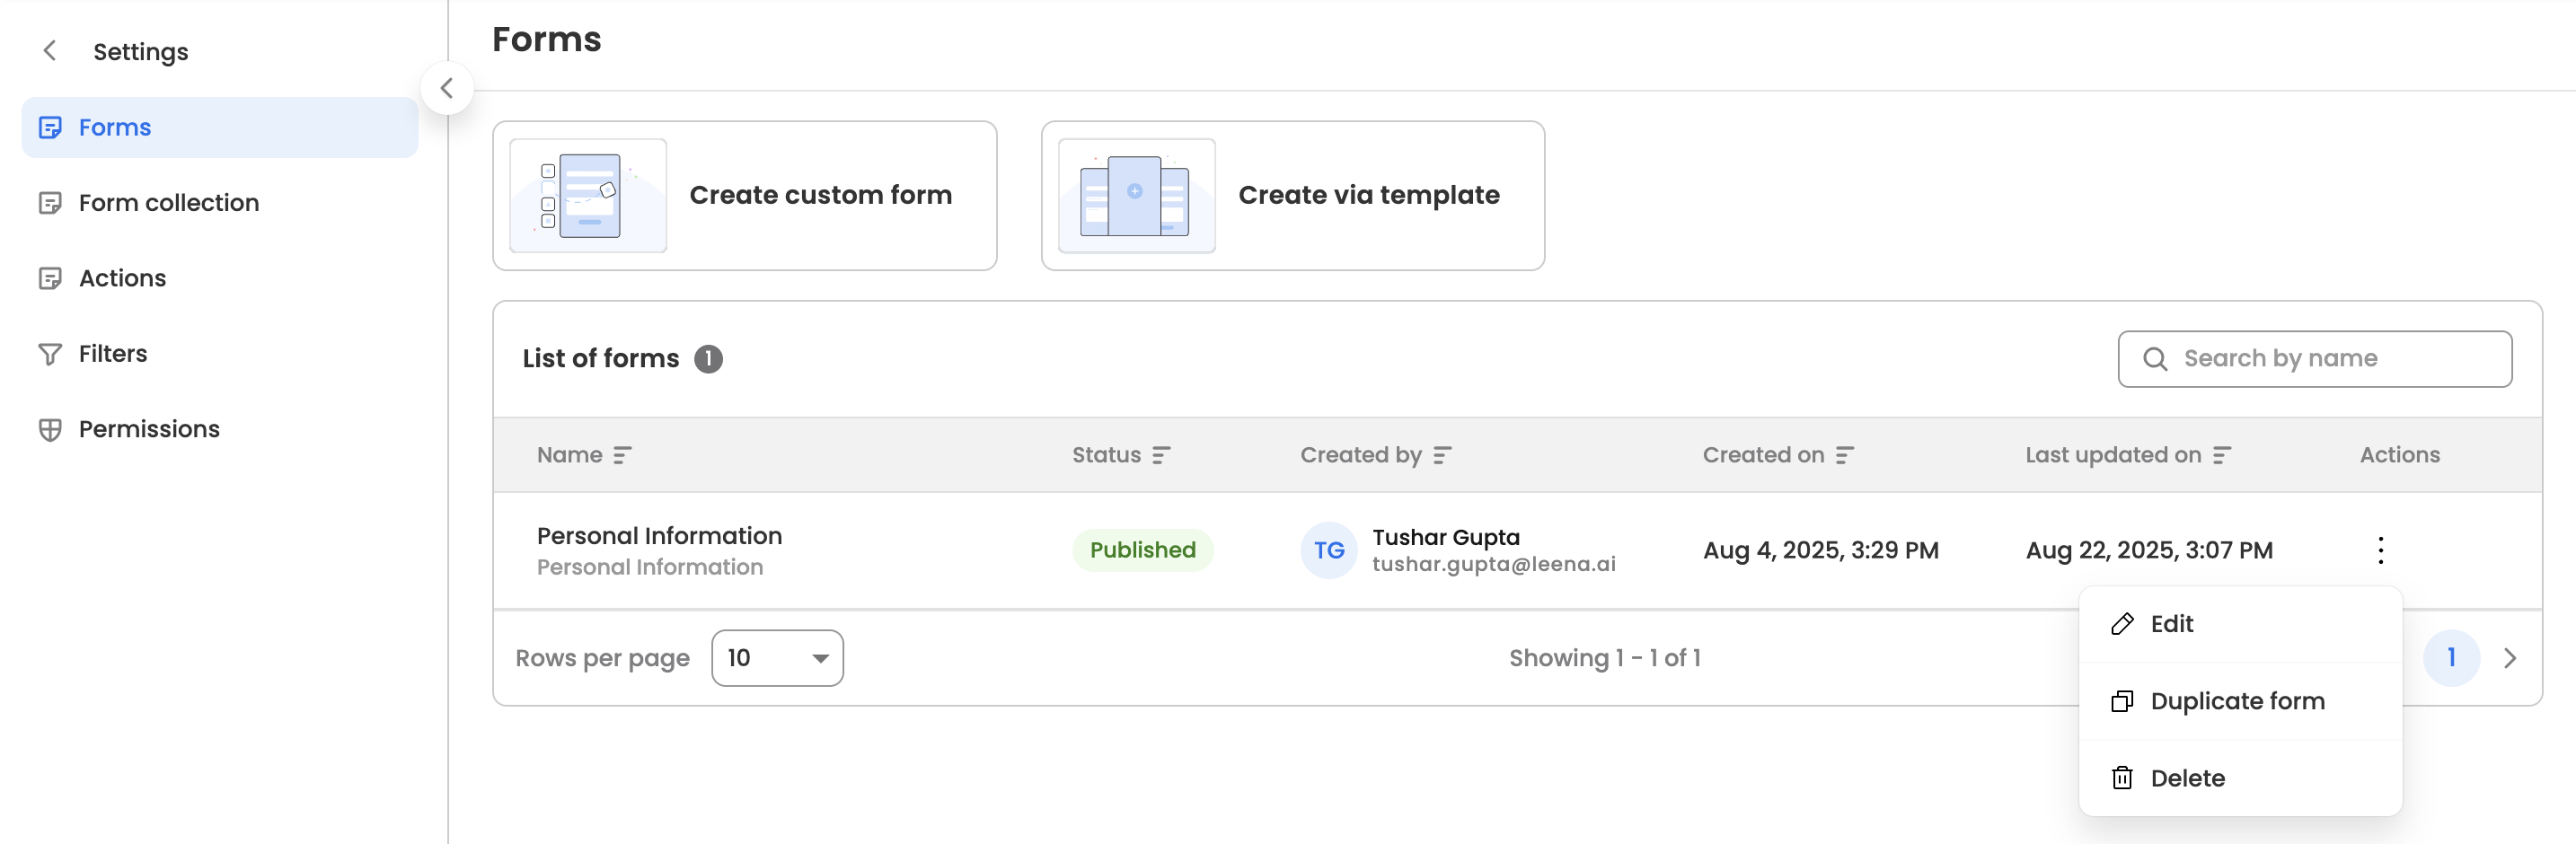
- Edit: Modify the configured form.
- Duplicate: Duplicate the form by specifying a name for the new form.
- Delete: Permanently delete the action.