
Email Settings and Automation rules
This feature is part of our initiative to bring backend configurations as configurable admin settings. With this feature, admins and implementation partners will be able to setup the email configuration and automation rules.
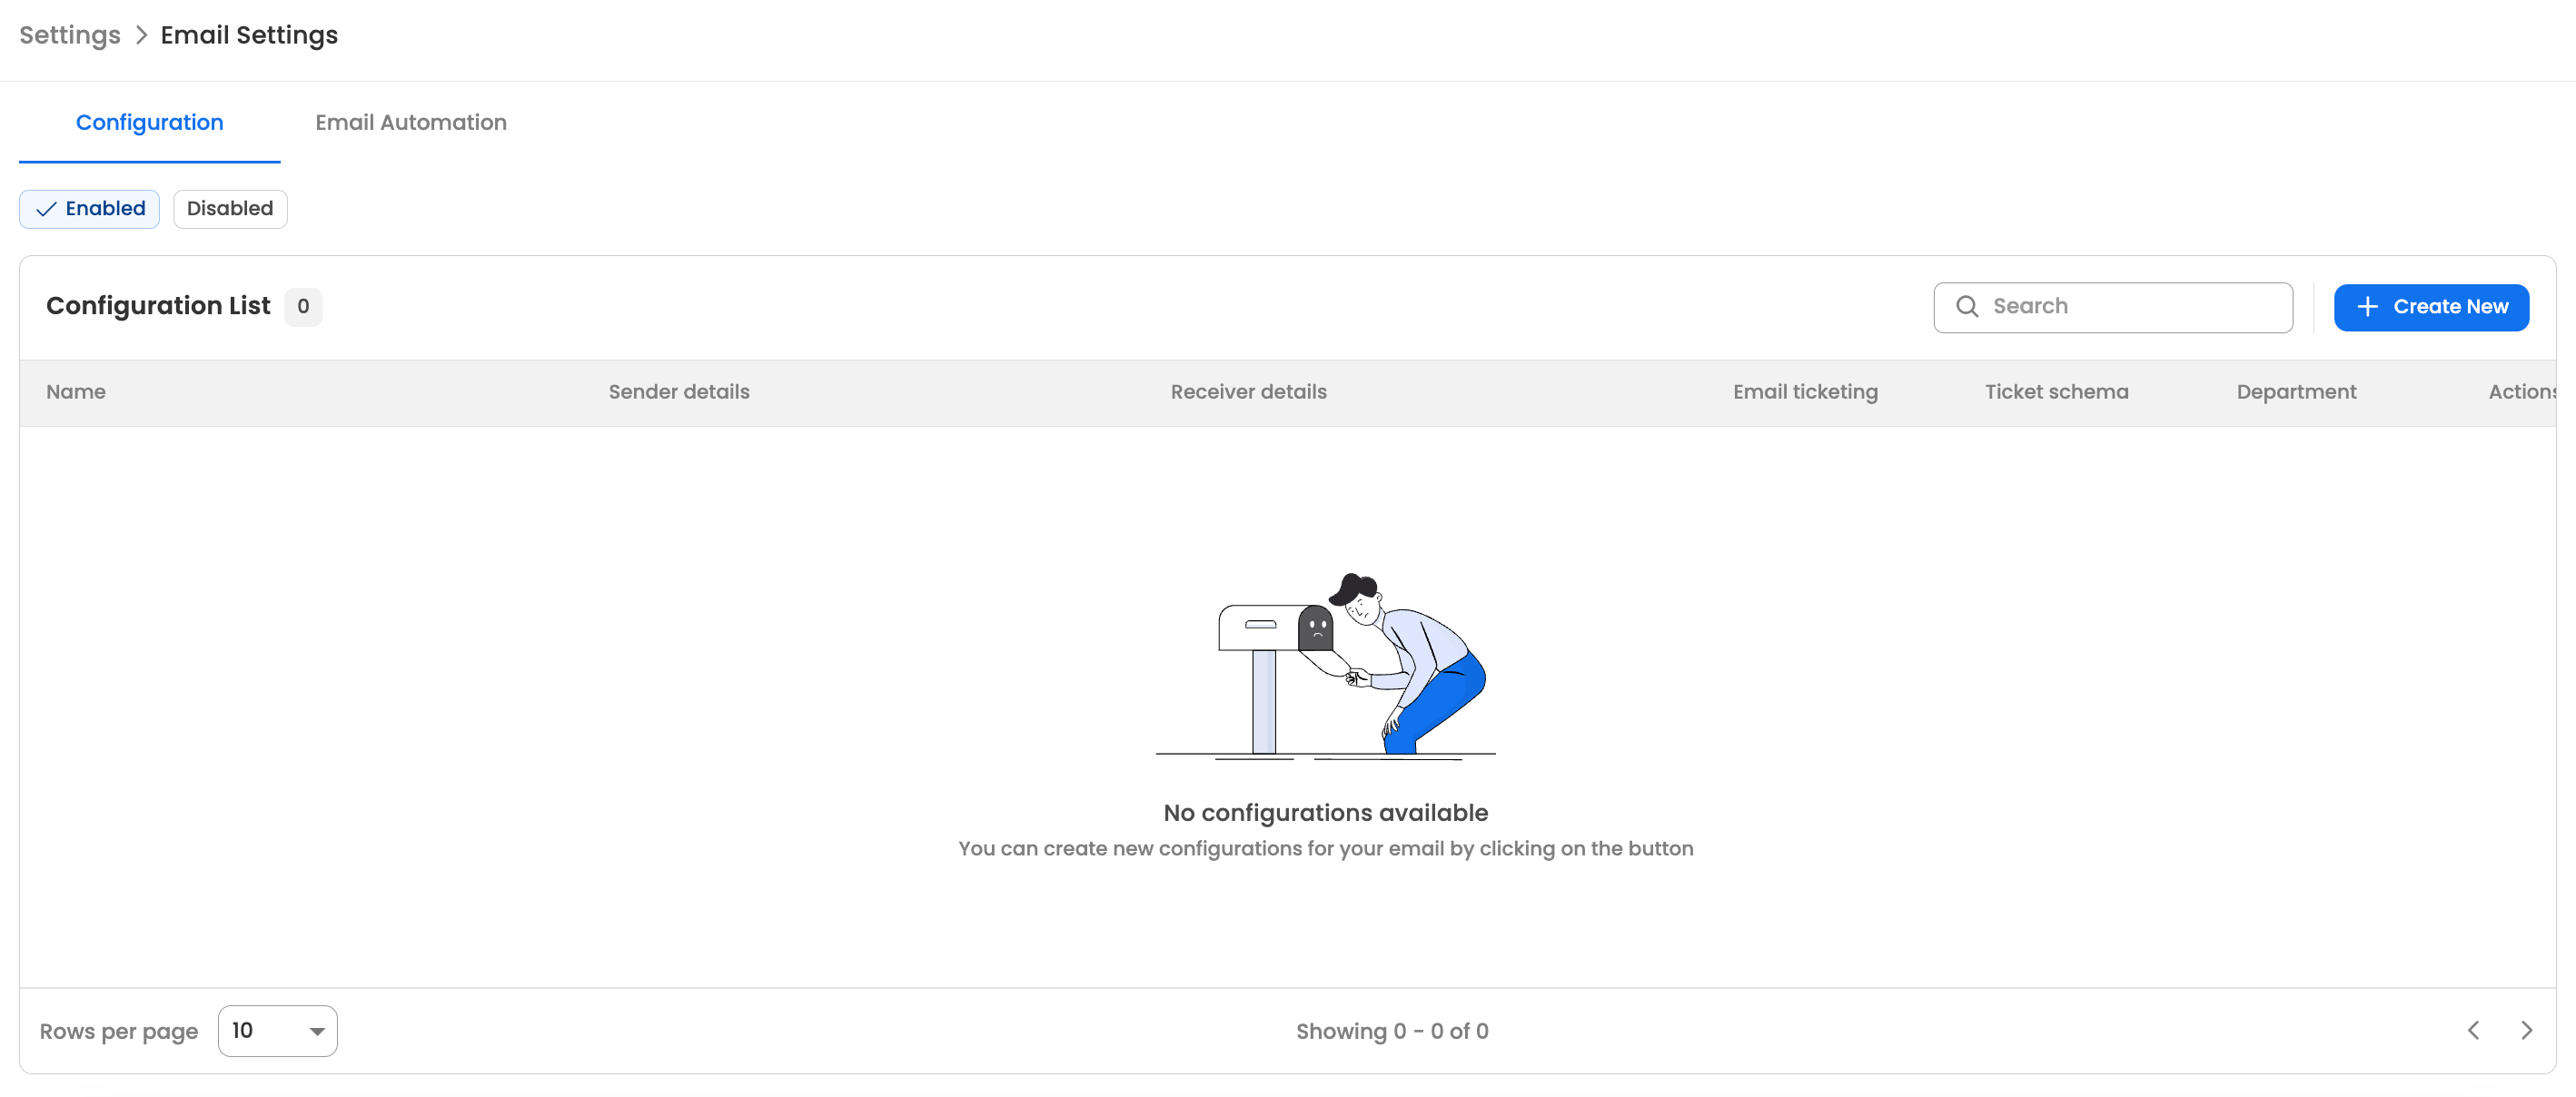
Email Configuration
Users will have to create an email configuration by clicking on the "Create New" button
-
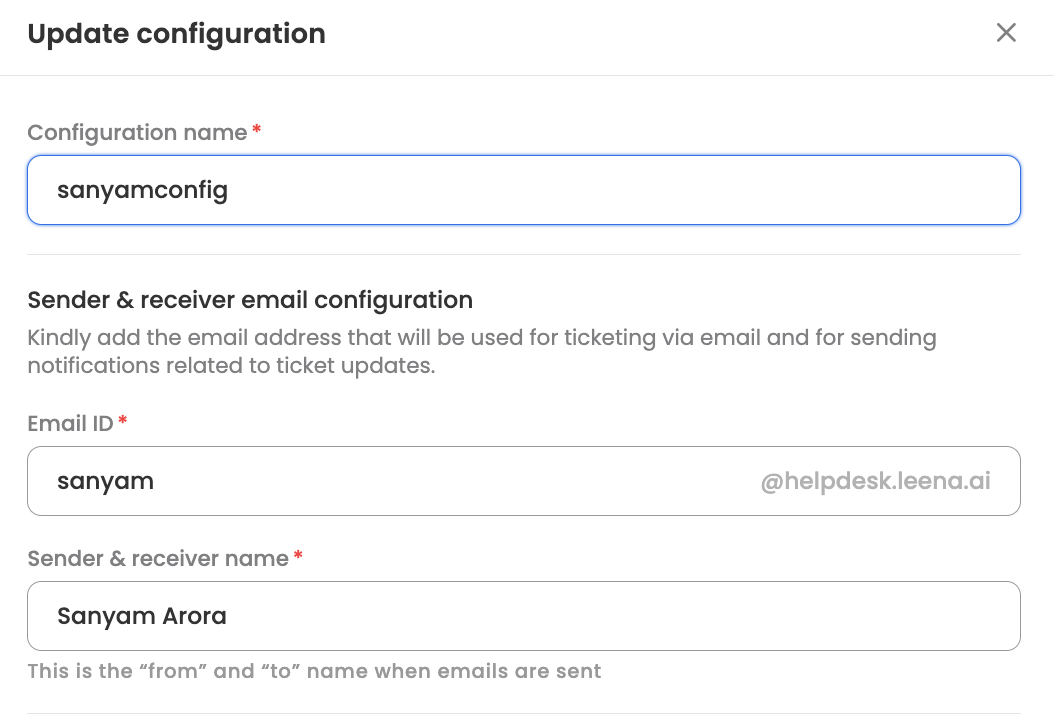
Users will first add the name of the config.
-
The user will be able to add the email address and the email name that will be used for email ticketing (receiving emails that will be used for creating tickets) and for sending email notifications relating to ticket related events like ticket closure, new comment etc. Both these sender and receiver emails will be the same in this setup.
-
Typically, this email address would be [email protected].
-
Customers can also add their custom email IDs for helpdesk if they do not want to use helpdesk.leena.ai domain for their email ticketing purposes

-
However, for this to work, customers will also have to setup email forwarding. The NLP based email triaging that identifies the category/subcategory of the tickets and eventual creation of the tickets has to receive email from helpdesk.leena.ai domain. So customers need to enable email forwarding for this account to [email protected].
-
Customers can also disable email ticketing here

-
If disabled, the email configured here, will only be used for sending email notifications for ticket updates. The option of creating tickets through email will be disabled.
-
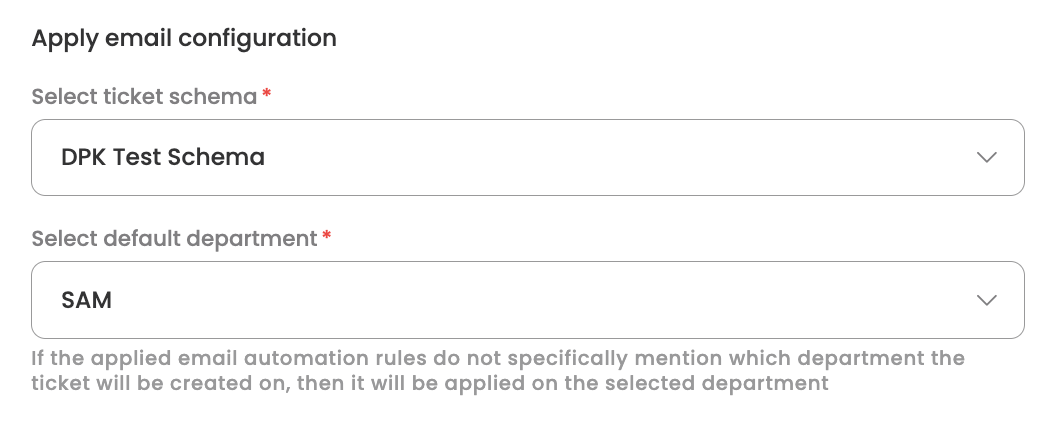
Finally, the user will then have to apply this configuration to a ticket schema.
-
This would apply to all tickets of departments which have this ticket schema association. If the ticket schema is not associated with any department then it would apply to the default department.
-
Customers can create multiple such email configurations and apply it for different schemas as per the use case. For eg., if the HR and IT departments want different emails for email ticketing then something like [email protected] and [email protected] will have to be configured and each will have to be associated with different ticket schemas.
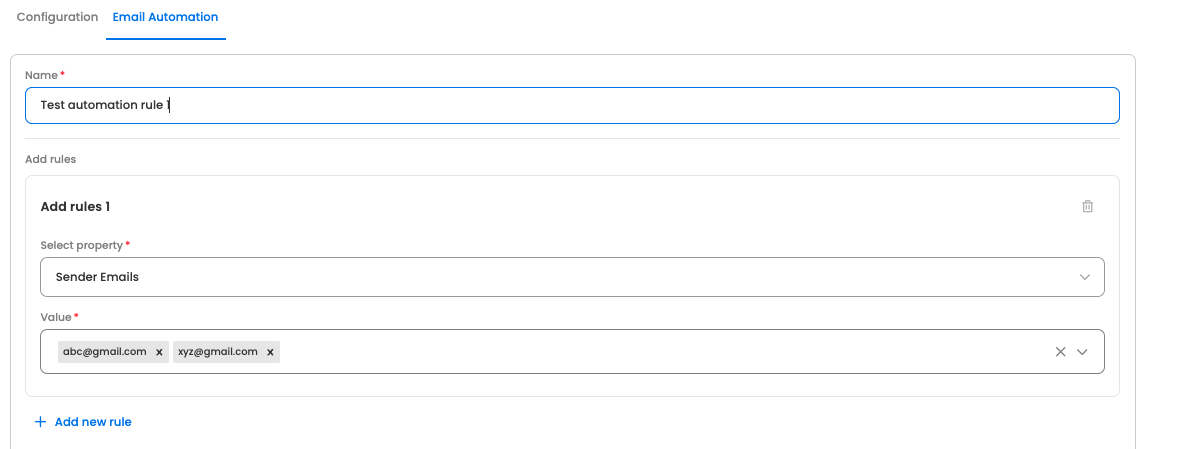
Email Automation Rules
Here users will be able to set different automation rules and exception conditions that need to be considered during email ticketing.
- The table will initially have no rules and the user can begin by clicking on the "Create New" button

-
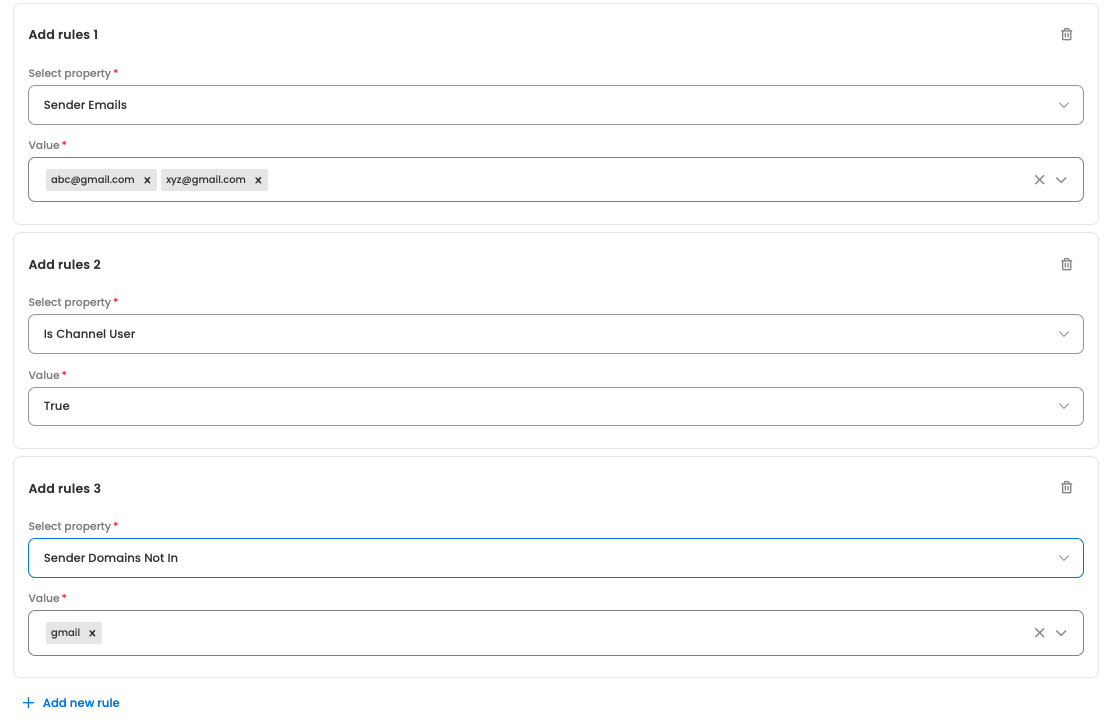
After setting the name for the larger automation rule, the user will then proceed to add rules section
-
There are multiple properties that can be chosen. These are going to be the conditions for which, on matching, certain automation rules will apply. More than one property conditions can be added
-
The entire list of properties are as follows
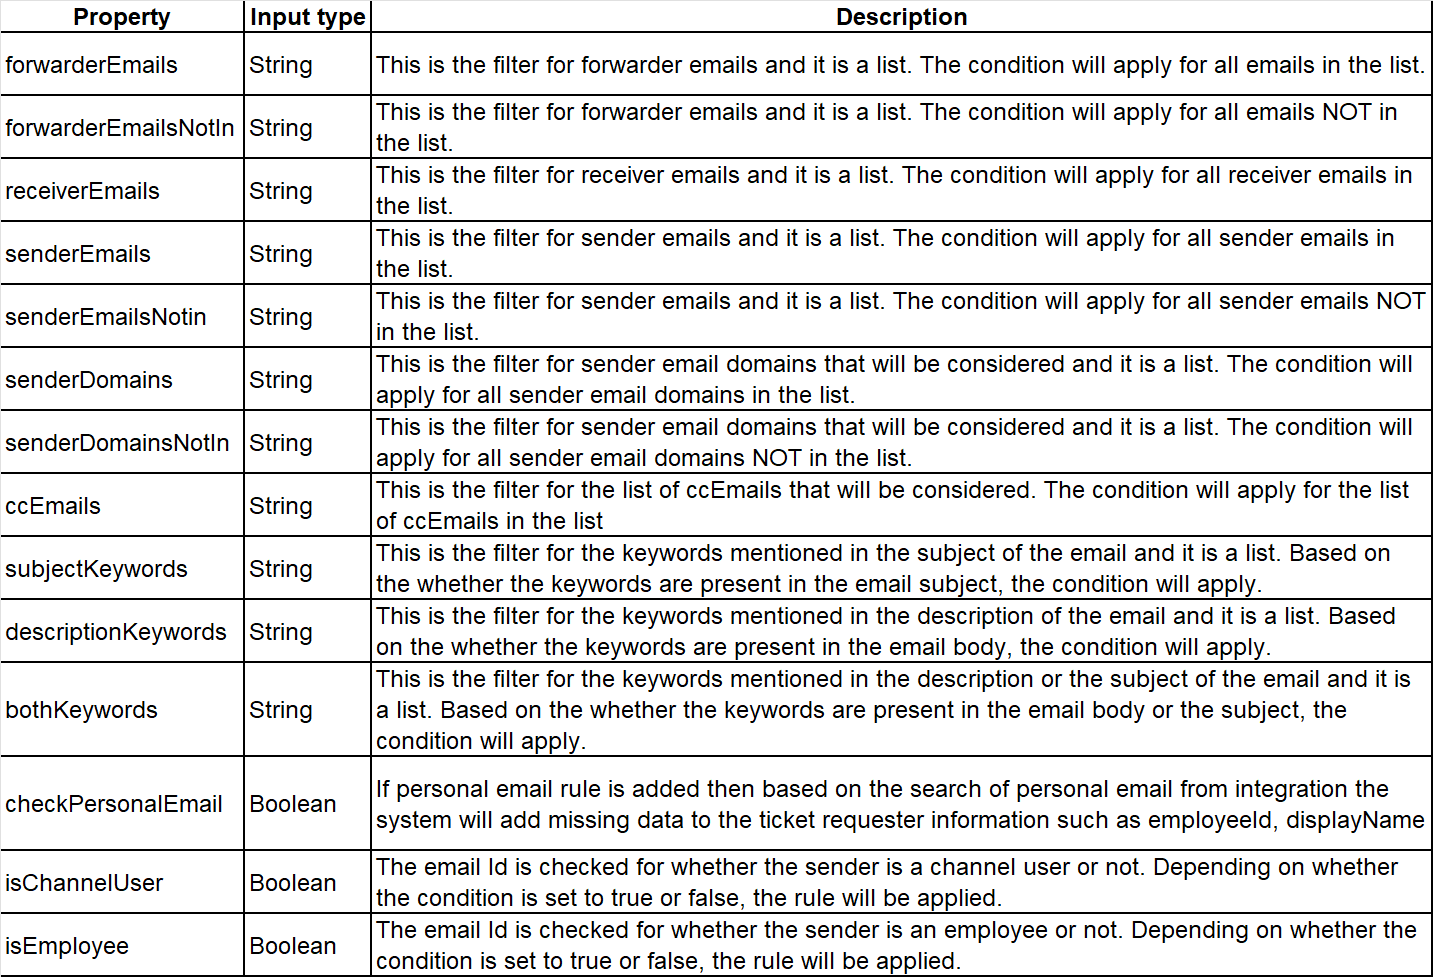
-
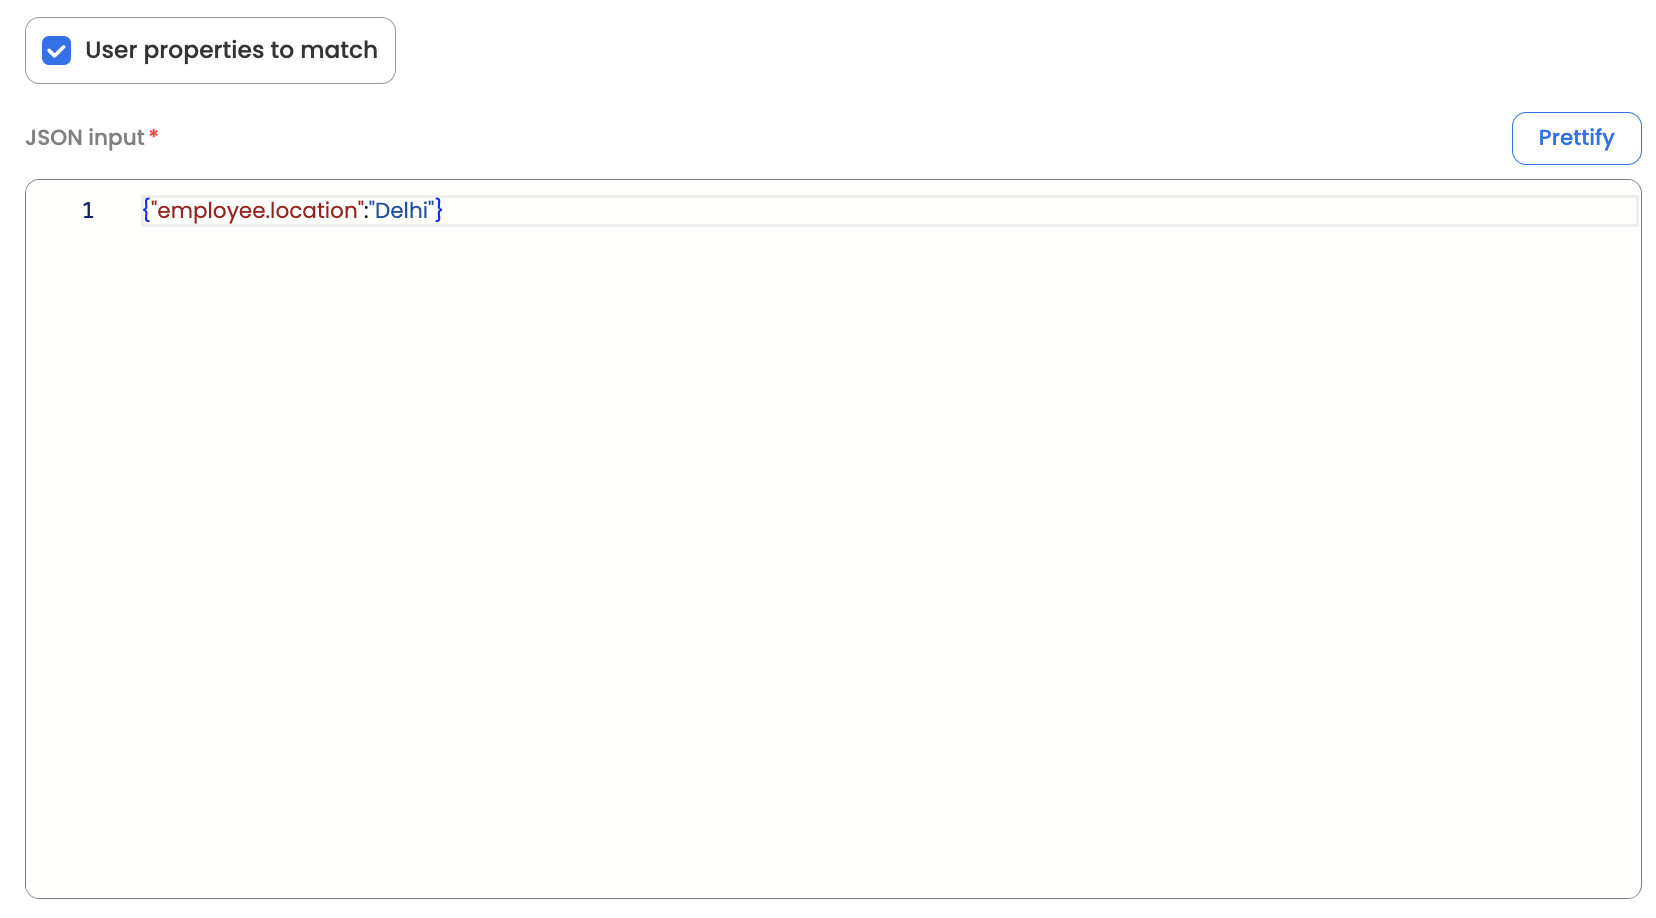
Additionally, "User properties to match" can be added in case user field conditions from the employee master data needs to be included. Here, we have provided the Json input where the key value pair can be added.
-
Based on all these conditions added the automation rule can define what action needs to be performed. There are 3 actions
- UserActionProperties: Here, based on the whether the rules match in the previous section, user properties can be added to the email ticket that is being created. Which properties need to be added is again defined as a key value pair Json input.
- Skip ticket creation: Based on whether the specified condition matches, if we want to skip ticket creation then this option has to be selected.
- Set Action properties: Lastly, based on whether the specified condition matches, if we want more operations to be performed on the subsequent ticket that is created, then that is also defined in the Json input here-

- Once we have defined the conditions and the action that needs to be performed, we can save the entire rule as a single email automation rule.
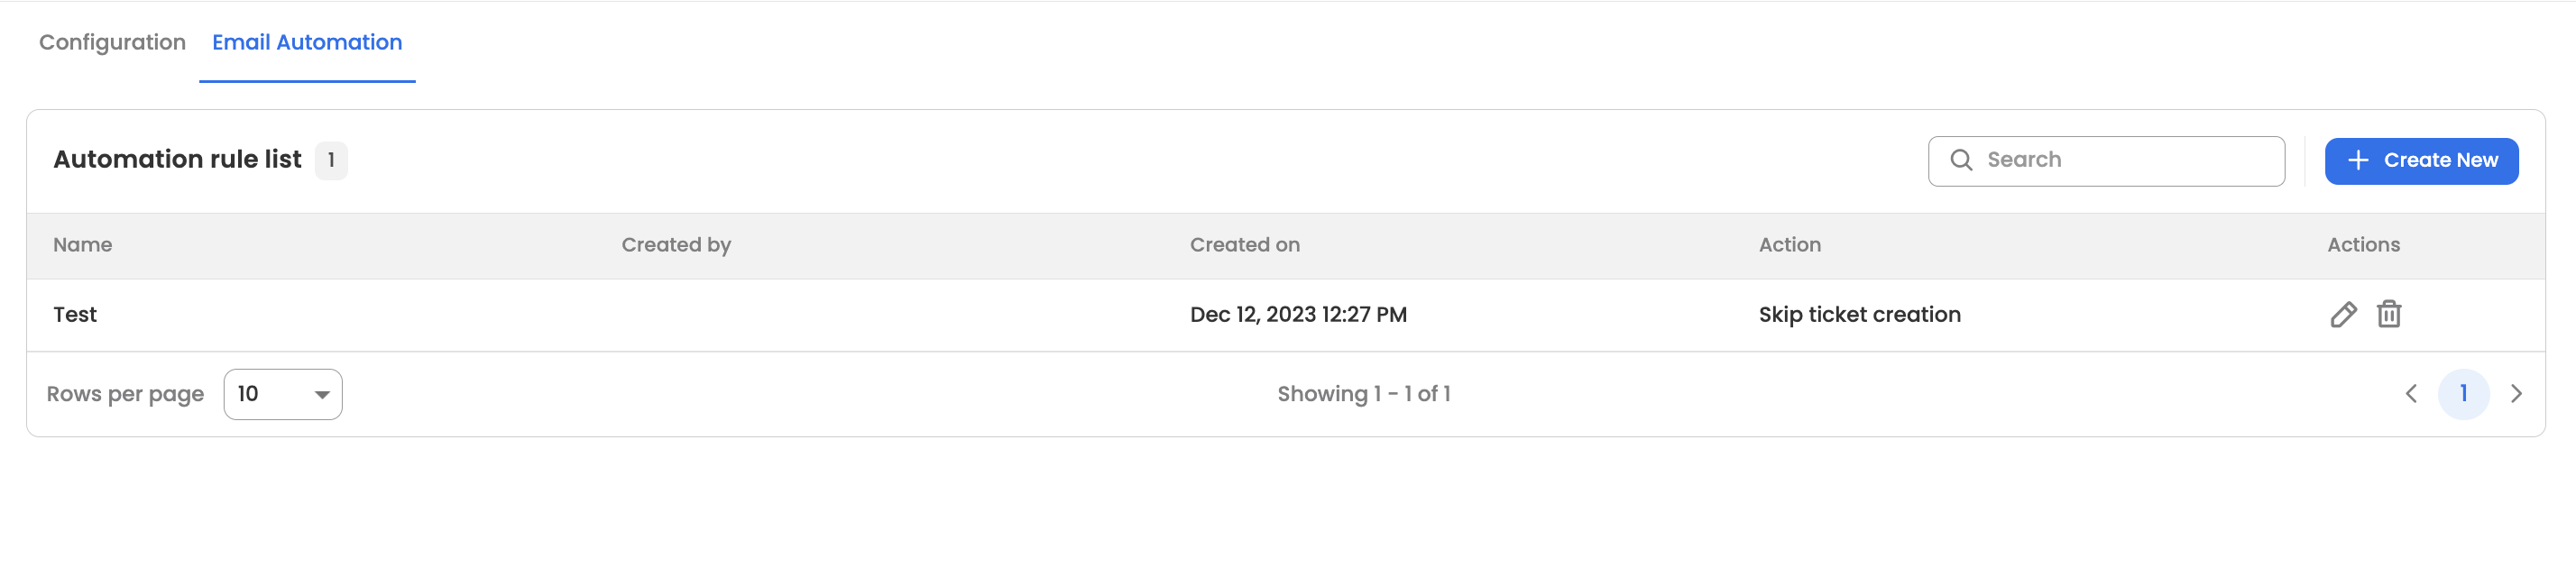
- Multiple automation rules can be added for the same bot. Based on whichever rule matches, the actions will be applied for the email tickets being created.