
BMC Helix
Overview
The BMC Helix connector enables your AI Colleagues to integrate with your organization's BMC Helix ITSM platform, facilitating automated IT service management, incident creation, and work order workflows.
BMC Helix ITSM is BMC's comprehensive IT service management solution that allows organizations to manage incidents, work orders, problems, changes, and service requests. The BMC Helix connector allows Leena AI to automate ITSM workflows, create and manage incidents, handle work orders, and interact with the platform seamlessly.
API Details
Leena AI integrates with BMC Helix via REST APIs.
Documentation link: https://docs.bmc.com/docs/itsm221/overview-of-the-platform-rest-api-1053748388.html
Setup
The BMC Helix connector uses JWT (JSON Web Token) authentication with username and password credentials.
Prerequisites
Before setting up the BMC Helix connector, ensure you have:
- Administrator access to your BMC Helix ITSM instance
- Access to BMC Helix AR System server
- A valid BMC Helix user account with appropriate permissions for API access
- Access to your Leena AI workspace with connector management permissions
- The base URL of your BMC Helix ITSM server
Get credentials
Here is how to obtain credentials for BMC Helix:
- Log in to BMC Helix ITSM as an administrator
- Ensure you have a user account with API access permissions:
- Navigate to the user administration section
- Verify the user has necessary permissions for incident and work order management
- Note down the username and password for the service account
- Obtain your BMC Helix server base URL:
- This is typically in the format:
https://your-instance.bmc.comorhttps://your-server:port - The URL should be accessible from Leena AI's network
- This is typically in the format:
- Verify API accessibility:
- Test the JWT login endpoint:
POST {base_url}/api/jwt/login - Ensure the AR System REST API is enabled on your server
- Test the JWT login endpoint:
Add connection
Here is how to add a connection on Leena AI:
- Log in to your Leena AI workspace
- Navigate to Settings > Integrations
- Search for "BMC Helix" and select it from the list to add its new connector
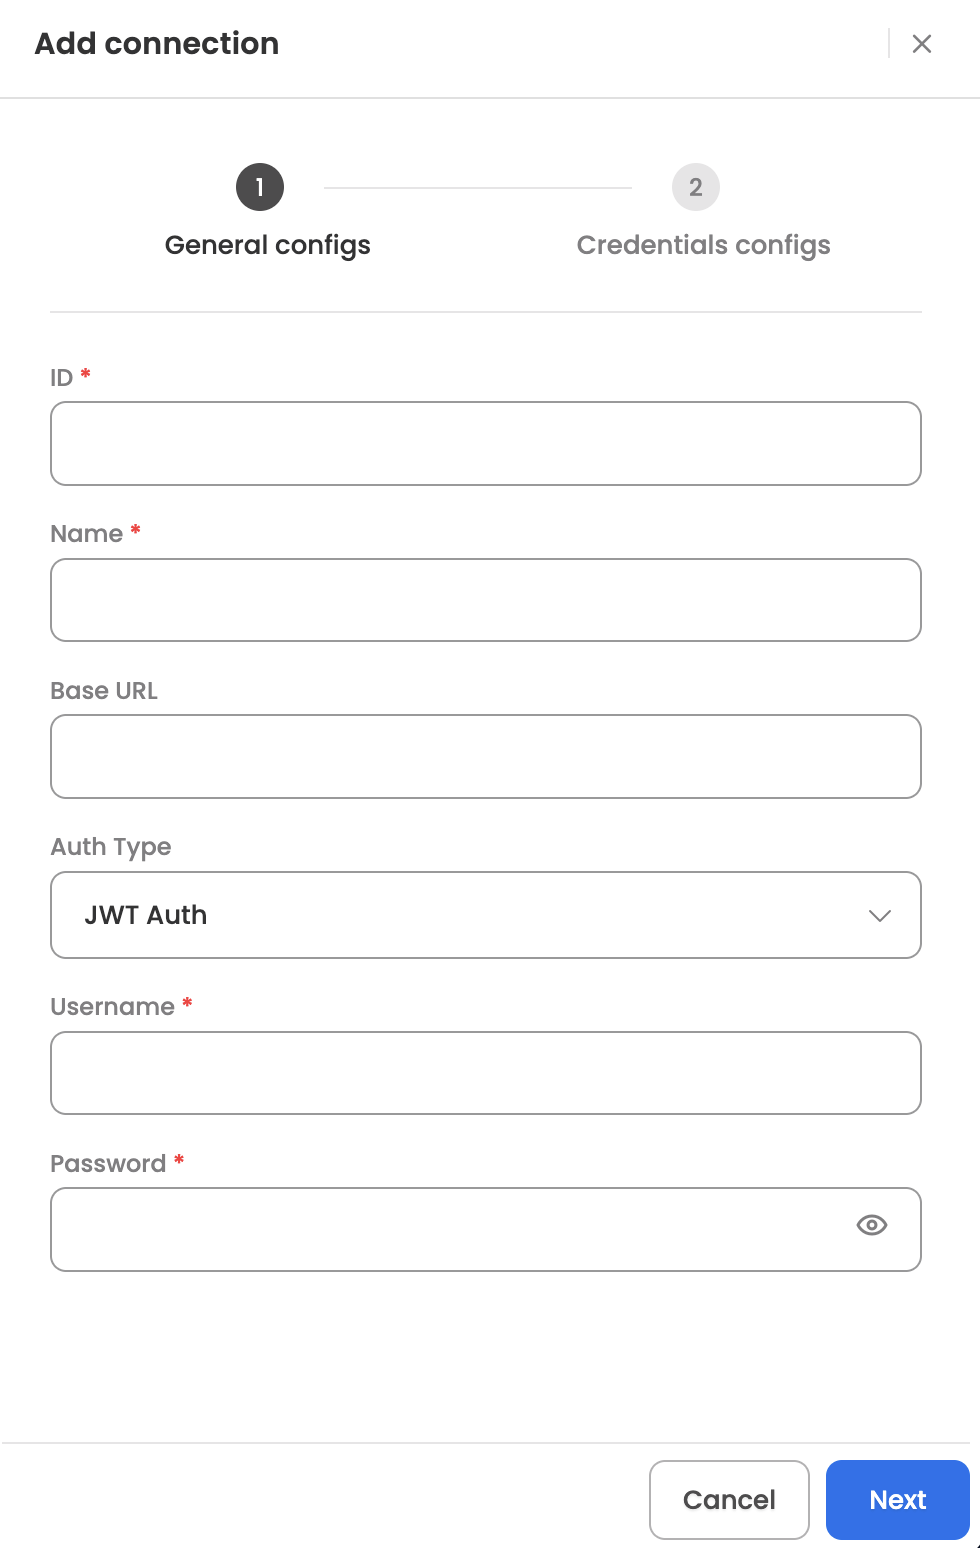
- Start configuring the connector
- Base URL: Your BMC Helix ITSM server URL (e.g., https://your-instance.bmc.com)
- Auth Type: Select "JWT Auth"
- Username: BMC Helix service account username
- Password: BMC Helix service account password
- ID Mapping Fields: The profile field in Leena AI which corresponds to the unique identifier in BMC Helix (Pre-filled with 'email')
- Test and Save Connection
- Click Connect in Leena AI for BMC Helix connector setup
- Leena AI will authenticate with your BMC Helix server using JWT
- Upon successful authentication, the connector will be saved
- The JWT token will be automatically managed and refreshed by Leena AI
Actions
The following actions are supported for the BMC Helix connector:
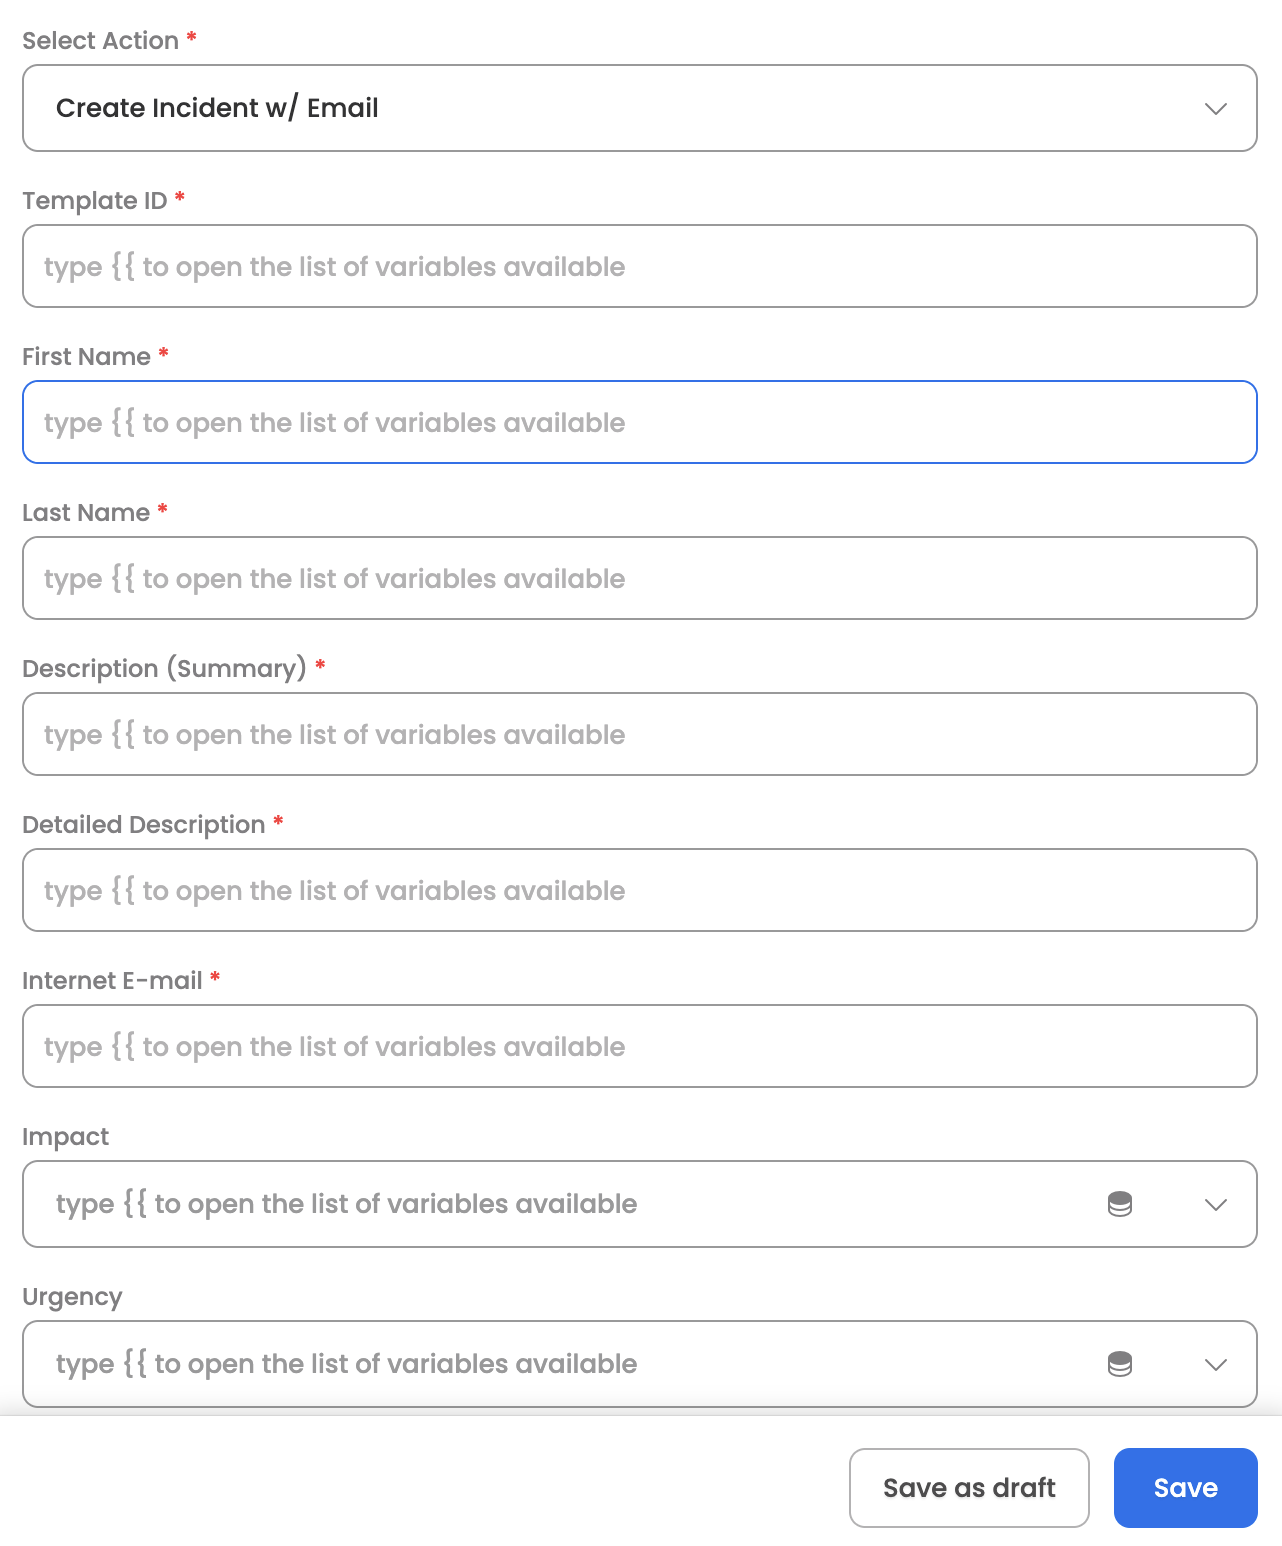
Create Incident w/ Email
Creates a new incident in BMC Helix ITSM using the user's Internet E-mail address for identification. The Agent can leverage the skill (workflow), which has been designed to create a new incident in BMC Helix, once the user raises a query to do so. Here are some common use cases:
-
IT Support Requests: Log hardware or software issues
-
Service Disruptions: Report system outages or performance issues
-
Access Issues: Report login or permission problems
-
Network Problems: Log connectivity issues
Input Parameters
Here are the input parameters required to set up this action:
Mandatory
| Name | Description |
|---|---|
| Template ID | The incident template ID to use for creation |
| First Name | First name of the requester |
| Last Name | Last name of the requester |
| Description (Summary) | Summary/title of the incident |
| Detailed Description | Detailed description of the incident |
| Internet E-mail | Email address of the requester |
Optional
| Name | Description |
|---|---|
| Impact | Impact level of the incident (1-Extensive/Widespread, 2-Significant/Large, 3-Moderate/Limited, 4-Minor/Localized) |
| Urgency | Urgency level (1-Critical, 2-High, 3-Medium, 4-Low) |
| Status | Initial status of the incident |
| Status Reason | Reason for the status |
| Reported Source | Source of the incident report |
| Service Type | Type of service affected |
| Company | Company associated with the incident |
| Assigned Group | Name of the assigned support group |
| Assignee | Individual assignee for the incident |
| Priority (1-5) | Priority level (1-5) |
| Incident Type | Type of incident |
| Assignee Support Company | Support company of the assignee |
| Assignee Support Organization | Support organization of the assignee |
Here is a sample JSON input:
// Basic Incident Creation with Email

{
  "templateId": "AGGAA5V0HGPWFANPQE5SBFRLQBAZSH",
  "firstName": "Alice",
  "lastName": "Johnson",
  "description": "Software installation request",
  "detailedDecription": "Need Adobe Acrobat Pro installed on workstation for PDF editing capabilities.",
  "internetEmail": "[email protected]",
  "impact": "4-Minor/Localized",
  "urgency": "3-Medium"
}

// Incident with Full Details

{
  "templateId": "AGGAA5V0HGPWFANPQE5SBFRLQBAZSH",
  "firstName": "Robert",
  "lastName": "Brown",
  "description": "Server performance degradation",
  "detailedDecription": "Production server PROD-WEB-01 showing high CPU usage. Response times increased by 300%.",
  "internetEmail": "[email protected]",
  "impact": "1-Extensive/Widespread",
  "urgency": "1-Critical",
  "status": "Assigned",
  "reportedSource": "Direct Input",
  "serviceType": "Infrastructure Restoration",
  "locationCompany": "Calbro Services",
  "assigneeGroup": "Server Operations",
  "assigneeSupportCompany": "Calbro Services",
  "assigneeSupportOrganization": "IT Support",
  "priority": 1
}
Response
Upon successful creation, the action returns the created incident details including:
- Incident Number
- Request ID
- HTTP status code
- Creation confirmation
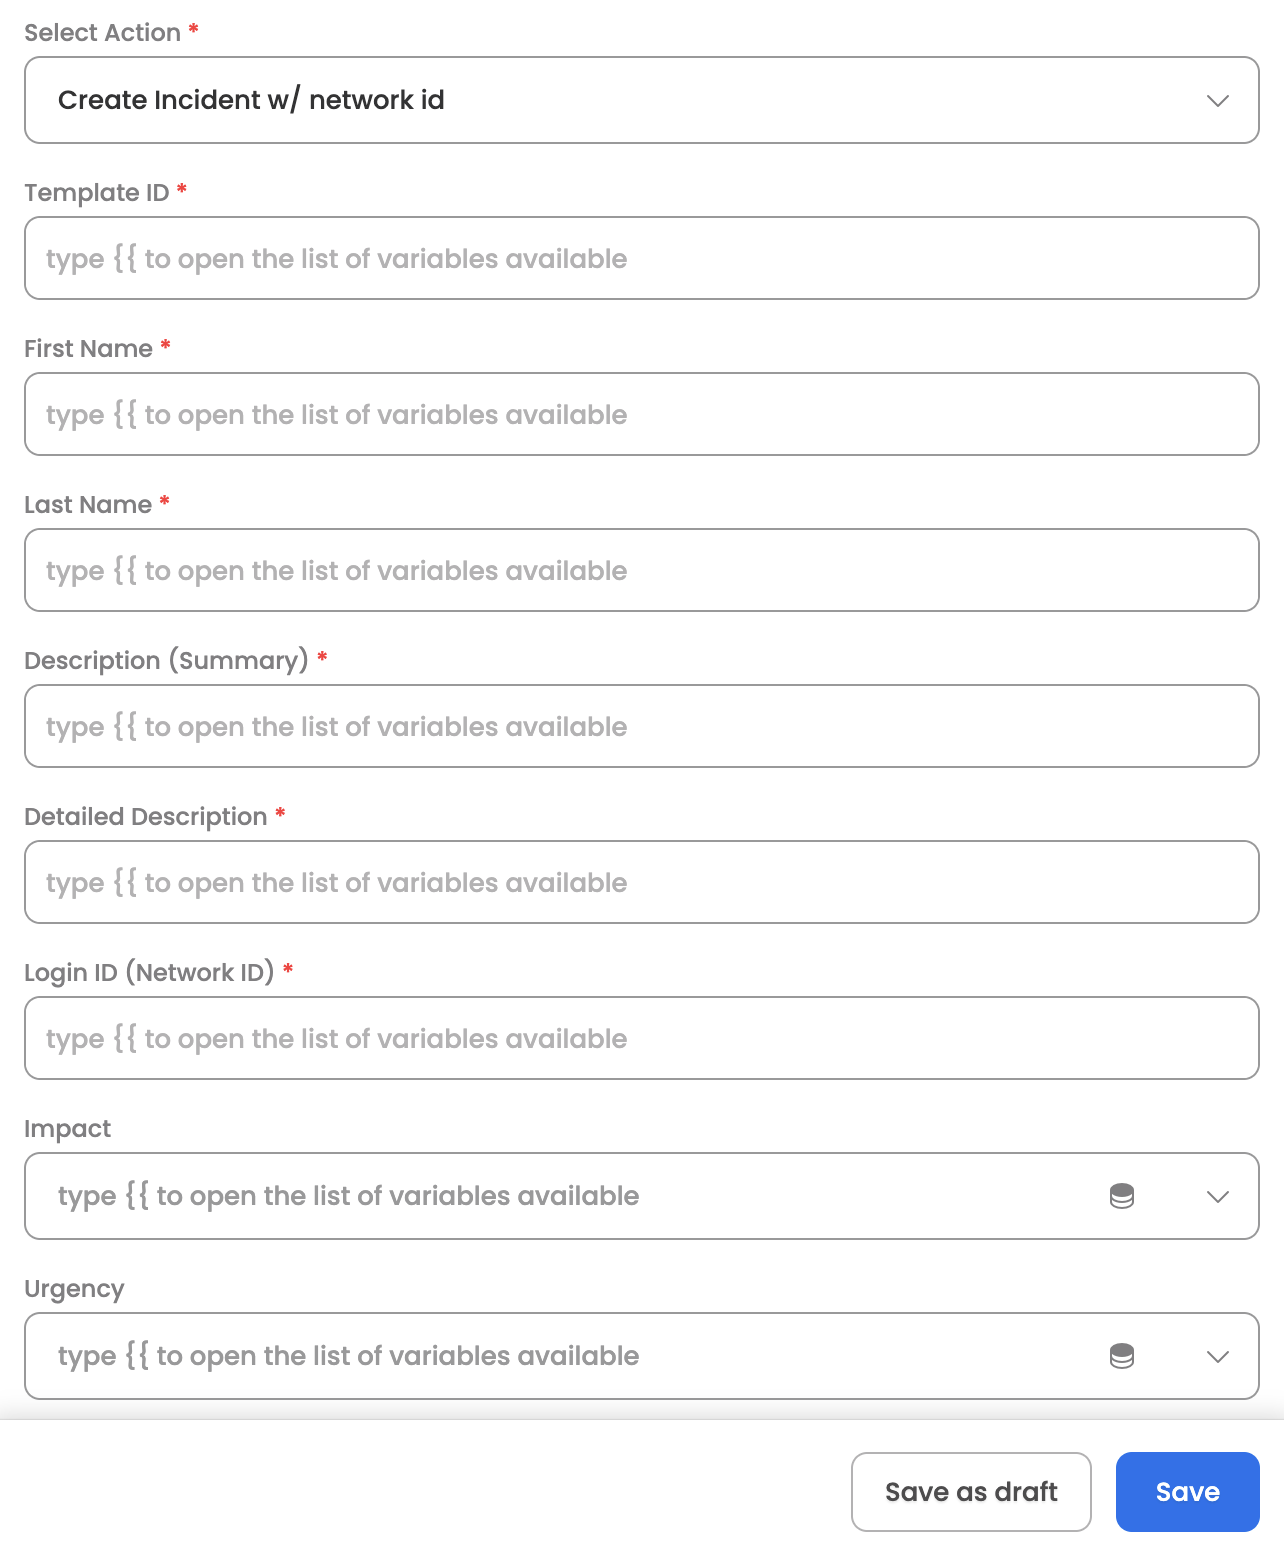
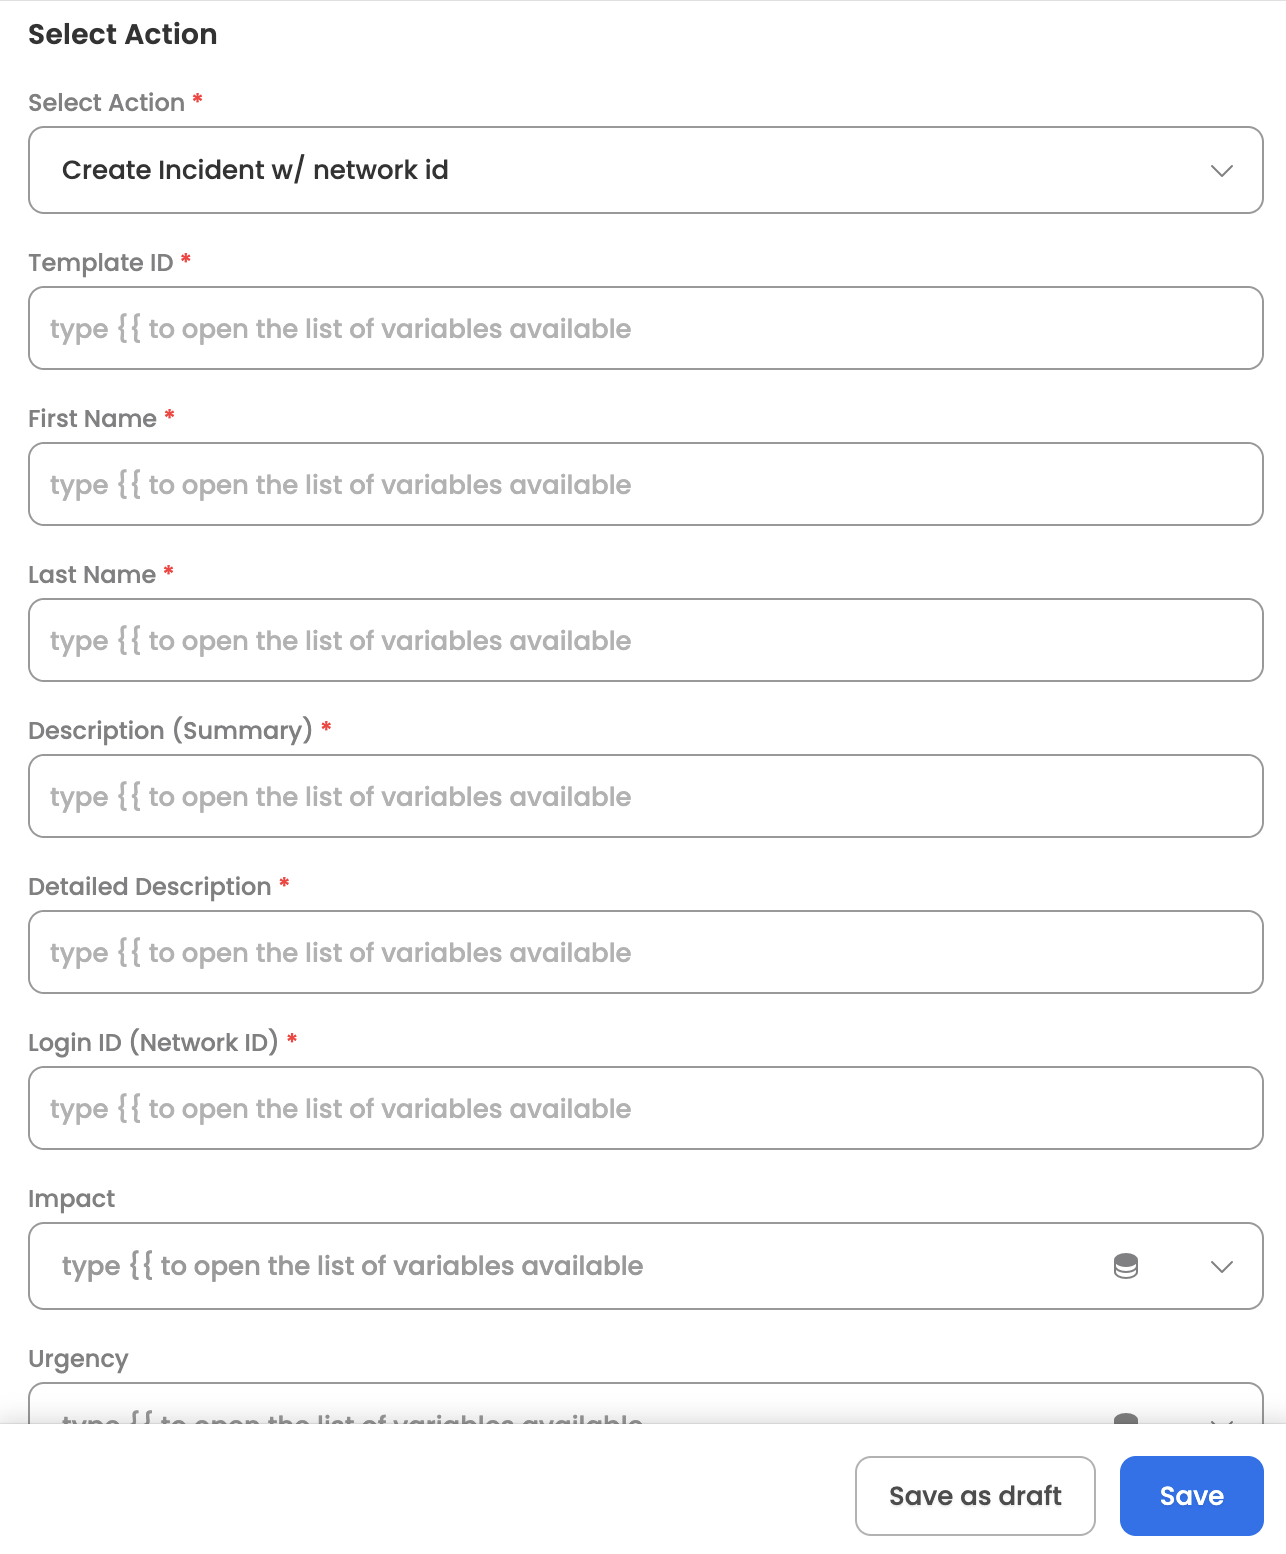
Create Incident w/ network id
Creates a new incident in BMC Helix ITSM using the user's Network ID (Login ID) for identification. The Agent can leverage the skill (workflow), which has been designed to create a new incident in BMC Helix, once the user raises a query to do so.
Input Parameters
Here are the input parameters required to set up this action:
Mandatory
| Name | Description |
|---|---|
| Template ID | The incident template ID to use for creation |
| First Name | First name of the requester |
| Last Name | Last name of the requester |
| Description (Summary) | Summary/title of the incident |
| Detailed Description | Detailed description of the incident |
| Login ID (Network ID) | Network ID (Login ID) of the requester |
Optional
| Name | Description |
|---|---|
| Impact | Impact level of the incident (1-Extensive/Widespread, 2-Significant/Large, 3-Moderate/Limited, 4-Minor/Localized) |
| Urgency | Urgency level (1-Critical, 2-High, 3-Medium, 4-Low) |
| Status | Initial status of the incident |
| Status Reason | Reason for the status |
| Reported Source | Source of the incident report |
| Service Type | Type of service affected |
| Company | Company associated with the incident |
| Assignee Groups | ID of the assignee groups |
| Assigned Group | Name of the assigned support group |
| Assignee | Individual assignee for the incident |
| Priority (1-5) | Priority level (1-5) |
| Assignee Support Company | Support company of the assignee |
| Assignee Support Organization | Support organization of the assignee |
Here is a sample JSON input:
// Basic Incident Creation with Network ID

{
  "templateId": "AGGAA5V0HGPWFANPQE5SBFRLQBAZSH",
  "firstName": "John",
  "lastName": "Smith",
  "description": "Unable to access email application",
  "detailedDecription": "User is unable to open Outlook application. Error message: Connection to server failed.",
  "loginId": "jsmith",
  "impact": "3-Moderate/Limited",
  "urgency": "2-High"
}

// Incident with Assignment Details

{
  "templateId": "AGGAA5V0HGPWFANPQE5SBFRLQBAZSH",
  "firstName": "Jane",
  "lastName": "Doe",
  "description": "VPN connection issues",
  "detailedDecription": "Unable to establish VPN connection from home office. Getting timeout errors.",
  "loginId": "jdoe",
  "impact": "2-Significant/Large",
  "urgency": "1-Critical",
  "status": "Assigned",
  "reportedSource": "ChatBot",
  "serviceType": "User Service Restoration",
  "locationCompany": "Calbro Services",
  "assigneeGroup": "IT Support",
  "priority": 2
}
Response
Upon successful creation, the action returns the created incident details including:
- Incident Number
- Request ID
- HTTP status code
- Creation confirmation
Get Incidents from Interface
Retrieves a list of incidents from BMC Helix ITSM. This action can be leveraged by Leena AI Orchestrator/Agent to list incidents based on various filter criteria. Here are some common use cases:
-
Incident Dashboard: Get all incidents for a user or team
-
Status Tracking: Find incidents by status (New, In Progress, Resolved)
-
Priority Review: List high-priority incidents
-
Reporting: Retrieve incidents for reporting and analytics

Input Parameters
Here are the input parameters required to set up this action:
Mandatory
None - all parameters are optional for this action.
Optional
| Name | Description |
|---|---|
| Qualification (Query Filter) | Query filter for incidents (e.g., 'Status'="New") |
| Fields | Comma-separated list of fields to return |
| Offset | Starting position for result set (for pagination) |
| Limit | Maximum number of records to return |
| Sort | Sort order (e.g., "Incident Number.ASC") |
Here is a sample JSON input:
// Get All New Incidents

{
  "qualification": "'Status'=\"New\"",
  "limit": 50,
  "sort": "Incident Number.DESC"
}

// Get High Priority Incidents for a Specific User

{
  "qualification": "'Priority'<=\"2\" AND 'Assignee Login ID'=\"jsmith\"",
  "fields": "Incident Number,Description,Status,Priority,Create Date",
  "offset": 0,
  "limit": 20,
  "sort": "Priority.ASC"
}

// Get Incidents by Status and Date Range

{
  "qualification": "'Status'=\"In Progress\" AND 'Submit Date'>\"2025-01-01\"",
  "fields": "Incident Number,Description,Status,Assignee,Submit Date",
  "limit": 100
}
Response
The action returns a list of incidents, each containing:
- Incident Number
- Summary/Description
- Status
- Priority
- Impact and Urgency
- Assignee information
- Creation and modification timestamps
- Additional fields as requested
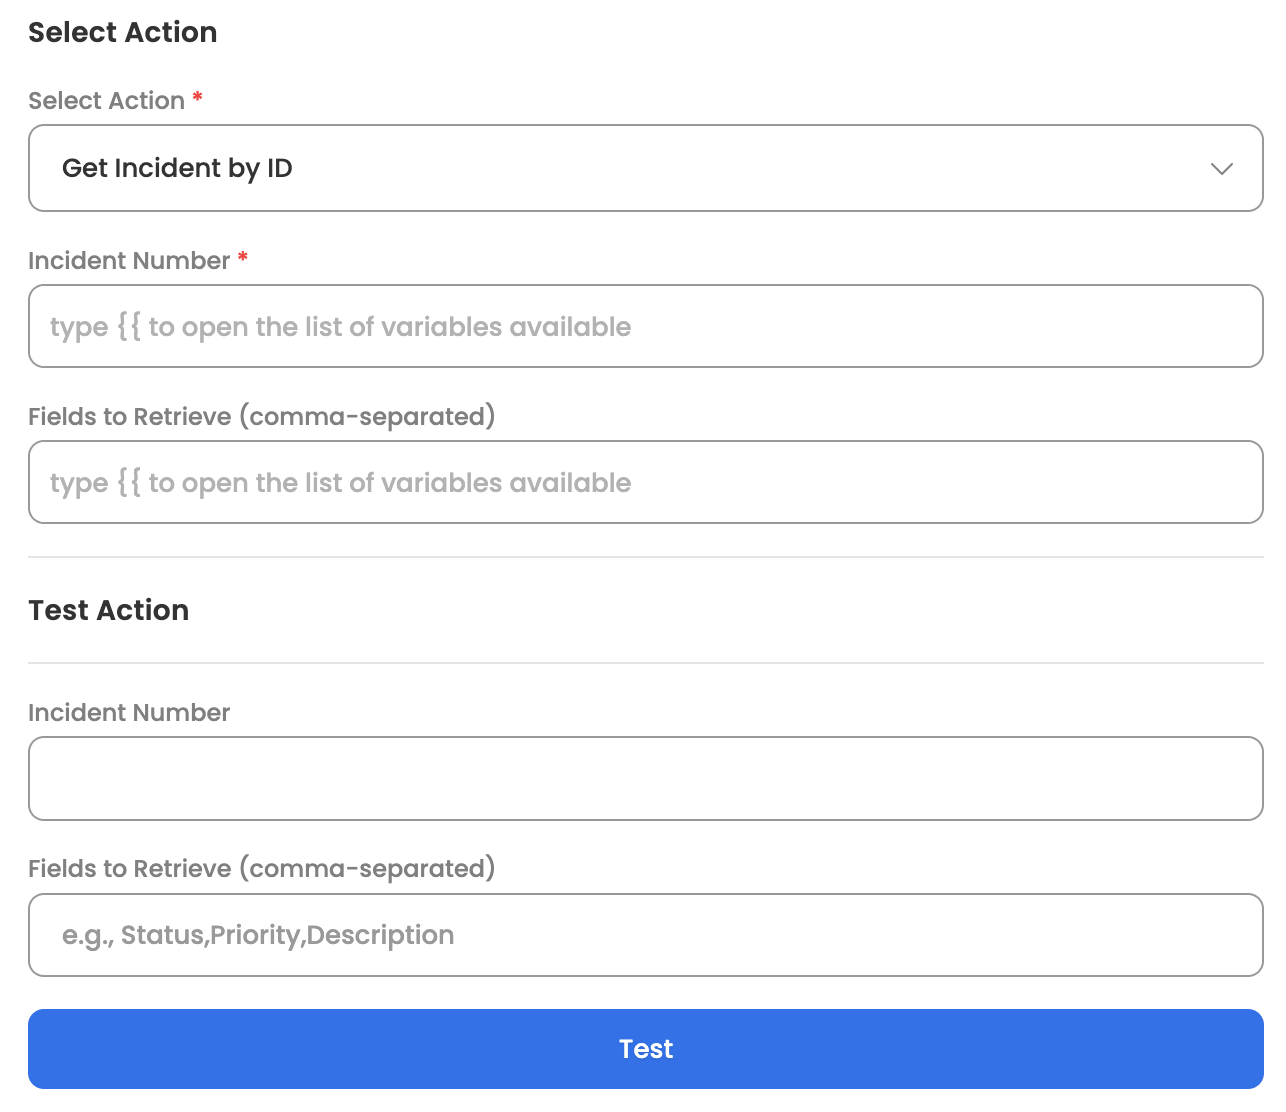
Get Incident by ID
Retrieves a specific incident from BMC Helix ITSM by its incident number. The Agent can leverage this action to fetch detailed information about a particular incident.
Input Parameters
Here are the input parameters required to set up this action:
Mandatory
| Name | Description |
|---|---|
| Incident Number | The unique incident number to retrieve |
Optional
| Name | Description |
|---|---|
| Fields to Retrieve (comma-separated) | Comma-separated list of specific fields to retrieve |
Here is a sample JSON input:
// Get Full Incident Details

{
  "incidentNumber": "INC000000000123"
}

// Get Specific Fields Only

{
  "incidentNumber": "INC000000000123",
  "fields": "Status,Priority,Description,Assignee,Resolution"
}
Response
The action returns the incident details including:
- Incident Number
- Status
- Priority
- Description
- Detailed Description
- Assignee information
- Impact and Urgency
- Creation and modification timestamps
- Resolution details (if applicable)
- Any other requested fields
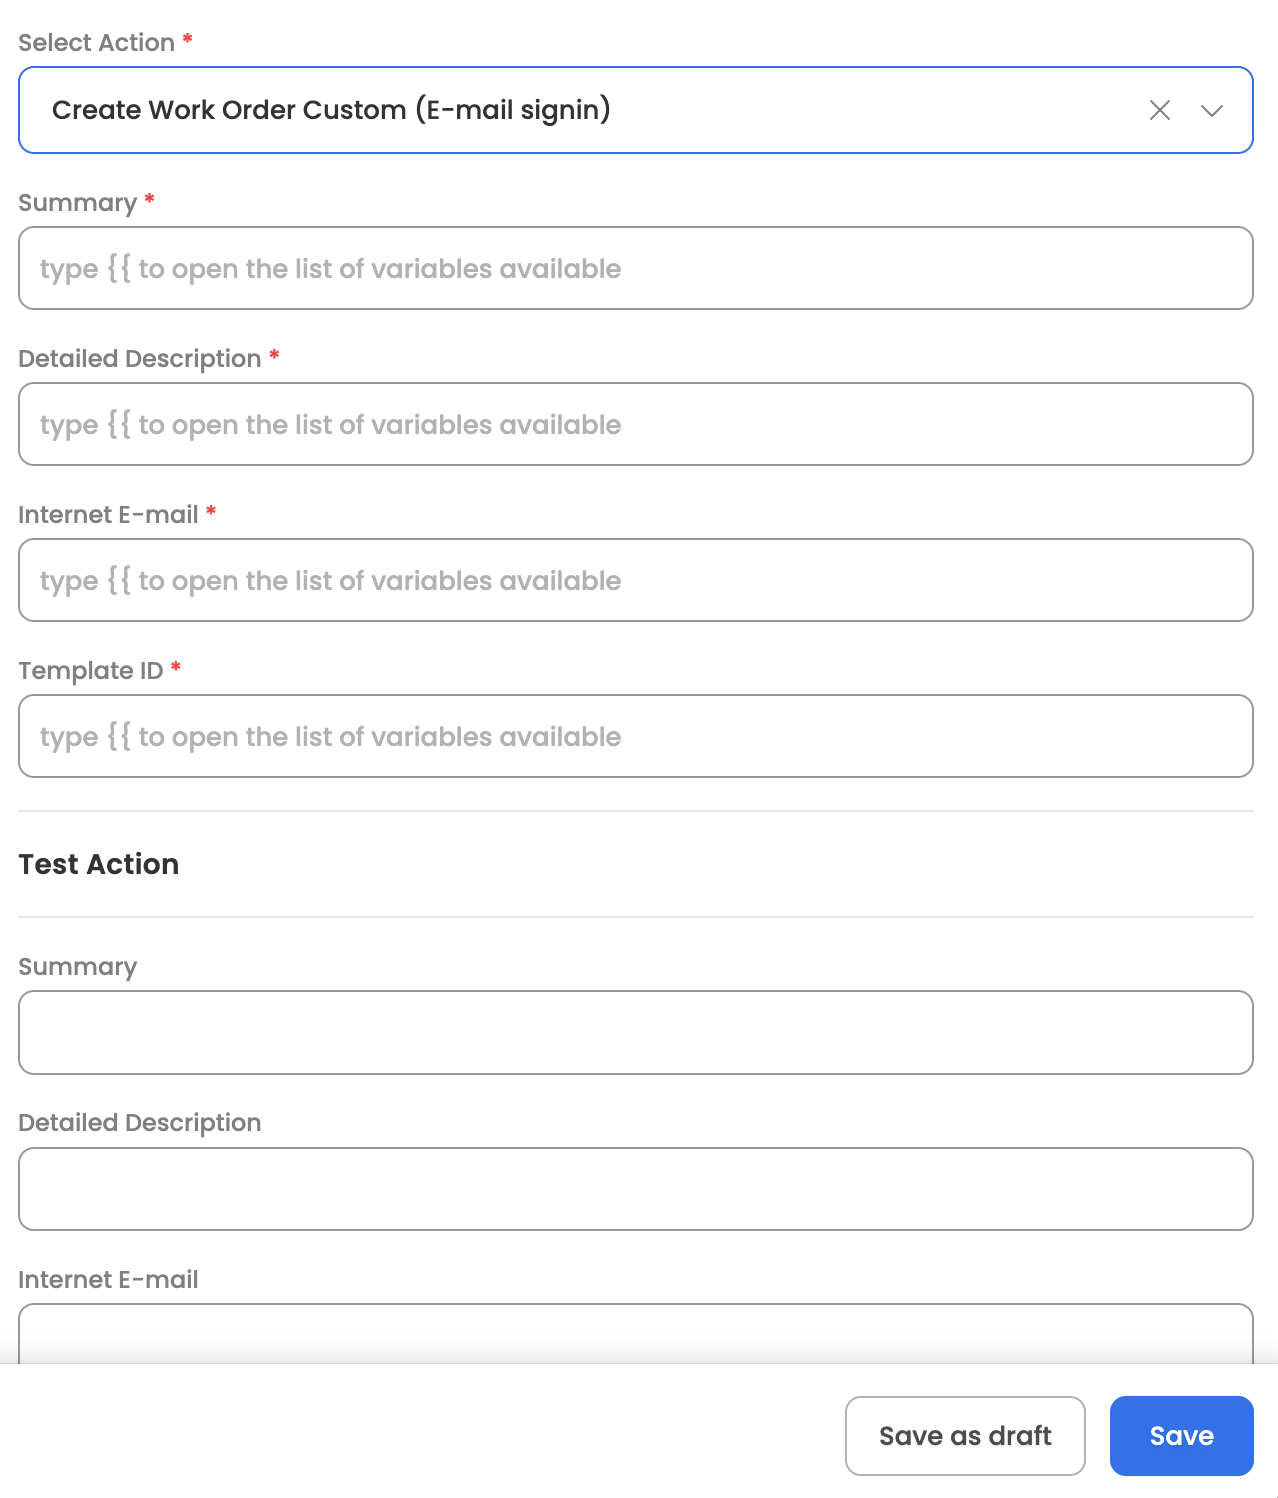
Create Work Order Custom (E-mail signin)
Creates a new work order in BMC Helix ITSM using the user's email address for identification. The Agent can leverage the skill (workflow), which has been designed to create a new work order in BMC Helix, once the user raises a query to do so. Here are some common use cases:
-
Service Requests: Request new hardware or software
-
Maintenance Tasks: Schedule equipment maintenance
-
IT Tasks: Create tasks for IT team members
-
Project Work: Log project-related work items
Input Parameters
Here are the input parameters required to set up this action:
Mandatory
| Name | Description |
|---|---|
| Summary | Title/subject of the work order |
| Detailed Description | Detailed description of the work order |
| Internet E-mail | Email address of the requester |
| Template ID | The work order template ID to use for creation |
Here is a sample JSON input:
// Basic Work Order Creation with Email

{
  "summary": "New laptop setup request",
  "detailedDescription": "Setup new Dell laptop for new employee starting next Monday. Install standard software suite and configure email.",
  "internetEmail": "[email protected]",
  "templateId": "WOTEMPLATE000001"
}

// Equipment Maintenance Work Order

{
  "summary": "Quarterly server maintenance",
  "detailedDescription": "Perform scheduled quarterly maintenance on PROD-DB-01 server including OS patches, disk cleanup, and performance tuning.",
  "internetEmail": "[email protected]",
  "templateId": "WOTEMPLATE000002"
}
Response
Upon successful creation, the action returns the created work order details including:
- Work Order ID
- HTTP status code
- Creation confirmation
Create Work Order Custom (Network ID signin)
Creates a new work order in BMC Helix ITSM using the user's Network ID (Login ID) for identification. The Agent can leverage the skill (workflow), which has been designed to create a new work order in BMC Helix, once the user raises a query to do so.
Input Parameters
Here are the input parameters required to set up this action:
Mandatory
| Name | Description |
|---|---|
| Summary | Title/subject of the work order |
| Detailed Description | Detailed description of the work order |
| Template ID | The work order template ID to use for creation |
| Reported Source | Source of the work order (Pre-filled as 'ChatBot') |
| Requester Login ID (Network ID) | Network ID (Login ID) of the requester |
Here is a sample JSON input:
// Basic Work Order with Network ID

{
  "summary": "Office relocation IT setup",
  "detailedDescription": "Setup network connections, phone system, and workstations for 5 employees moving to Building B, Floor 3.",
  "templateId": "WOTEMPLATE000001",
  "reportedSource": "ChatBot",
  "requesterLoginId": "facilities_mgr"
}

// Software Deployment Work Order

{
  "summary": "Deploy CRM update to sales team",
  "detailedDescription": "Roll out Salesforce Lightning update to all 50 sales team members. Schedule training sessions and provide documentation.",
  "templateId": "WOTEMPLATE000003",
  "reportedSource": "ChatBot",
  "requesterLoginId": "sales_ops"
}
Response
Upon successful creation, the action returns the created work order details including:
- Work Order ID
- HTTP status code
- Creation confirmation
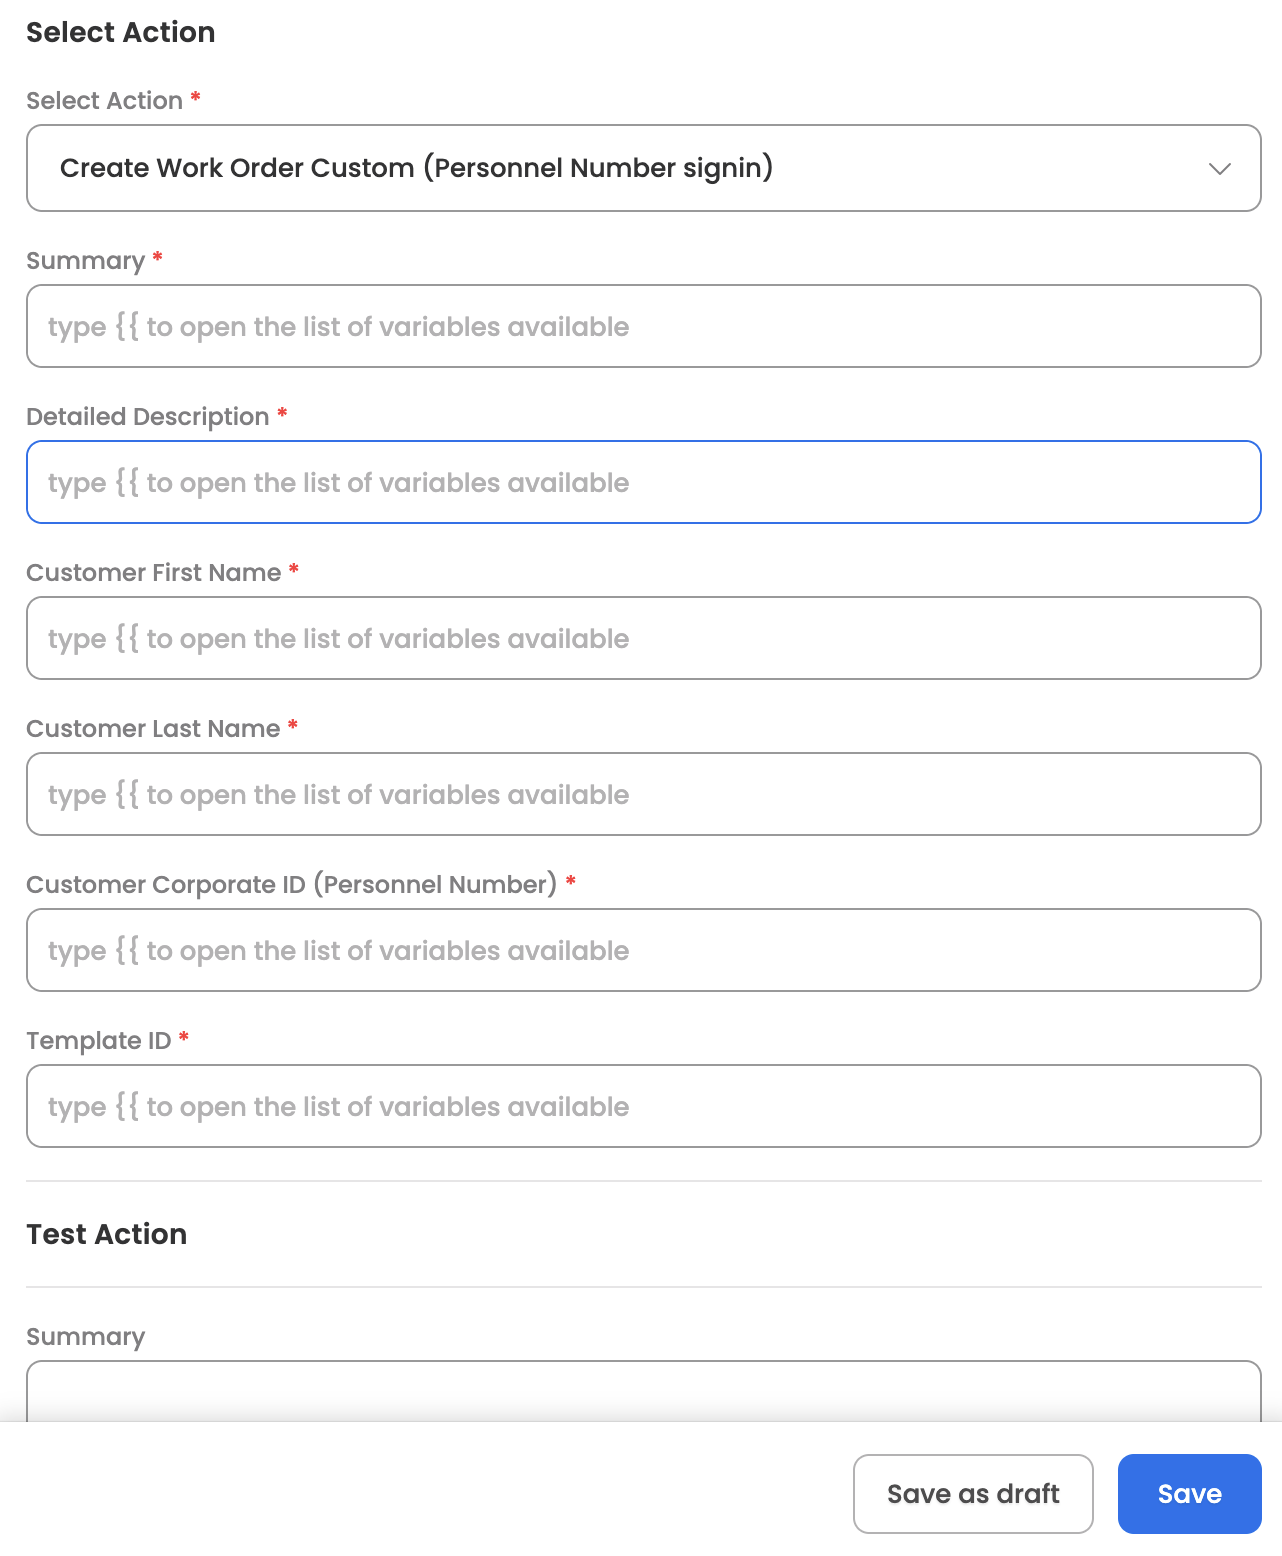
Create Work Order Custom (Personnel Number signin)
Creates a new work order in BMC Helix ITSM using the customer's Personnel Number (Corporate ID) for identification. The Agent can leverage the skill (workflow), which has been designed to create a new work order in BMC Helix, once the user raises a query to do so.
Input Parameters
Here are the input parameters required to set up this action:
Mandatory
| Name | Description |
|---|---|
| Summary | Title/subject of the work order |
| Detailed Description | Detailed description of the work order |
| Customer First Name | First name of the customer |
| Customer Last Name | Last name of the customer |
| Customer Corporate ID (Personnel Number) | Personnel number/Corporate ID of the customer |
| Template ID | The work order template ID to use for creation |
Here is a sample JSON input:
// Work Order with Personnel Number

{
  "summary": "Access card replacement",
  "detailedDescription": "Employee lost access card. Need replacement card programmed with same access levels for Building A and server room.",
  "customerFirstName": "John",
  "customerLastName": "Smith",
  "customerCorporateId": "EMP001234",
  "templateId": "WOTEMPLATE000004"
}

// Hardware Upgrade Request

{
  "summary": "Workstation memory upgrade",
  "detailedDescription": "Upgrade RAM from 16GB to 32GB on workstation WS-DEV-042 for development work requiring multiple VMs.",
  "customerFirstName": "Jane",
  "customerLastName": "Doe",
  "customerCorporateId": "EMP005678",
  "templateId": "WOTEMPLATE000005"
}
Response
Upon successful creation, the action returns the created work order details including:
- Work Order ID
- HTTP status code
- Creation confirmation