
Dashboard User
Watch the tutorial
Adding a dashboard user
-
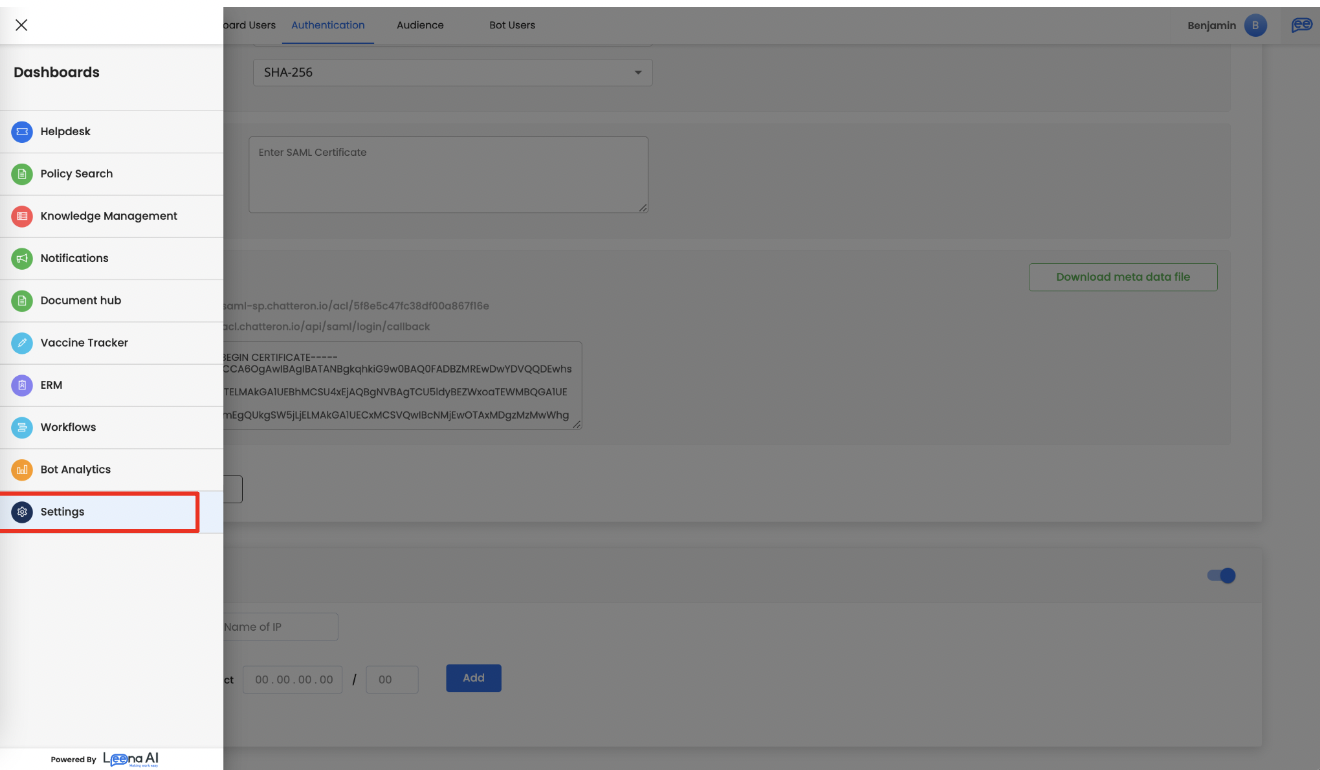
Navigate to the ‘Settings’ section from the hamburger menu (at the left of the Unified Dashboard view).
-
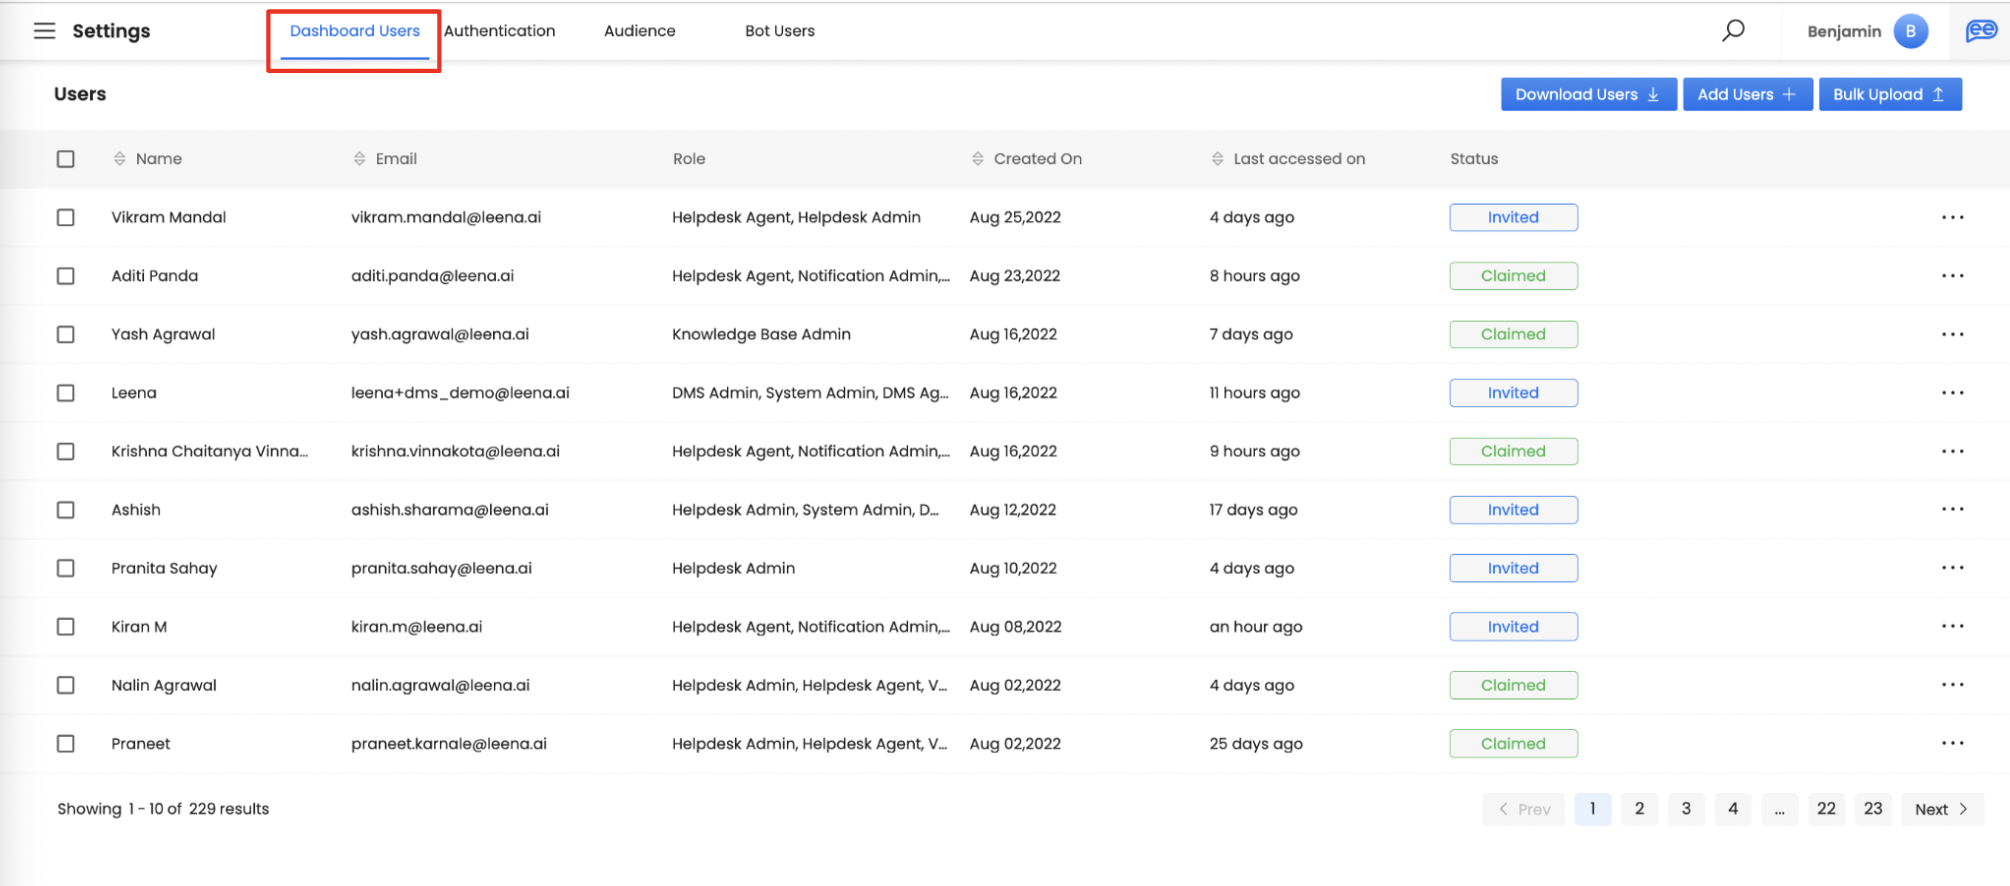
Click on the ‘Dashboard Users’ section
-
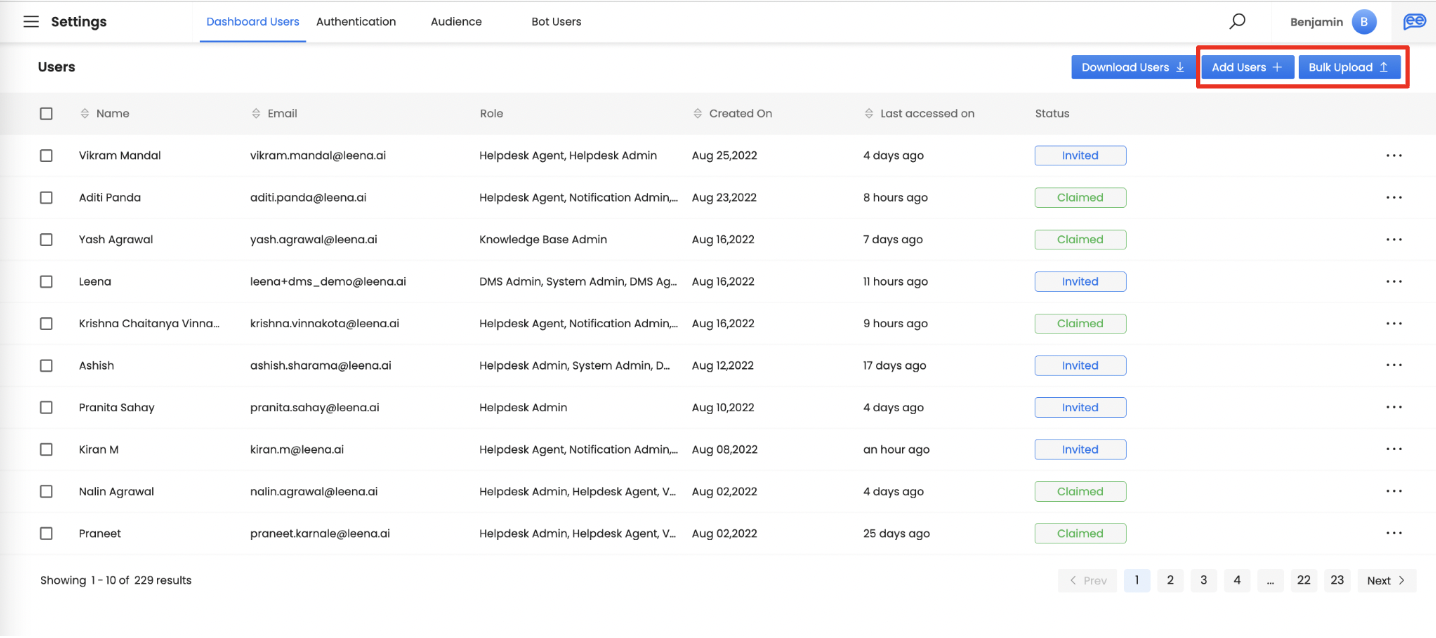
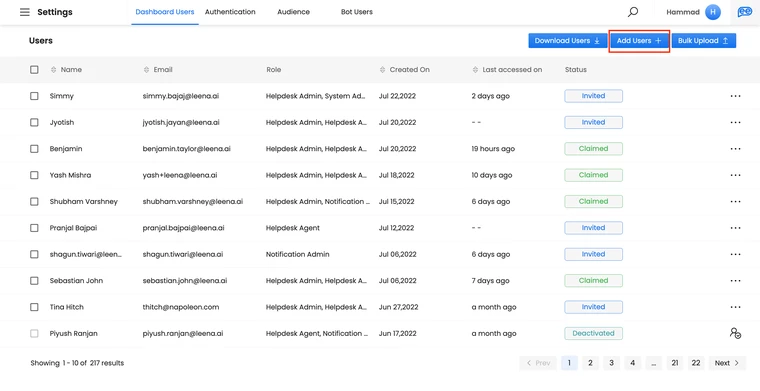
Users can be added either one-by-one or in bulk. Find the options at the top right of the dashboard
Adding users one-by-one
-
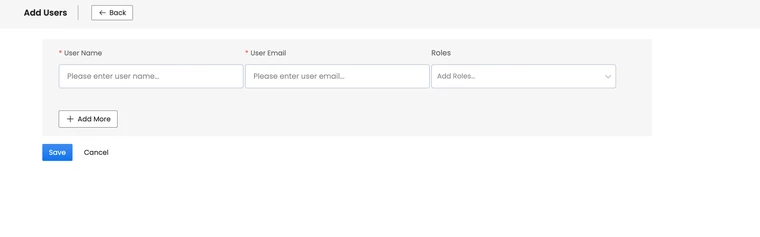
You can add users one by one by clicking on the ‘Add Users +’ button
-
Fill user details including their roles in the next page and click ‘Save’.
-
After the details are saved, a profile gets created as a dashboard user.
Creating users via bulk upload
-
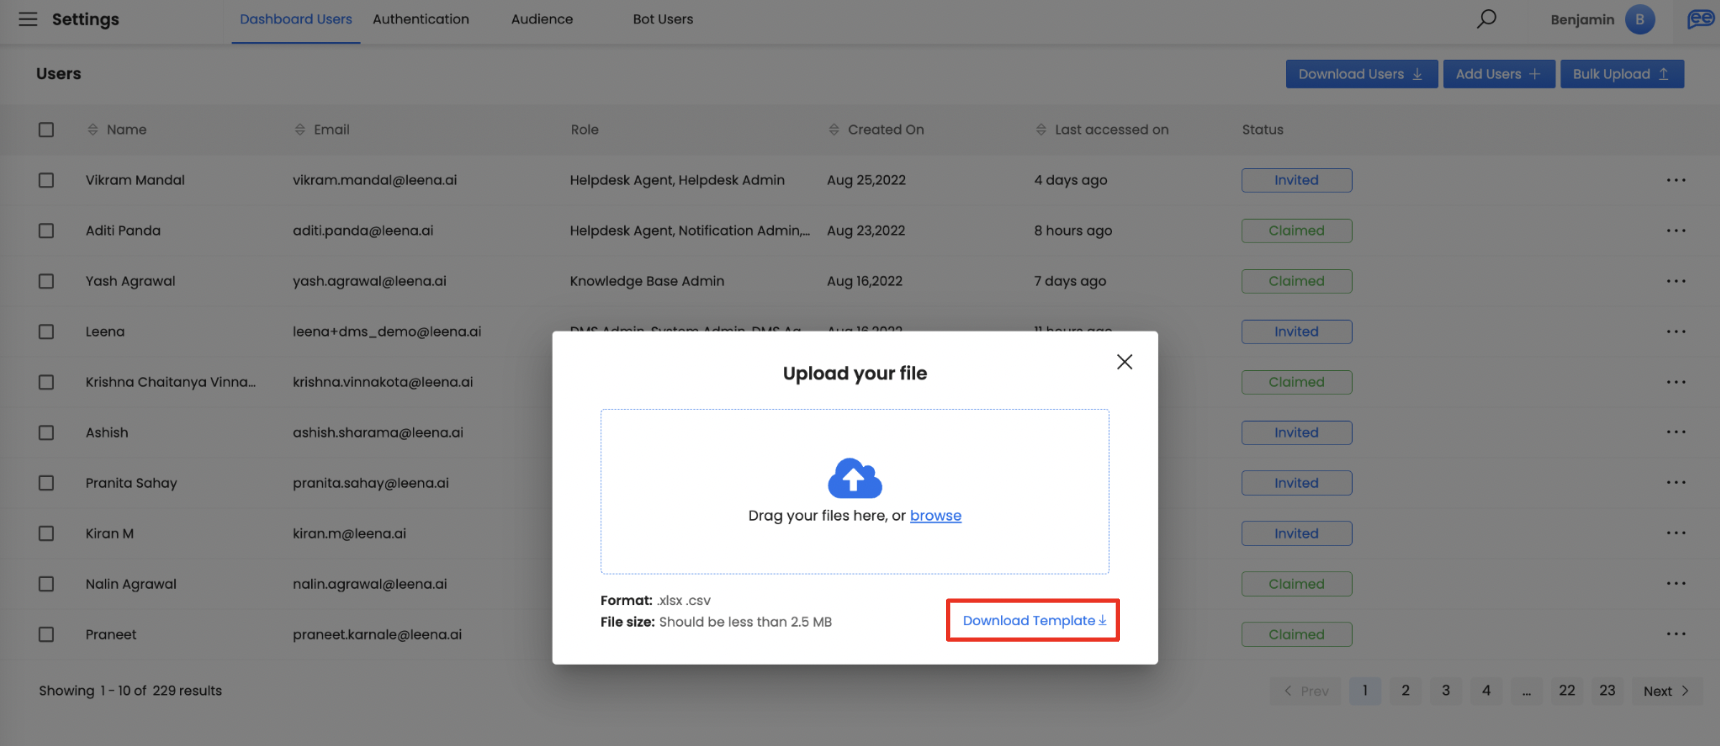
Click on the ‘Bulk Upload’ button to upload users en masse

-
Download the template sheet and fill in details of new user(s).
-
Upload it using the ‘Drag your files here, or browse’ option.
-
Once successfully uploaded, dashboard users would be created triggering invitation emails to all of them.
Granting role to the user
-
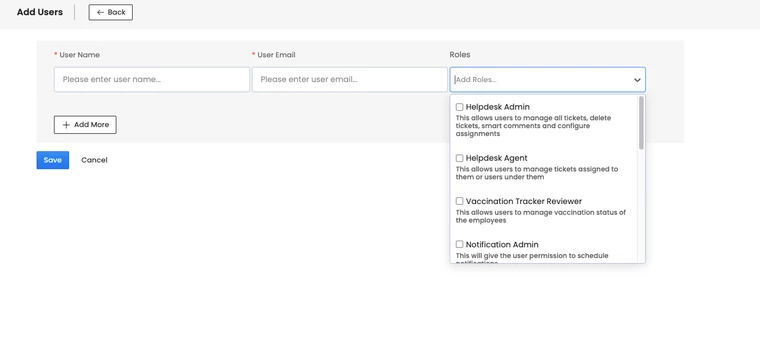
While adding dashboard users, providing roles is mandatory.
-
Roles cover Admin, Agent, and Reviewer options that vary in how the user will engage with the dashboard.
-
Different accesses can be enabled for users across different modules, ranging from View or Edit for Admin and Agent type of users.
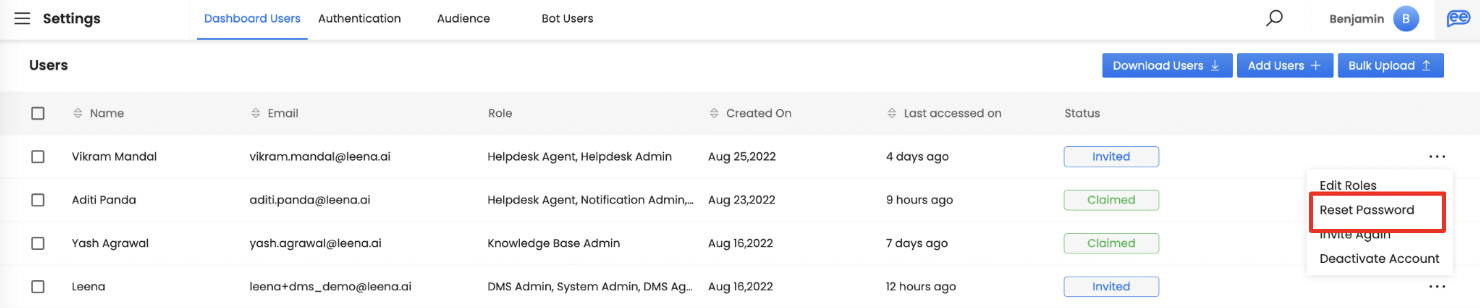
Actions against a user
-
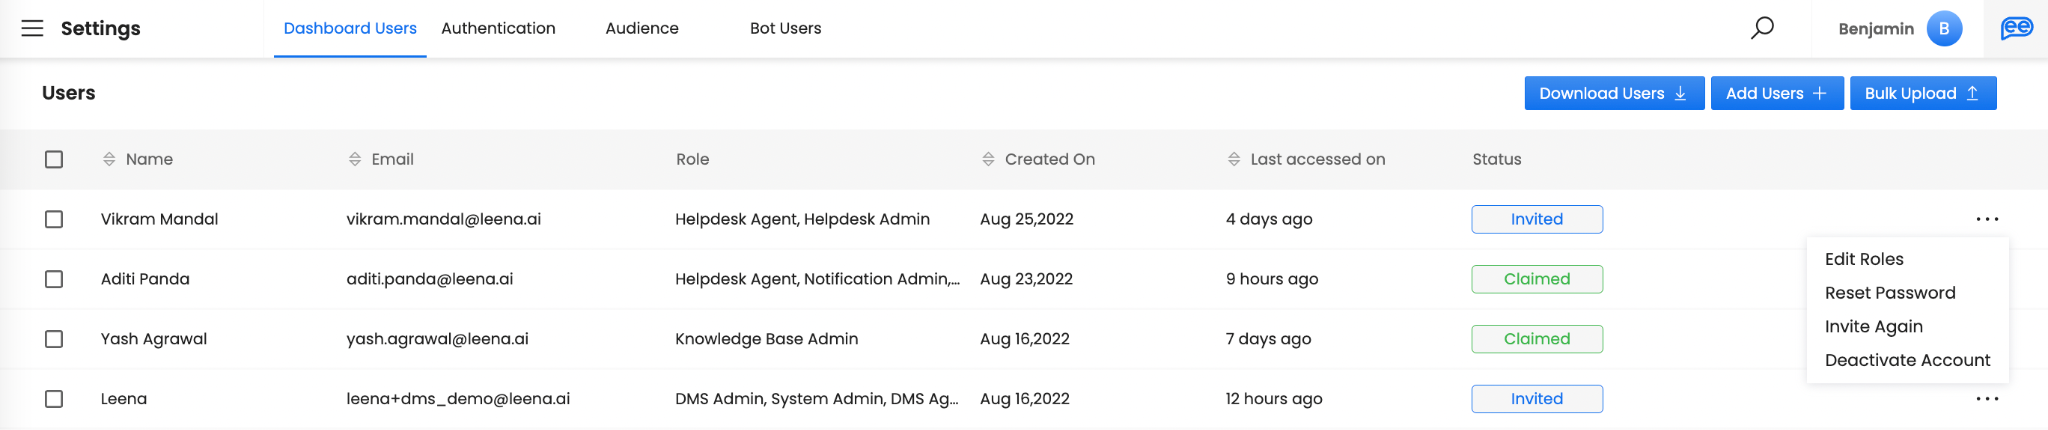
Different actions can be taken against dashboard users. Click on the flutter (horizontal dots) icon against a dashboard user, and take action(s).
-
They range from:
-
Modify Roles: Roles or accesses granted to users can vary from administrators to agents to reviewers.

-
Reset Password: Users can refresh passwords which might have not been changed for some time or if they have forgotten it.
-
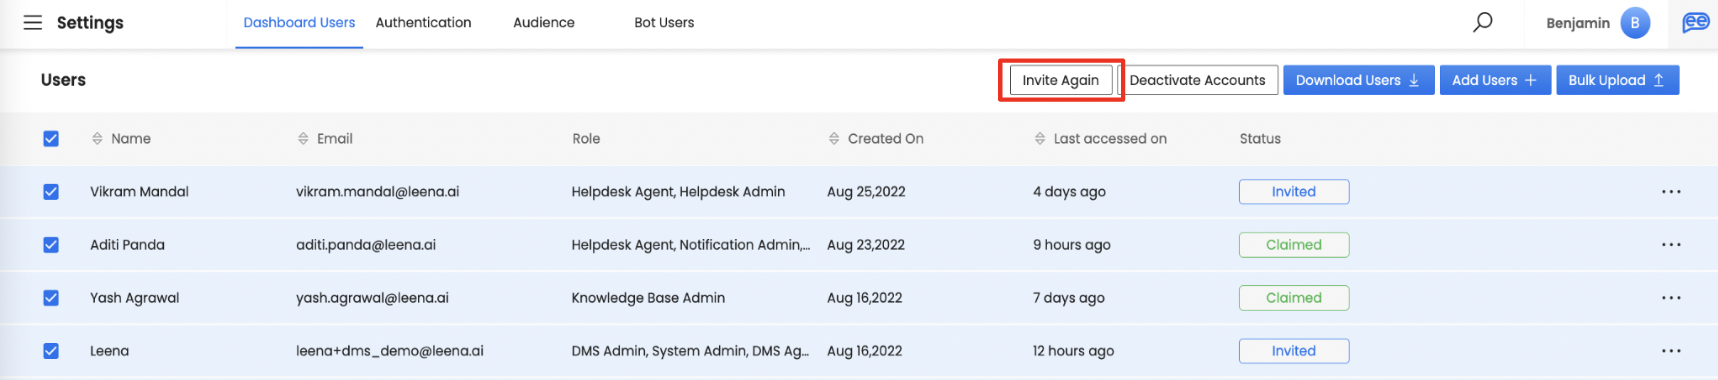
Invite Again: Invitation emails or links can be resent to dashboard users using this option. You can re-invite users in bulk by clicking respective checkboxes on the left and clicking on ‘Invite Again’.
-
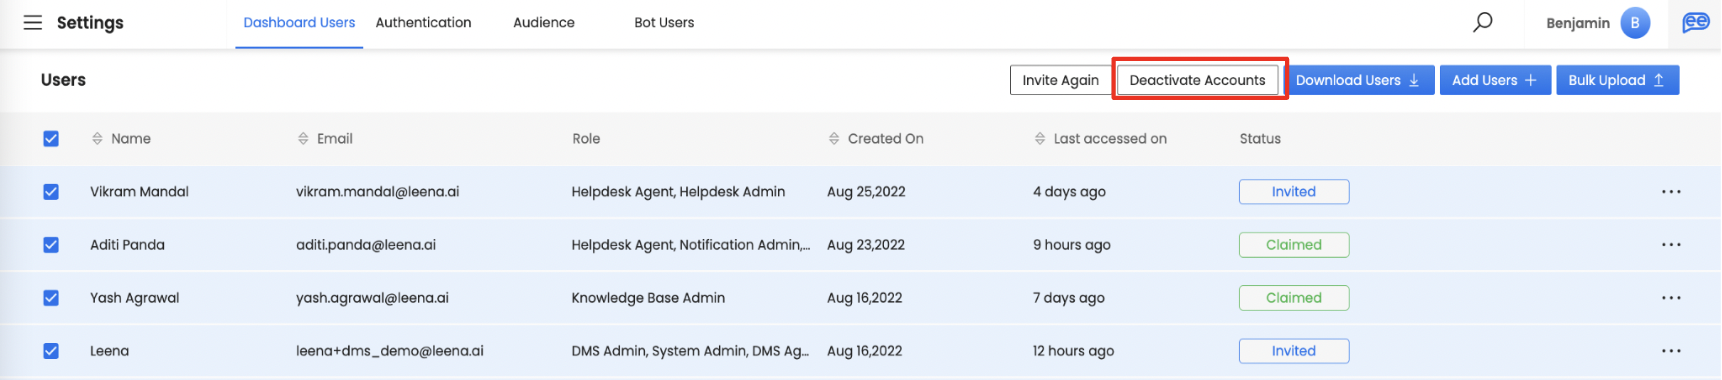
Deactivate Account: Deactivate User accounts with this action. You can perform the same task in bulk by clicking respective checkboxes on the left and clicking on ‘Invite Again’.
-