
Filters
Introduction
Filters enable onboarding/offboarding agents to quickly locate relevant candidates from the list. These filters can be customized to meet specific requirements.
Add new filter
Here’s how to add a new filter:
-
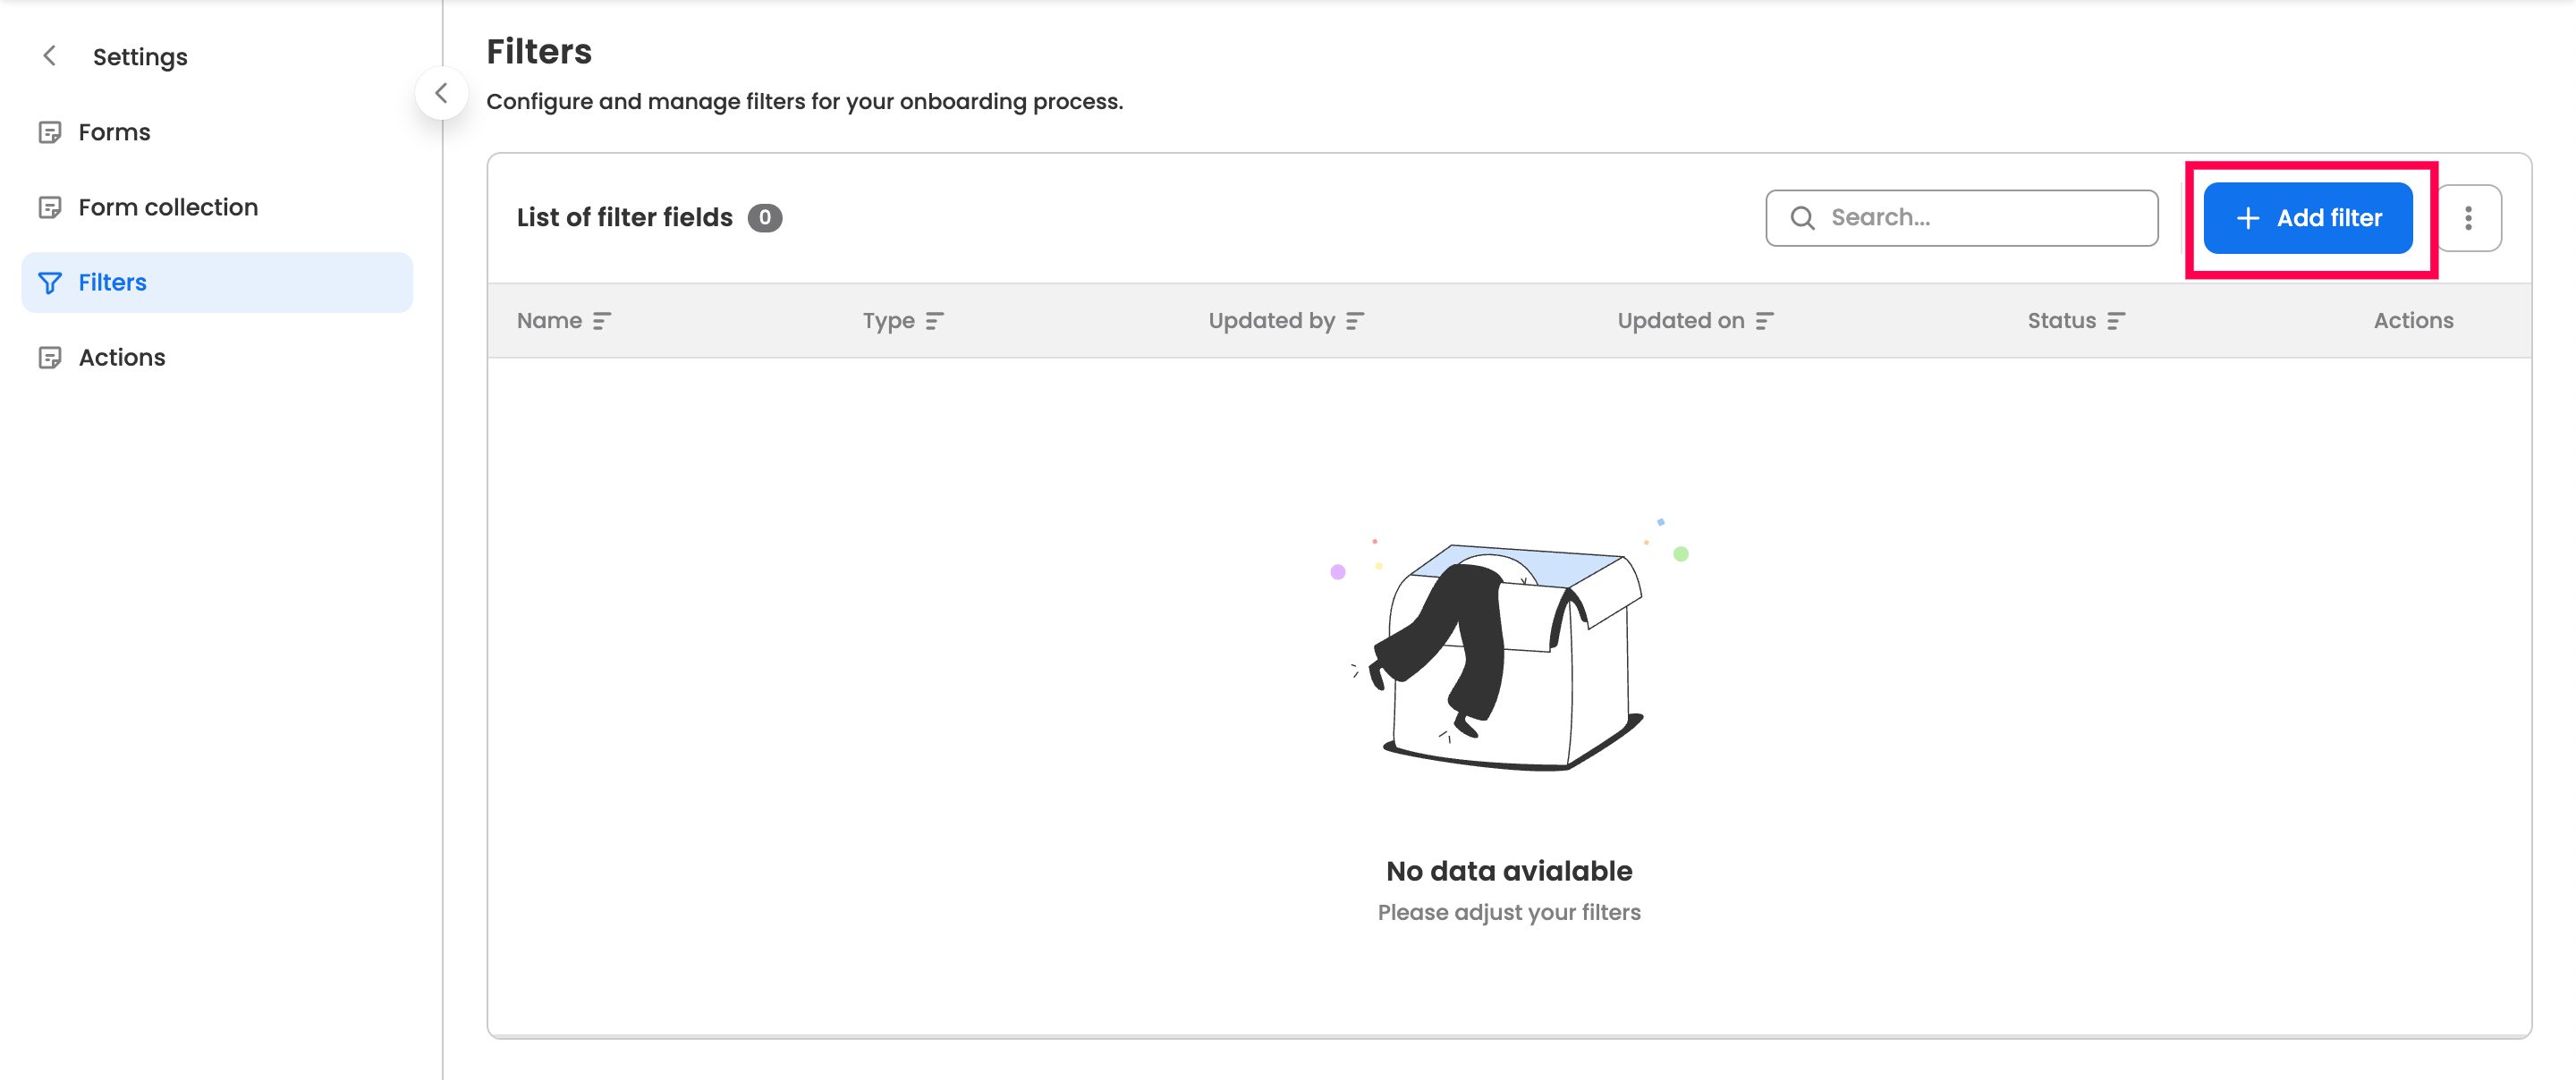
Go to the filters within the onboarding settings.
-
Click the “+ Add filter” button located at the top-right corner of the table.
-
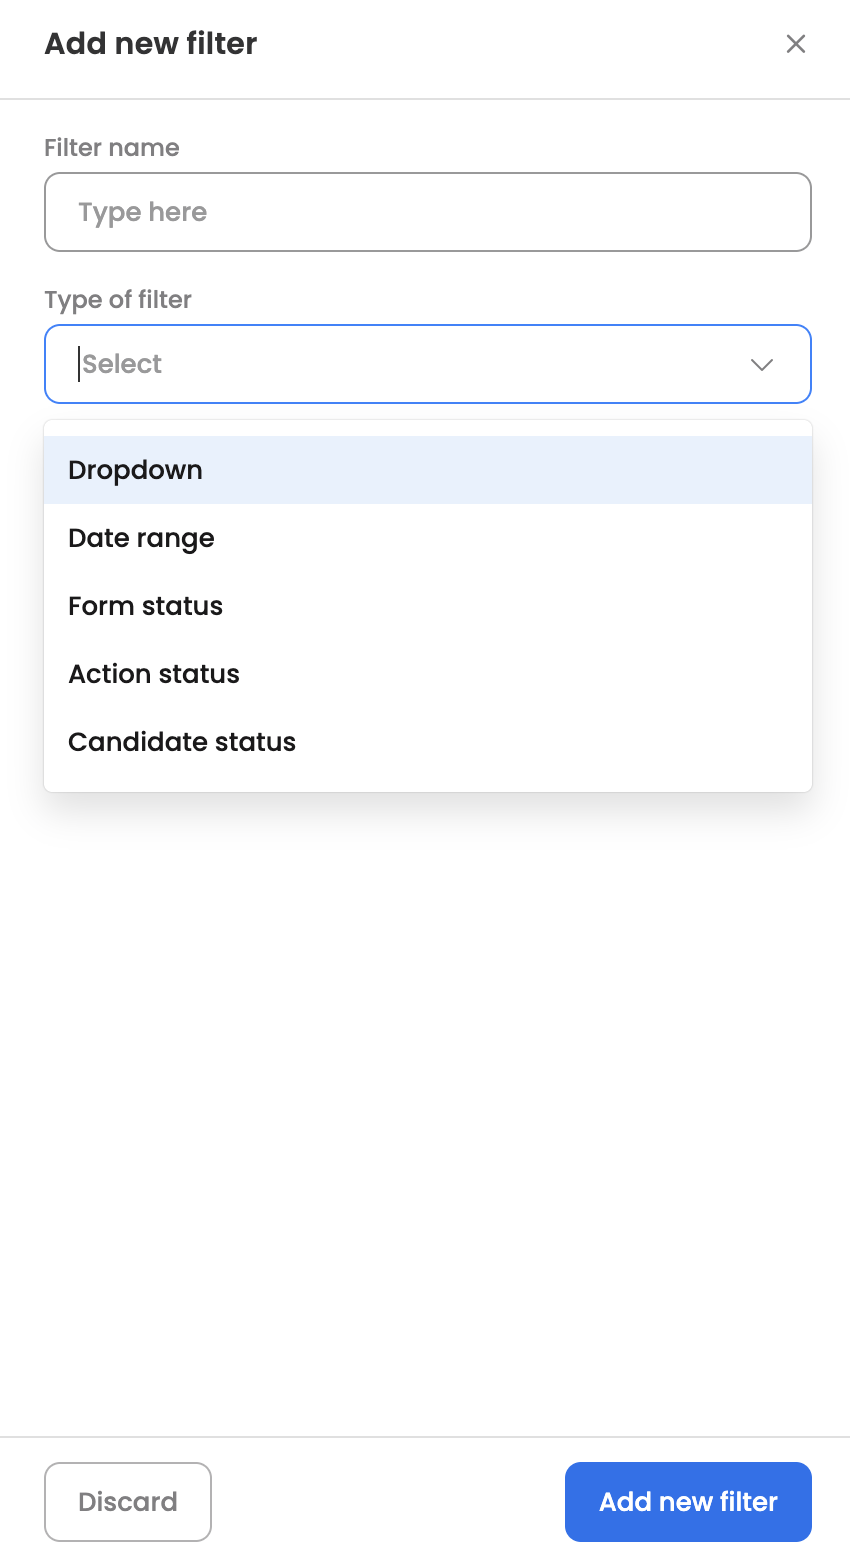
Enter a name for the filter that will be visible to the agent, and select the filter type.
- Dropdown: Create a dropdown filter for the section key (Non-date range). If the selected field isn’t a dropdown, choose the data source.
- Dropdown list: Use the configured dropdown list as the available options in the filter dropdown.
- Webhook: Use a webhook URL to fetch the dropdown options dynamically.
- Past data: Display all historical values for the section key in the dropdown.
- Dropdown: Create a dropdown filter for the section key (Non-date range). If the selected field isn’t a dropdown, choose the data source.
-
Date range: Create a date range filter for a section key with a date field type.
-
Form status: Create a dropdown filter displaying all forms and use it to filter out candidates whose form status matches the configured one.
-
Action status: Create a dropdown filter displaying all actions and use it to filter out candidates whose action status matches the configured one.
-
Candidate status: Create a dropdown filter displaying all candidate statuses and use it to filter out candidates whose status matches the selected one.
Reorder filters
You can reorder all enabled filters by clicking the three-dot menu in the filter list table and selecting the “Reorder Filters” section. From there, simply use the drag-and-drop method to rearrange the filters.

Managing existing filters
The configured filters will be visible in the filter settings, here are the actions which can be performed for each configured filters:

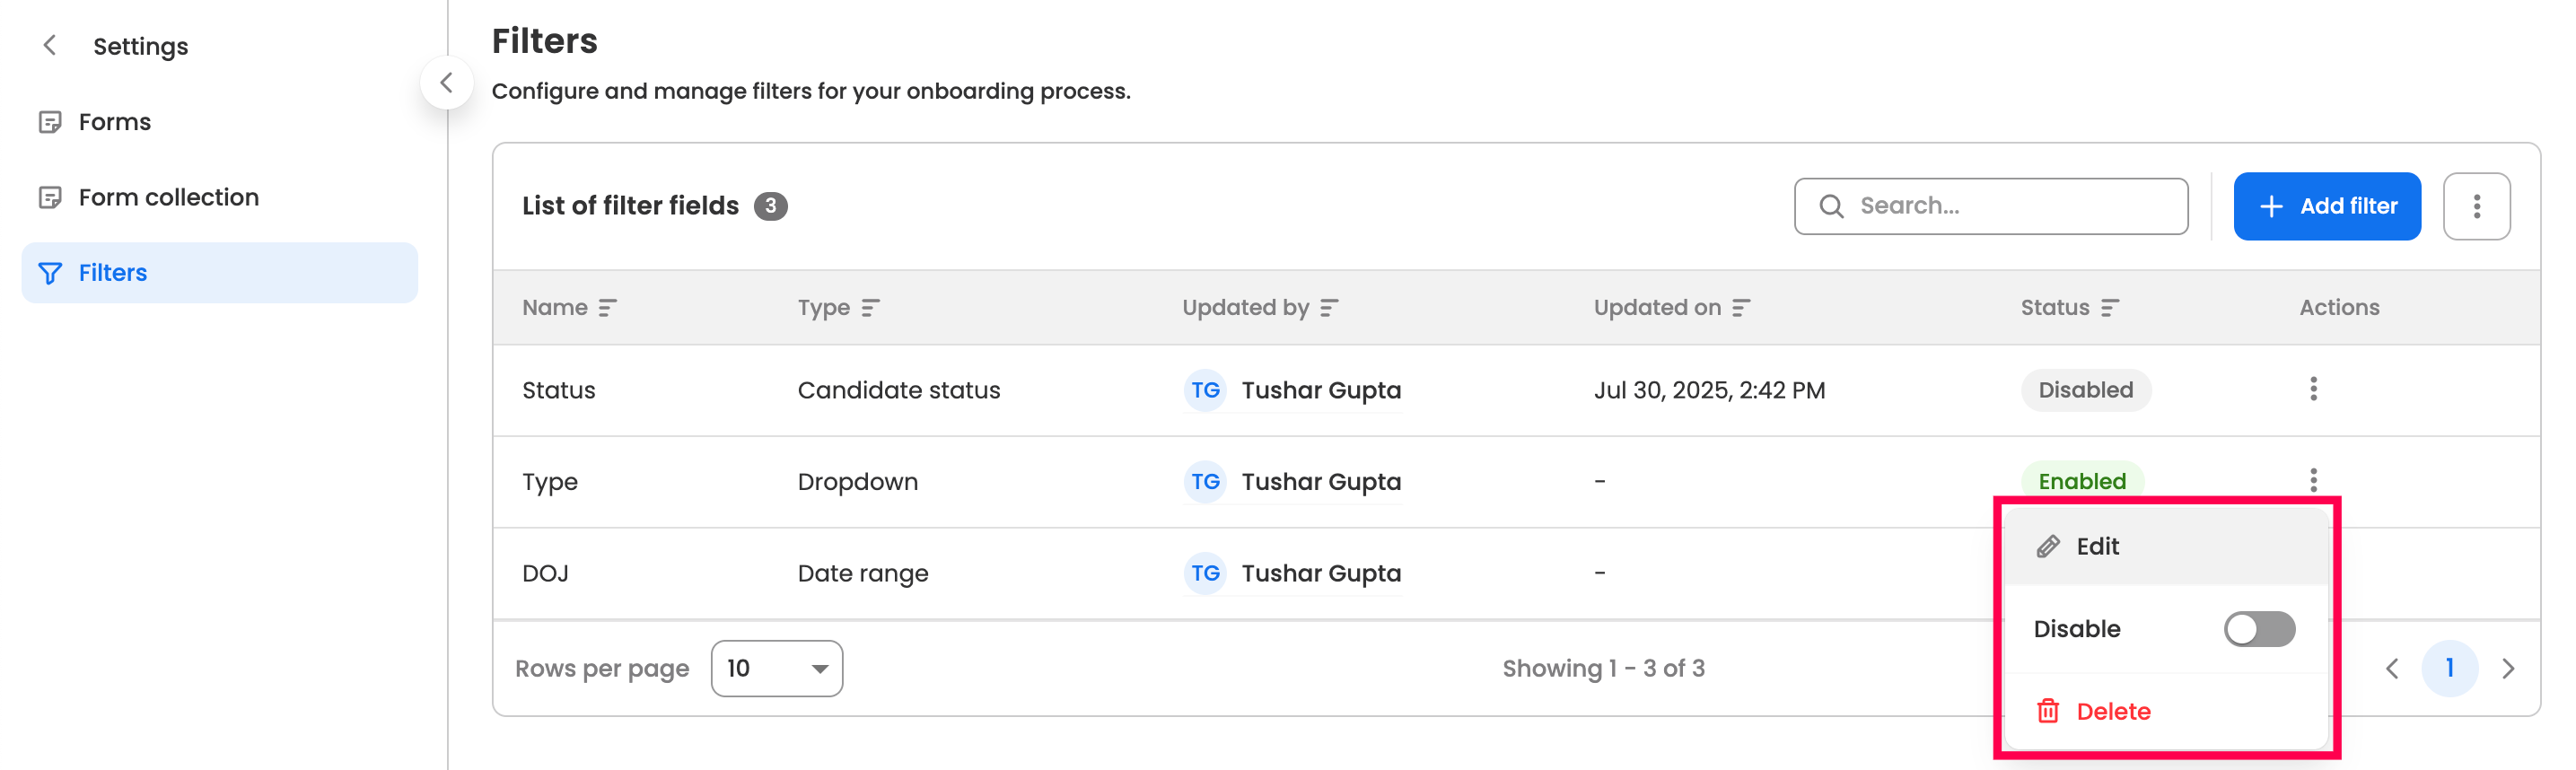
- Edit: Modify the configured filter.
- Enable/Disable: Disable the active filter to hide it. Similarly, enable the disabled filter to make it visible again.
- Delete: Permanently delete the filter.