
End Nodes
Every workflow needs a clear ending. Workflows Studio provides two terminal nodes for this purpose — the End Node and the End Flow Node. Both mark the conclusion of a workflow, but they serve different needs depending on how simple or complex your workflow outcomes are.
This guide covers when and how to use each one, how they differ, and best practices for designing clean workflow endings.
End Node
The End Node is the simplest way to finish a workflow. It marks the workflow item as Completed (Successful) — no configuration needed. Every new workflow is created with one End Node by default.
When to Use
Use the End Node when your workflow has a single, straightforward "happy path." If every item that reaches the end should be treated as successfully completed, the End Node is all you need. Common examples include a simple document submission, an information request that doesn't require approval, or a notification workflow.
Key Behaviors
The End Node always sets the workflow item status to Completed. It does not cancel any other in-progress steps — if you have parallel branches, they continue running independently even after one branch reaches the End Node. There is no configuration panel; it works out of the box.
The End Node also cannot be duplicated on the canvas. Each workflow has exactly one default End Node. If you need multiple termination points with different outcomes, use End Flow Nodes instead.
Callback to AI Colleague (Optional)
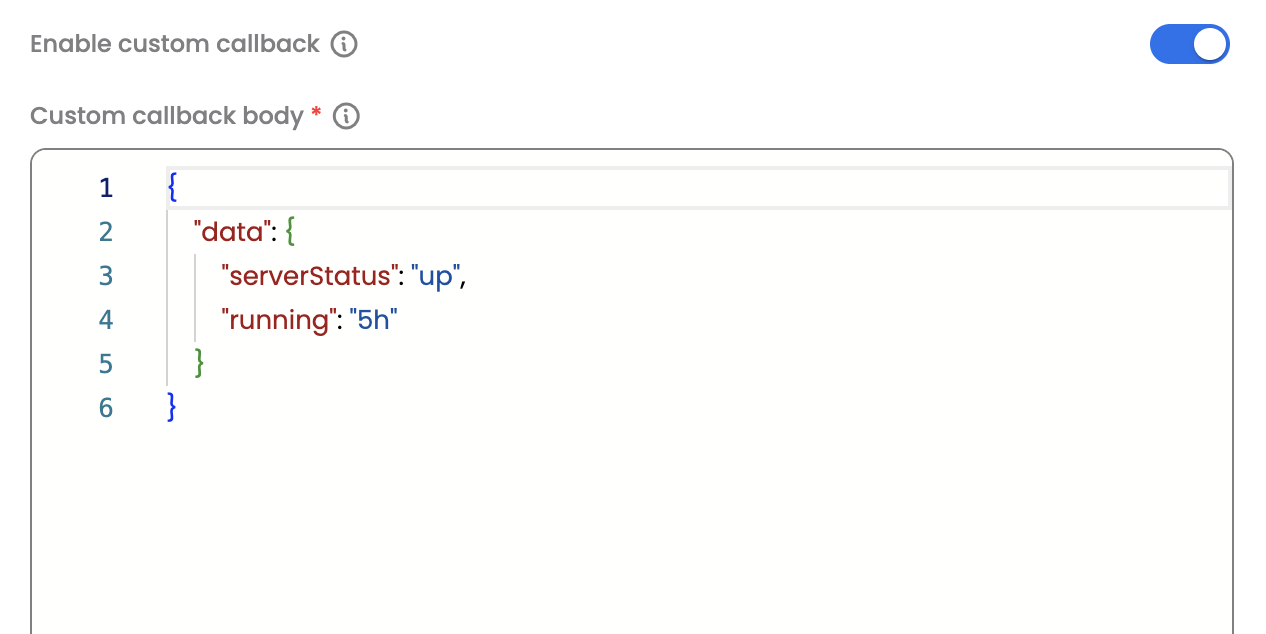
Even though the End Node requires no status configuration, it does support an optional callback to the AI Colleague (AIC). If your workflow was initiated by an AI Colleague and you want it to be notified when the workflow finishes, you can enable the callback on the End Node. This is useful when the AI Colleague needs to send a follow-up message, update a record, or trigger the next step in a conversation after the workflow completes.
In the Custom callback body, you can specify what data will be send to the AI Colleague.
End Flow Node
The End Flow Node gives you full control over how a workflow ends. Instead of always marking items as "Completed," you choose the specific outcome — Completed, Rejected, Withdrawn, or Failed — and when this node fires, it immediately stops all other running steps for that item.
When to Use
Use an End Flow Node when your workflow has multiple possible endings and you need to tell them apart in reports and dashboards. Typical scenarios include:
- Rejection paths — after an approval is denied, end the workflow as "Rejected" so it shows up clearly in reports.
- Withdrawal flows — when an employee cancels their own request mid-process, end it as "Withdrawn."
- Failure handling — when a critical integration or action fails and the workflow can't continue, end it as "Failed" so your team can triage it.
- Parallel branch control — if your workflow branches into parallel paths and one branch reaches a final decision, the End Flow Node on that branch stops everything else. No stale approvals or delayed tasks continue running.
Configuration
Item End Status
This is the primary setting. Choose the final status that will be applied to the workflow item when this node runs.
| Status | What It Means | When to Use |
|---|---|---|
| Completed | Workflow finished successfully | At the end of the approval/fulfillment path |
| Rejected | Request was explicitly denied | After an approval denial |
| Withdrawn | Requester canceled their own request | After a user-initiated cancellation |
| Failed | Something went wrong and the workflow couldn't finish | After an unrecoverable integration or action failure |
The status you pick here is what appears in dashboards, reports, the progress tracker, and any analytics.
Hide Status
A toggle that controls whether end users see this termination point in the progress tracker.
- Off (default) — the End Flow Node and its status are visible. The employee can see that the workflow ended and why (e.g., "Request Withdrawn").
- On — the node is hidden from the progress tracker. Use this for internal mechanics that end users don't need to see, like a silent withdrawal cleanup.
Important: When Hide Status is turned on, the node can only accept one incoming connection. If you need multiple paths to converge on a hidden endpoint, place a Merge Node before the End Flow Node.
Callback to AI Colleague (Optional)
Just like the End Node, the End Flow Node can notify the AI Colleague (AIC) when it executes. You configure a callback template that includes relevant workflow data (like item ID, status, and reference ID). When the node runs, this data is sent to the AIC so it can react — for example, sending the employee a "your request was approved" or "your request was rejected" message based on the terminal status.
This is especially useful for workflows where AI Colleagues are the primary interface for the employee. Without the callback, the AIC wouldn't know the workflow finished.
How They Differ
| End Node | End Flow Node | |
|---|---|---|
| Final status | Always "Completed" | You choose: Completed, Rejected, Withdrawn, or Failed |
| Stops other running steps? | No — other branches keep going | Yes — all in-progress steps for this item are immediately cancelled |
| Configuration needed? | None | Must select an Item End Status |
| Hide from progress tracker? | Not available | Available via Hide Status toggle |
| Multiple incoming connections | Yes | Yes (unless Hide Status is on — then only one) |
| AIC callback | Supported | Supported |
| Can be duplicated? | No (one per workflow) | Yes (use as many as you need) |
| Best for | Simple workflows with one outcome | Workflows with multiple outcomes or parallel branches |
Rule of thumb: If your workflow can only end one way (success), use the End Node. If it can end in approval, rejection, withdrawal, or failure, use End Flow Nodes.
What Happens When They Run
End Node
When the workflow reaches the End Node, the item's status is updated to Completed and a completion timestamp is recorded. Other branches, if any, are not affected — they keep running. If a callback is configured, the AI Colleague is notified.
End Flow Node
When the workflow reaches an End Flow Node:
- The item's status is set to whatever you configured (Completed, Rejected, Withdrawn, or Failed) and a completion timestamp is recorded.
- All other in-progress steps are immediately cancelled. Any pending approvals, input forms, delays, or actions across the entire workflow for this item are stopped and marked as "Cancelled" in the progress tracker. This is the key difference — the End Flow Node is a decisive, "everything stops now" termination.
- If an AIC callback is configured, the AI Colleague is notified with the terminal status and workflow context.
- The workflow stops — no further steps execute.
Progress Tracker Visibility
End Node
Always visible when the workflow completes. Shows as "Completed" with a timestamp.
End Flow Node
Visibility depends on your settings:
- Hide Status off — the node and its status are visible in the tracker. The employee sees the outcome (e.g., "Application Rejected," "Request Withdrawn").
- Hide Status on — the node is completely hidden from the end user's progress tracker. Useful for internal terminations.
- If the workflow took a different branch — the End Flow Node that wasn't reached is automatically filtered out of the tracker. End users only see what actually ran.
When other steps are cancelled by an End Flow Node, those steps show as "Cancelled" in the progress tracker with a timestamp, so there's a clear audit trail.
Common Patterns
Simple Workflow (End Node)
For a basic document submission or info request, the default End Node is sufficient. The workflow runs from start to finish, and when it reaches the End Node, the item is marked as Completed.
Approval with Rejection (End Flow Nodes)
After an Approval Node, connect the "Approved" handle to downstream steps ending at an End Flow Node set to Completed, and connect the "Rejected" handle to an End Flow Node set to Rejected. Both outcomes are now clearly tracked in reports.
Withdrawal Flow (End Flow Node + Hide Status)
This is the most common pattern — and it's auto-generated when you create a new workflow. When the workflow supports user-initiated cancellation, the Trigger Node's "withdraw" handle connects through a Synchronous Block to an End Flow Node with Withdrawn status and Hide Status on. The employee's request is silently cancelled without cluttering their progress tracker.
Failure Handling (End Flow Node)
When a critical Action Node or integration call fails and recovery isn't possible, connect the failure handle to an End Flow Node set to Failed. This makes failed items easy to find in failure dashboards and scheduled failure reports.
AIC Follow-Up (Callback)
When an AI Colleague starts a workflow on behalf of an employee, enable the callback on your terminal nodes. The AIC gets notified when the workflow finishes, letting it send a contextual follow-up message like "Your leave has been approved" or "Your request was declined — here's what you can do next."
Multiple Outcomes in One Workflow
A single workflow can have many End Flow Nodes. For example, a leave request might have three endings: Completed (approved), Rejected (denied by manager), and Withdrawn (employee cancelled). Each shows as a distinct outcome in reports.
Validation Rules
When you publish your workflow, the builder validates all terminal nodes:
End Node:
- Must have at least one incoming connection (can't be floating/disconnected).
- Cannot have any outgoing connections.
End Flow Node:
- Must have at least one incoming connection.
- Cannot have any outgoing connections.
- If Hide Status is on, only one incoming connection is allowed. Use a Merge Node upstream if multiple paths need to converge here.
- Item End Status must be set to one of the four allowed values.
Data Center
Neither the End Node nor the End Flow Node produces any output in the Data Center. Since nothing comes after them, there's no data to pass downstream.
Best Practices
Use the right node for the job. Don't use End Flow Nodes everywhere if a simple End Node will do. Conversely, don't force all outcomes through a single End Node when your workflow has distinct endings — you lose reporting clarity.
Give End Flow Nodes descriptive names. The node name shows up in the progress tracker (unless hidden). "Leave Approved," "Application Rejected," and "Request Withdrawn" are far more helpful than "End Flow 1."
Use specific statuses for each outcome. Route approval paths to Completed, denial paths to Rejected, cancellation paths to Withdrawn, and error paths to Failed. This makes your analytics meaningful and your failure reports actionable.
Remember: End Flow Node cancels everything. When it fires, all other active steps stop. Make sure this is what you want — if parallel branches should continue independently, use the End Node instead.
Hide internal mechanics. Enable Hide Status on withdrawal flows and system-level terminations that employees don't need to see.
Enable AIC callbacks when AI Colleagues initiate workflows. This closes the loop — the AI Colleague knows the outcome and can communicate it to the employee naturally, instead of the employee having to check a dashboard.
Converge before hiding. If multiple paths need to end at a hidden End Flow Node, place a Merge Node before it. Hidden End Flow Nodes only allow one incoming connection.
Changelog
| Date | Change |
|---|---|
| Current update | Restructured doc to cover both End Node and End Flow Node. Added AIC Callback section for both nodes. Expanded Progress Tracker visibility rules. Rewrote for functional audience (workflow builders and admins) rather than developers. |