Report configurations
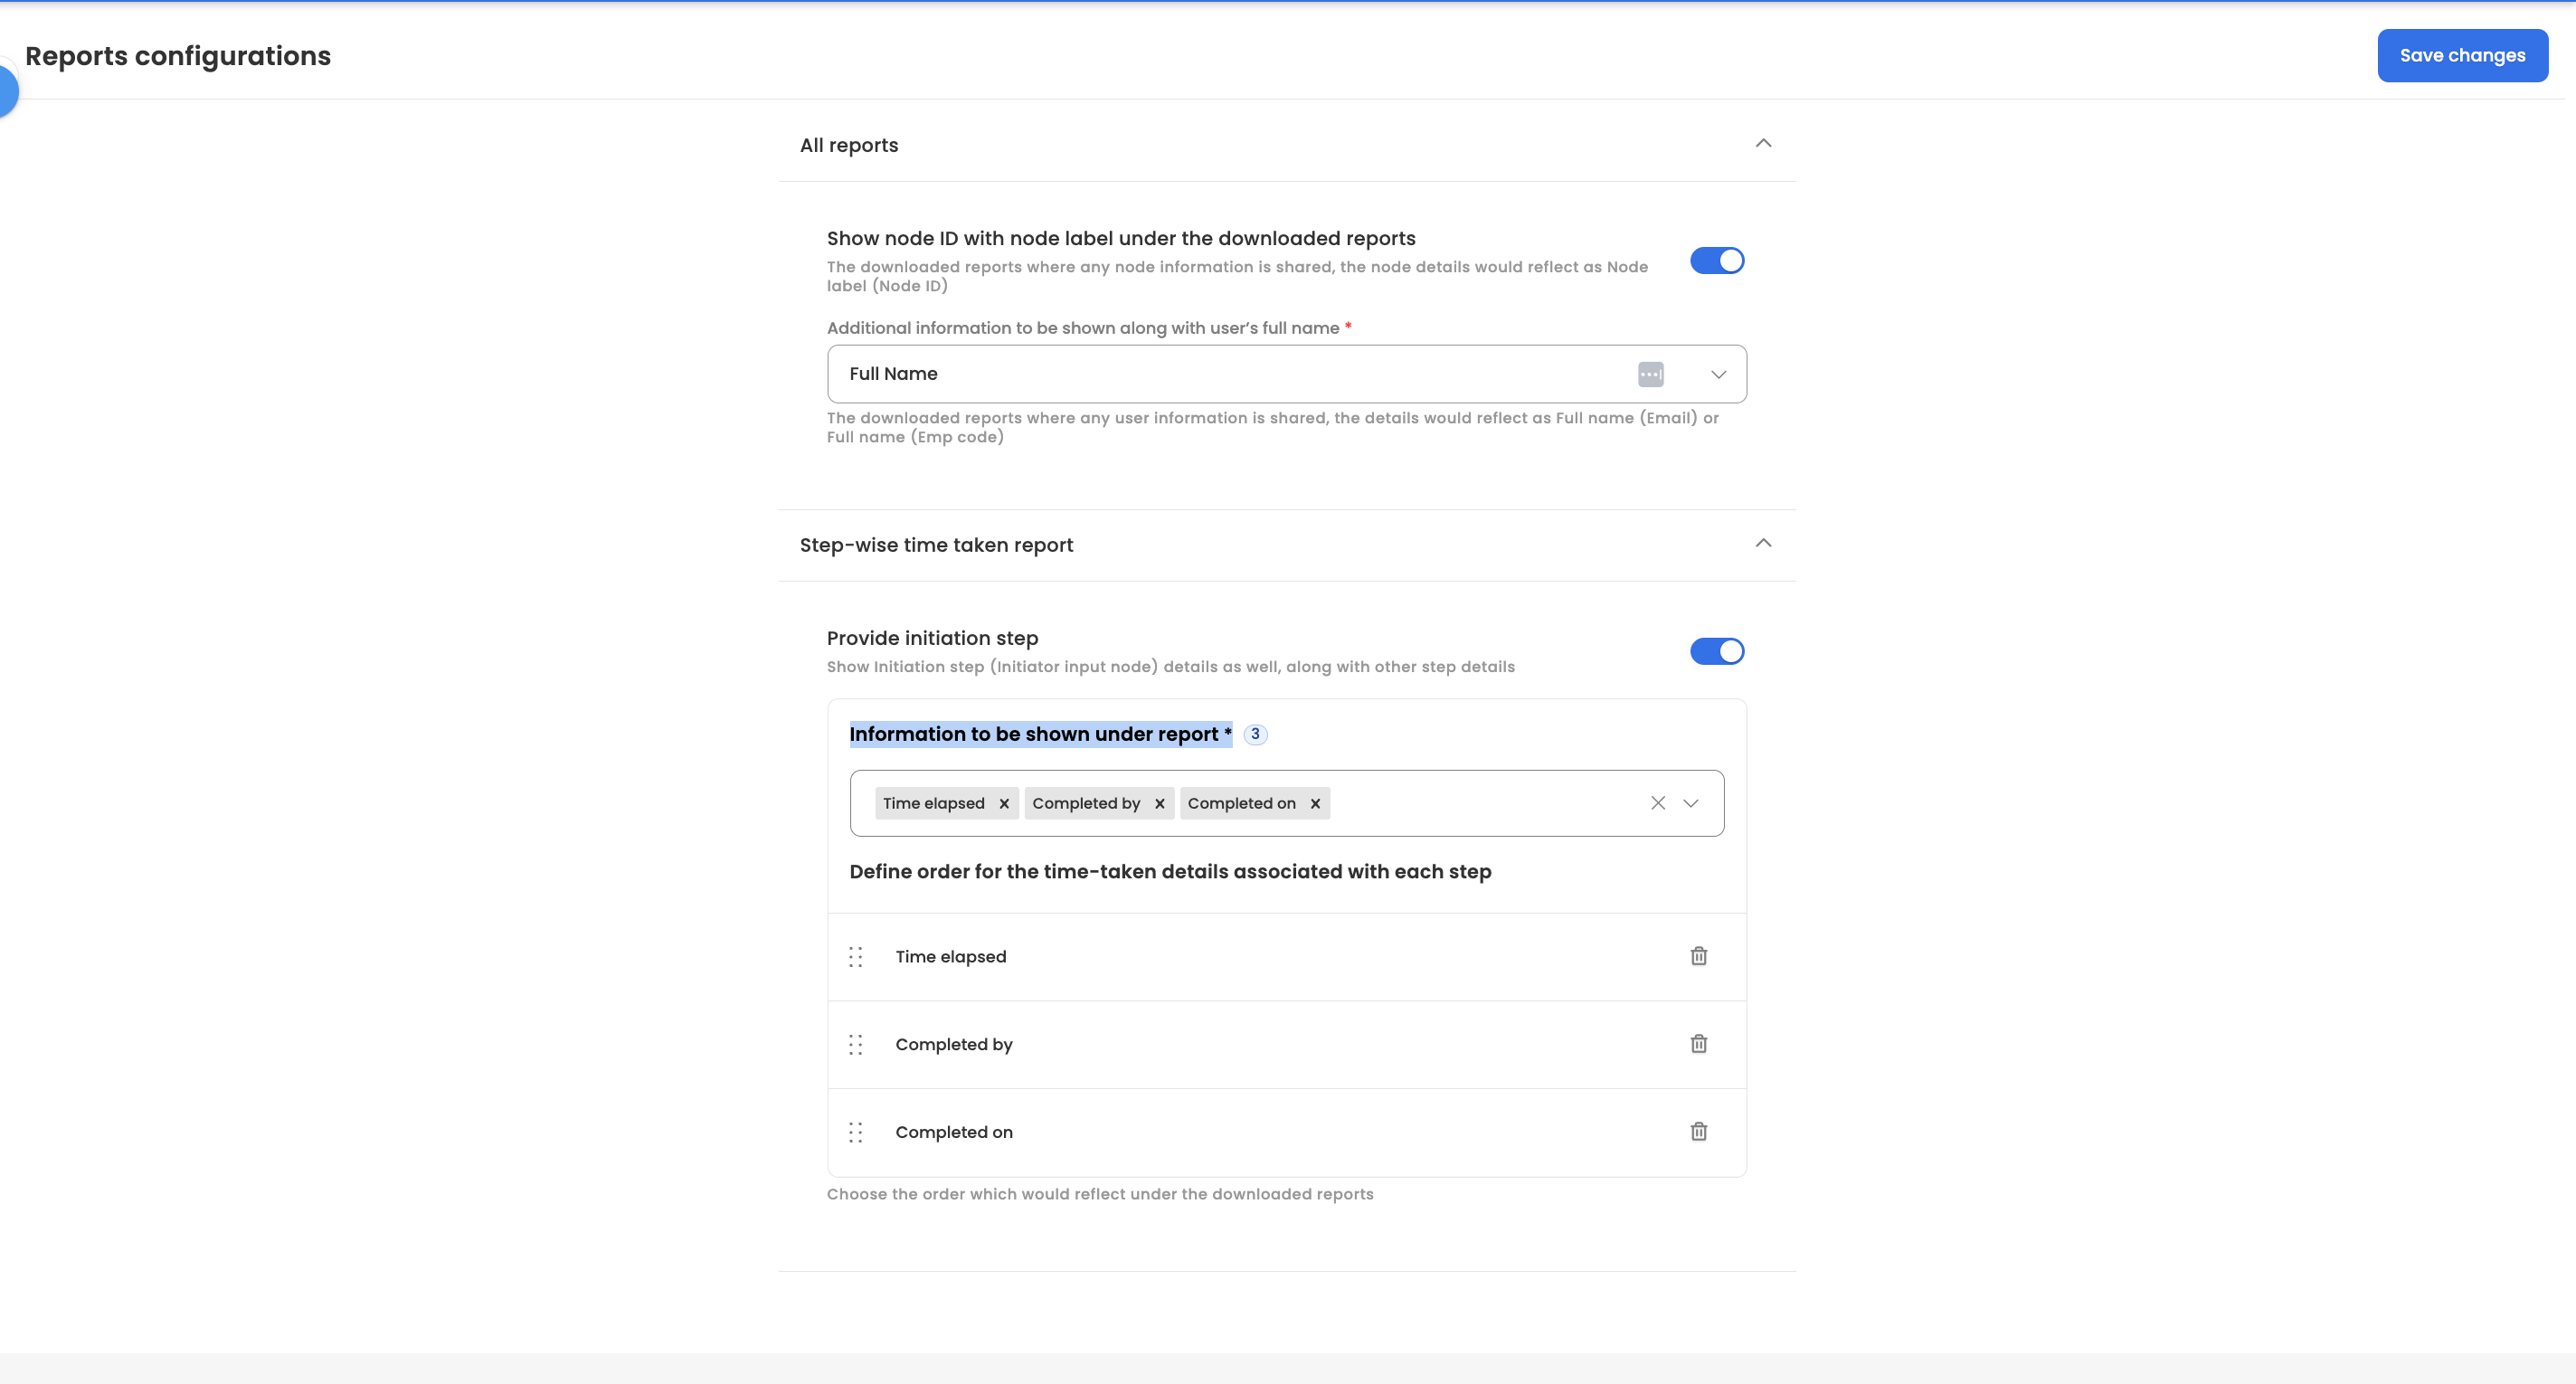
Reports Configurations is a new settings area that lets you customize how information appears in all your downloaded workflow reports. You can now control how user names are displayed, whether to show technical node IDs, and what timing information to include in step-by-step reports.
Key Features:
- Node ID Display: Show both step names and technical IDs for better troubleshooting
- User Information Options: Choose how user names appear (with email, employee code, or just name)
- Complete Step Tracking: Include the starting step (initiation step) in your time reports
- Custom Time Details: Pick what timing information to show and arrange it your way
Key Points:
- Settings apply to all future downloaded reports from your workflows
- Your existing user permissions stay exactly the same
- Works with all current workflow types and report formats
How to Configure:
- Access Report Settings:
- Go to Workflows Studio → Settings → Reports Configurations
- All customization options are available on one page
- Set Up Node Display:
- Turn on "Show node ID with node label under the downloaded reports"
- When enabled, reports will show "Step Name (Node123)" instead of just "Step Name"
- Helps technical teams identify exact workflow components
- Choose User Information Display:
- Select from three options:
- Full Name: Shows "John Smith"
- Full Name (Email): Shows "John Smith ([email protected])"
- Full Name (Employee Code): Shows "John Smith (EMP001)"
- Choice applies to all user references in reports
- Select from three options:
- Configure Step-wise Time Tracking:
- Include Initiation Step: Turn on "Provide initiation step" to show the starting step details (initiator input node)
- Select Information Points: Choose what to display for each step:
- Time elapsed/taken
- Completed by (who finished the step)
- Completed on (when it was finished)
- Arrange Display Order: Drag and drop to change the order these details appear
- Save Changes:
-
Click "Save changes" to apply all settings
-
New settings take effect for all reports downloaded after saving

-
Updated 4 months ago
