Configure Workflow
Create workflow App as any custom App
- Start designing a custom workflow, similar to any custom workflow.
- Since audience definition is not mandatory, you can choose any audience. If a workflow only needs to be restricted to be called via REST API, and cannot be initiated manually, then we can restrict a workflow for an Audience which only as implementation team members (restricted audience).
Designing Form
- The form should primarily be designed from the perspective that it would contain the fields which are request body keys for the workflow.
- The created form can be mapped under the 'Initiator Input' node.
- The fields in the form can be considered as request body variables/keys, and once the Workflow initiation API is called the 'Initiator Input' node gets submitted.
Designing Workflow
The workflow to be designed should be limited to only 3 main properties:
- Start Node
- Initiator Input Node
- Synchronous Block (below Initiator input node)
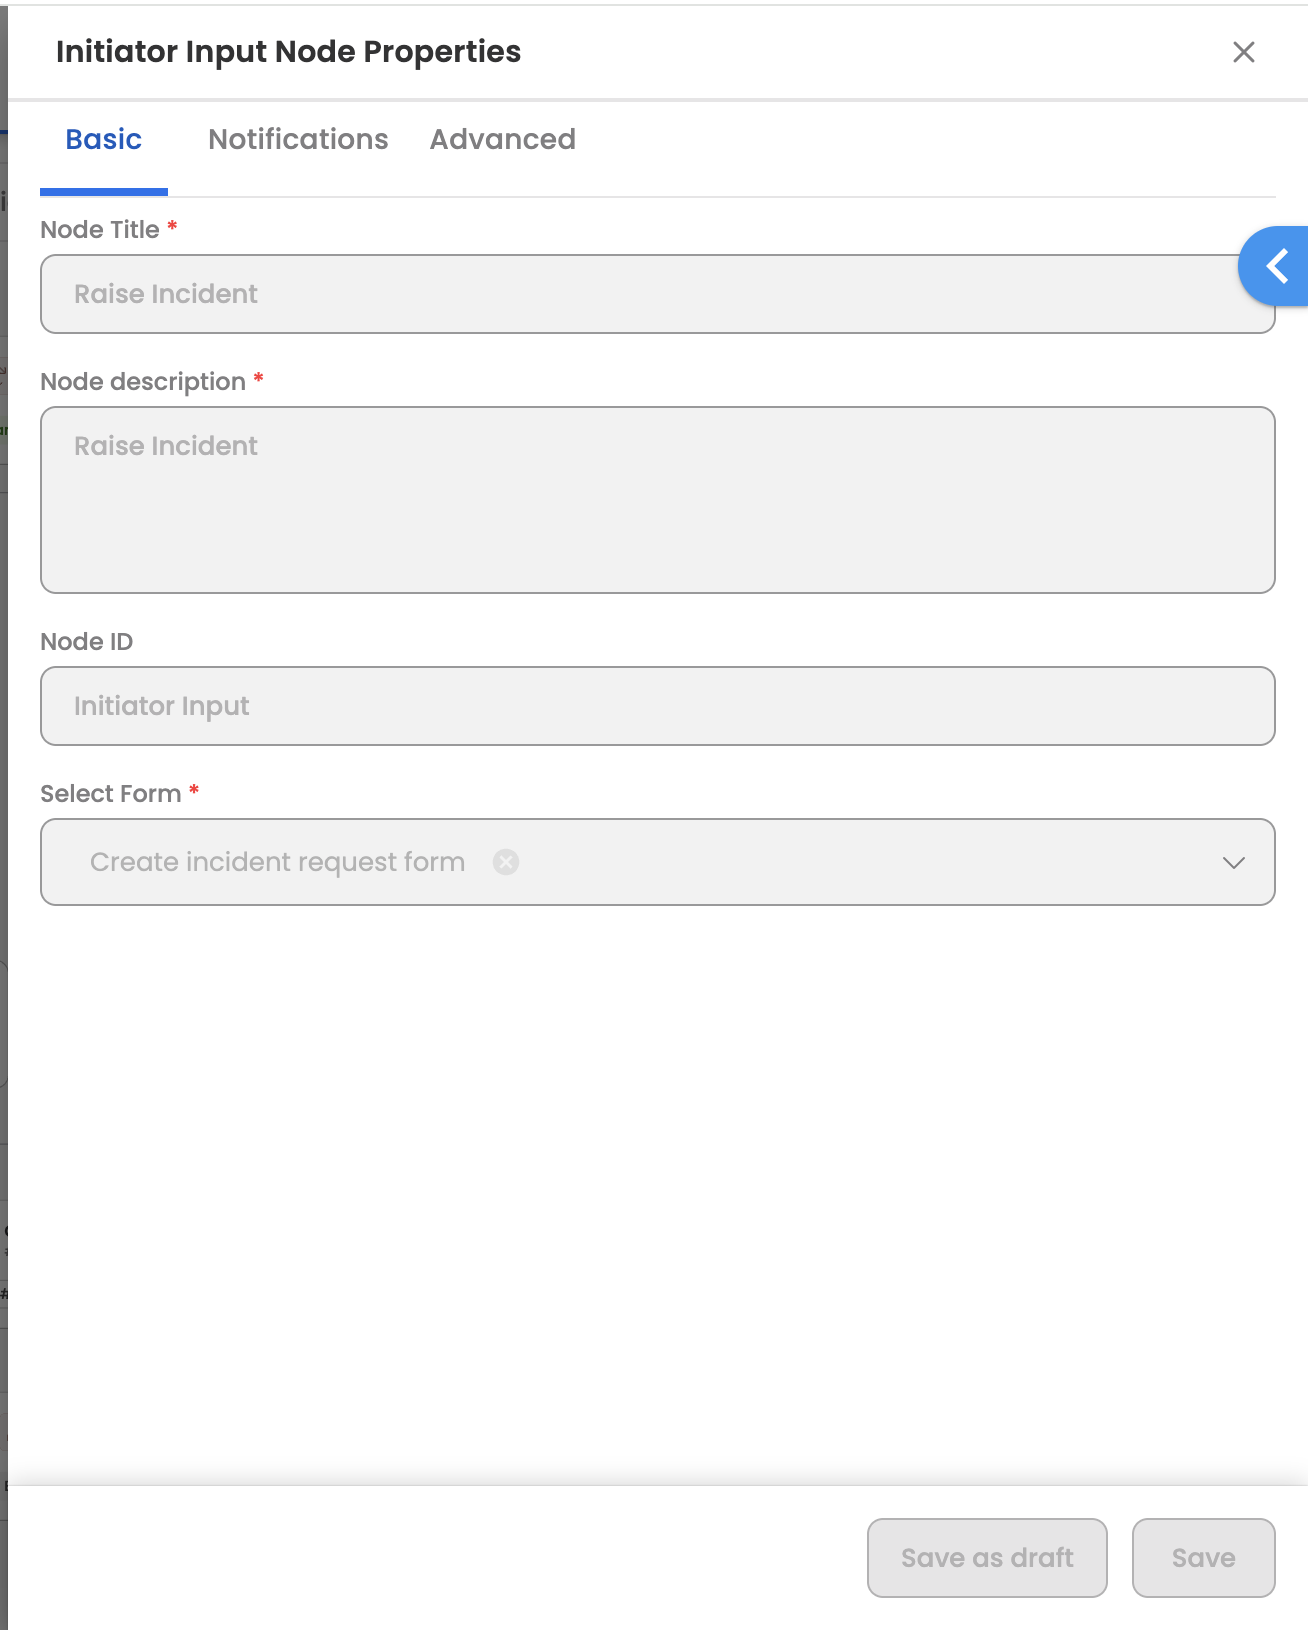
Configure Initiator Input node
The form designed to capture the request variables should be attached under the node.
Configure Synchronous Block
- You would have to add a synchronous block after the initiator input node.
- The Synchronous block ensures that synchronously action/function nodes are executed to generate appropriate response.
Start Node
- The last step for workflow design is to ensure that appropriate response is returned for the REST API call made to trigger the workflow.
- There are 2 configurations, which would have to be configured under Start Node:
- Enable API-triggered initiation of Workflow: Enable this configuration to allow Workflow to be initiated via REST API call.
- Response for API/Web-hook call: Draft the required response body. It should generally include keys from data center, which are part of the action/function nodes triggered under the Synchronous Block.
Implementing a use case
Lets take an example of designing a use case to create an incident under Servicenow. The workflow should be directly initiated from bot, without the requirement to render the form.
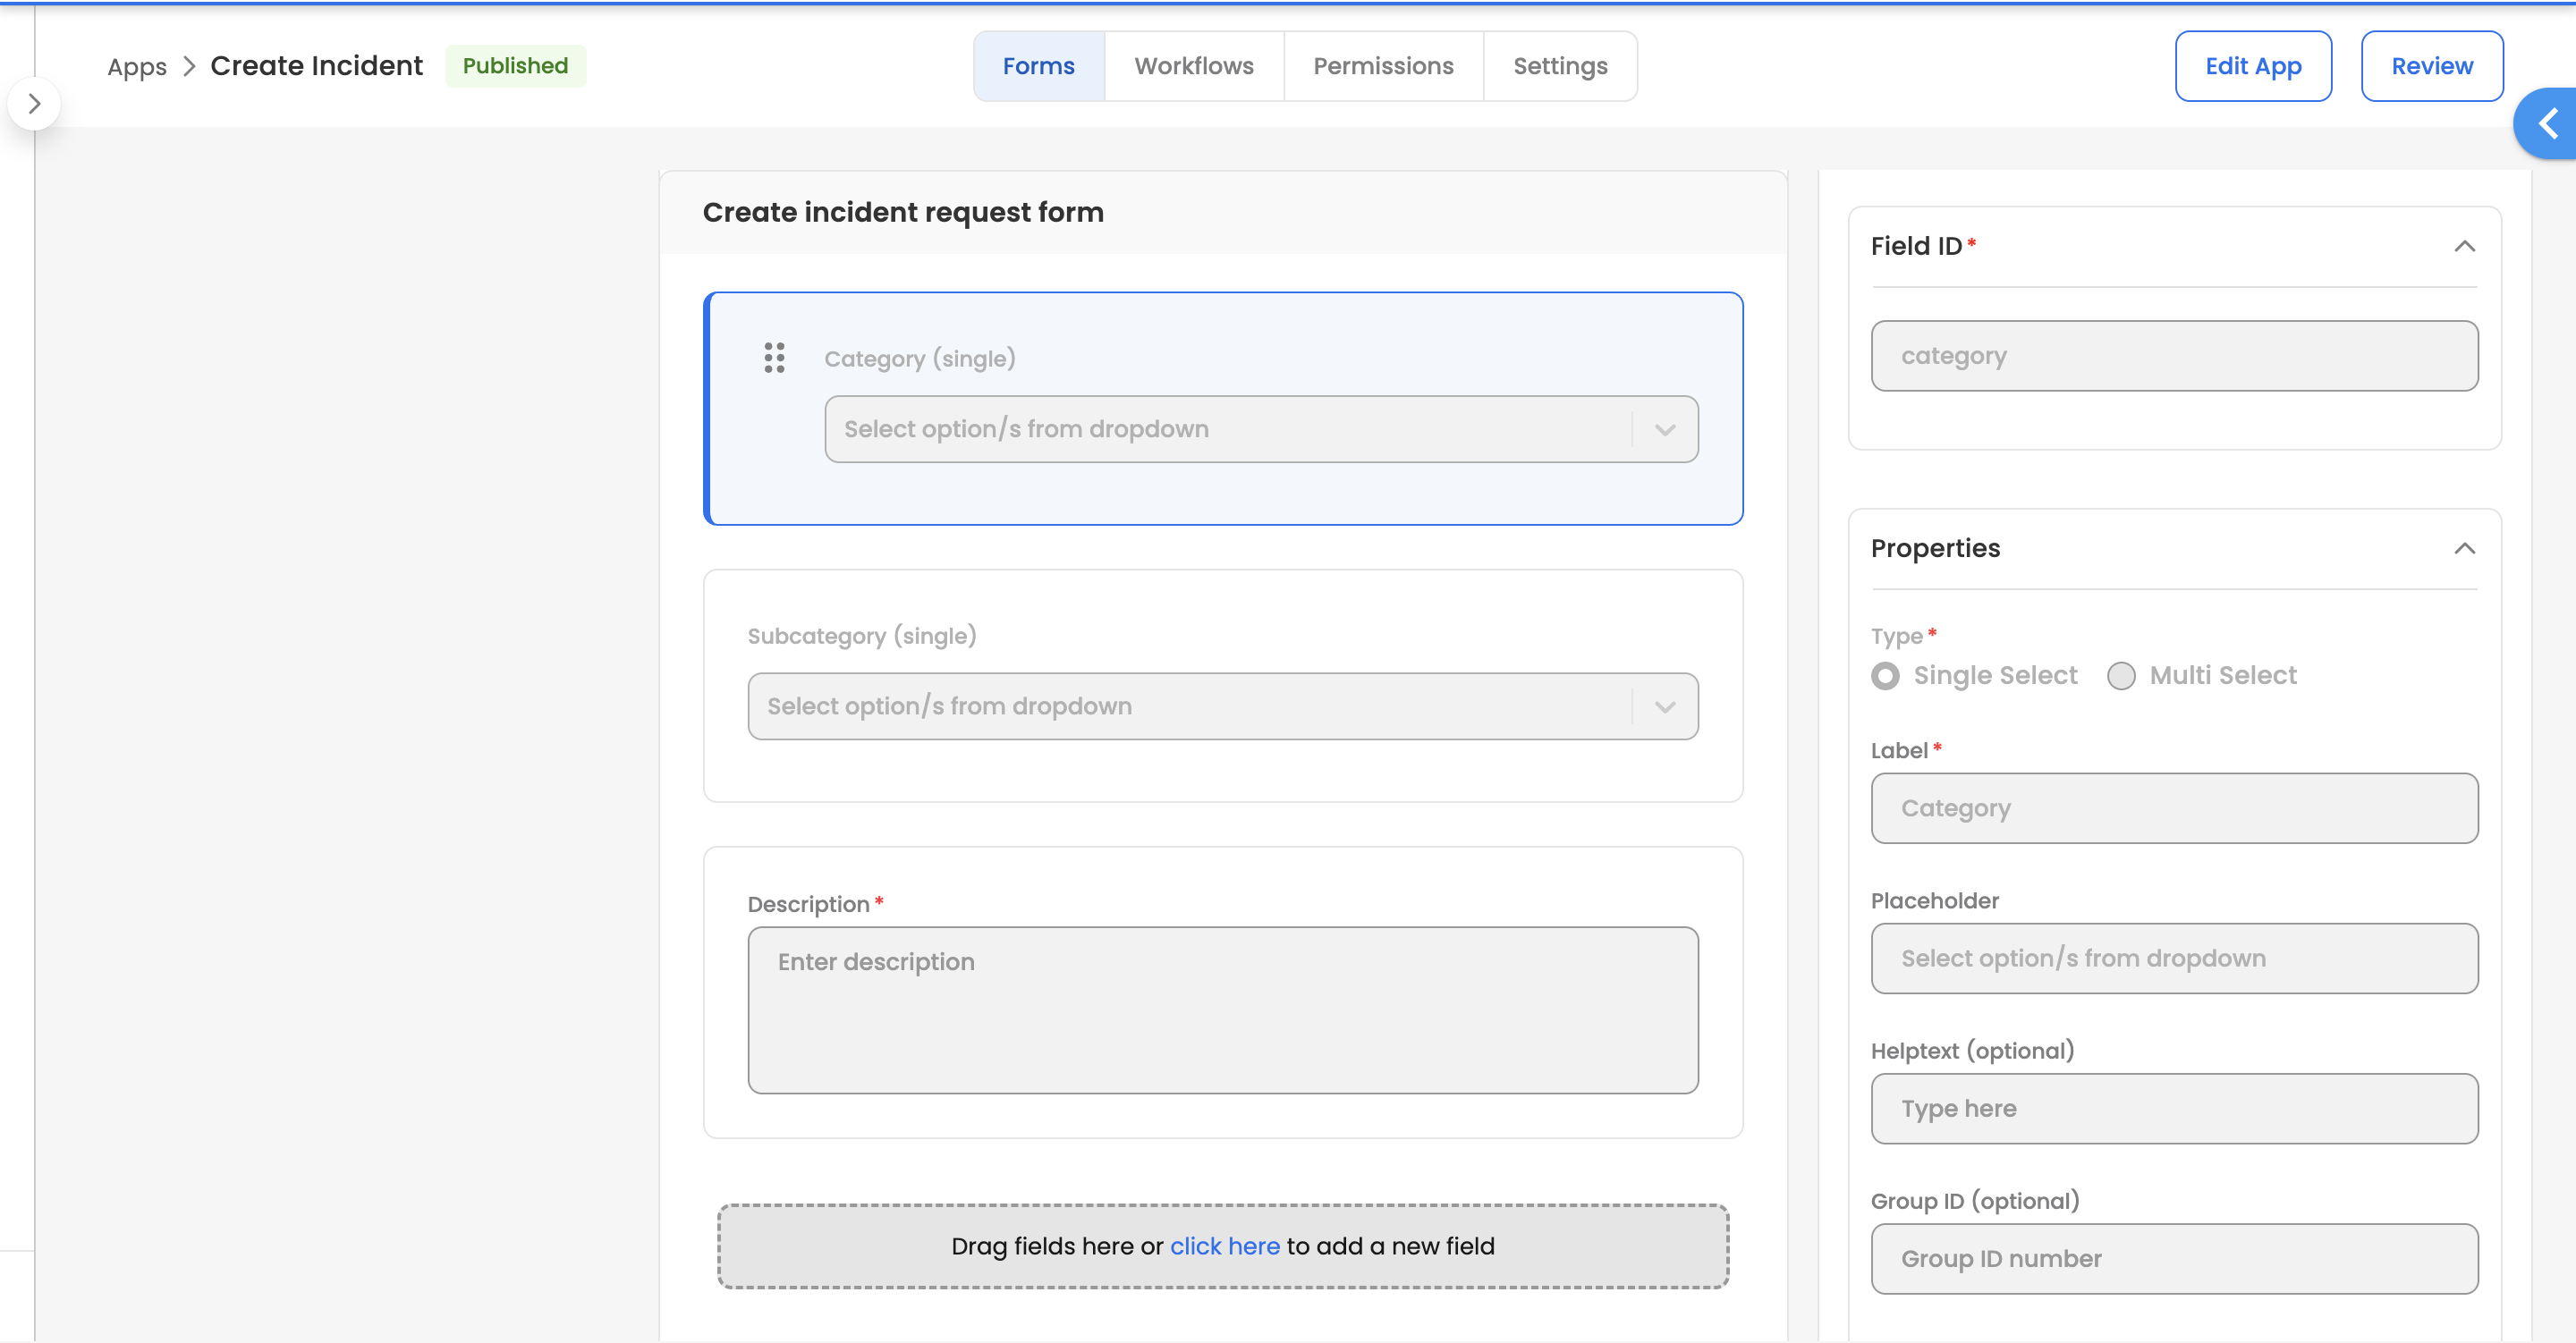
Form
Create a single form which takes input of 'Category', 'Sub-category' & 'Description' (all the required fields to create an incident). These details should be passed under request body to initiate a workflow.
Workflow - Initiator input configuration
Under initiator input, just configure the form that has been created above.
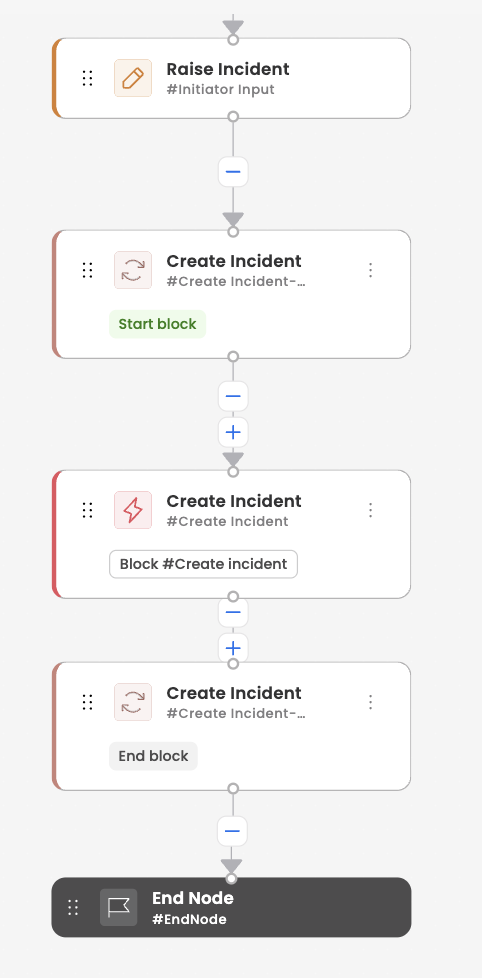
Workflow - Synchronous Block
-
Add a Synchronous Block below the Initiator input node.
-
In the above example, a Synchronous Block called 'Create Incident' has been created.
-
Within the Synchronous Block, add an action node to create an incident request under Servicenow. You can leverage pre-defined connector and action to configure this node. Detailed documentation can be found here.
Workflow - Start Node
-
Under Start node, you can enable the configuration: Enable API-triggered initiation of Workflow
-
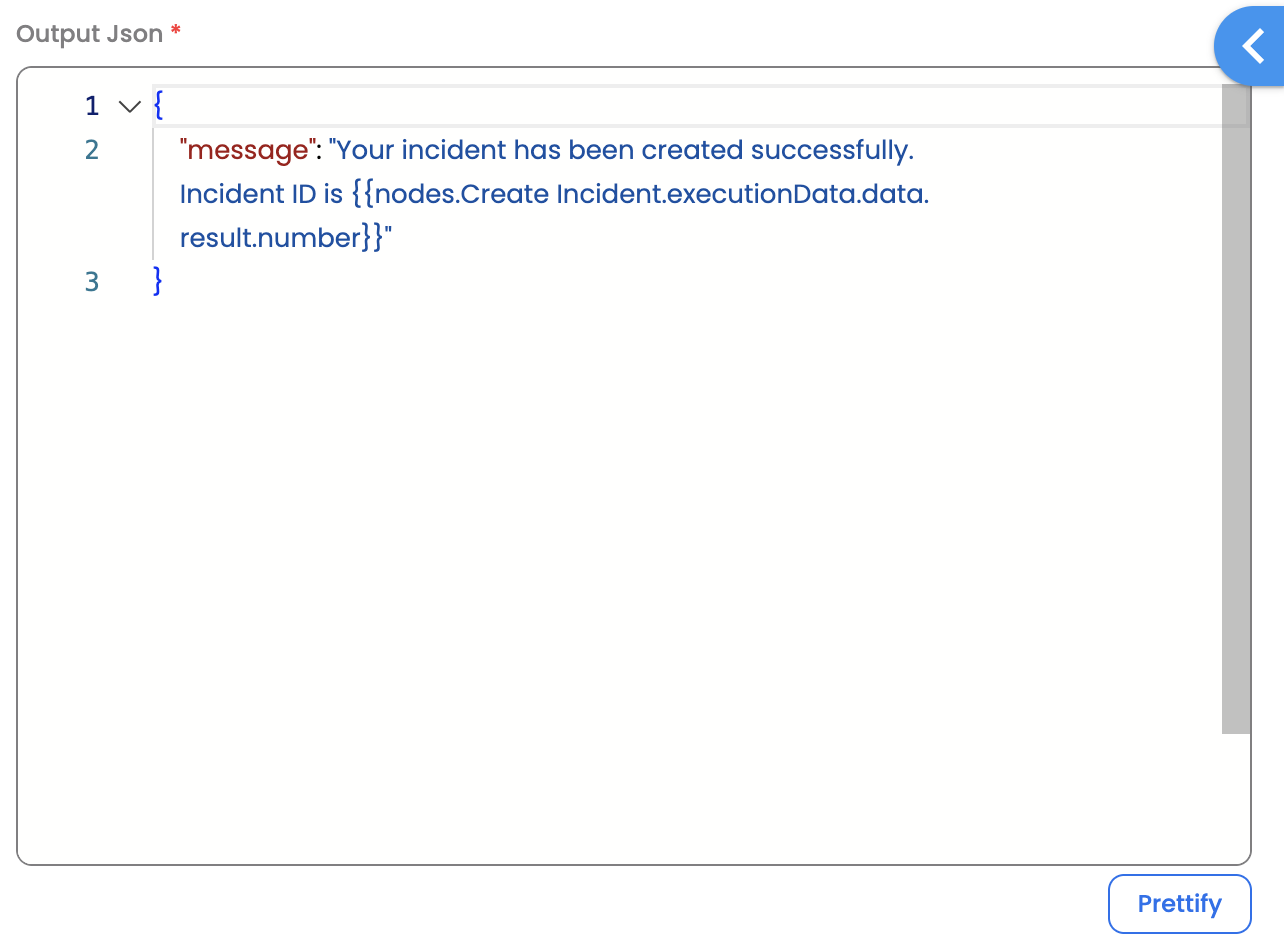
Under the response, configure a custom JSON response, which can return success/failure message appropriately.