
Managing Multiple Instances of a Connector
Watch the tutorial
User Guide: Managing Multiple Instances of a Connector
Audience: Knowledge Management (KM) Administrators
1. Overview
This guide explains how to connect and manage multiple instances of the same connector type within the platform. This feature allows you to integrate with several distinct sources of the same kind. For example, you can connect to:
- A SharePoint site for your HR department and another for your Marketing department.
- Multiple, separate Confluence spaces or Jira projects.
This ensures that you can bring in siloed knowledge from across your organization using a single, manageable interface.
2. Key Rules & Limitations
Before you begin, please take note of these important system rules:
- Five-Instance Limit: You can configure a maximum of five (5) instances for any single connector type (e.g., you can have up to 5 SharePoint connections, but not a 6th).
- Automatic Naming Convention: To prevent confusion, the system automatically names your instances.
- The first instance uses the base name (e.g., "SharePoint").
- Subsequent instances will have a number appended (e.g., "SharePoint - 2", "SharePoint - 3", etc.).
- Unique Credentials Required: You must use a unique set of credentials for each connector instance. The system performs a check across all environments (including UAT and Production) and will prevent you from adding an instance if its credentials are already in use.
3. How to Add and Manage Connector Instances
The process involves connecting your first account and then adding additional accounts as needed.
Step 1: Connecting Your First Instance
This follows the standard process for adding any new connector.
-
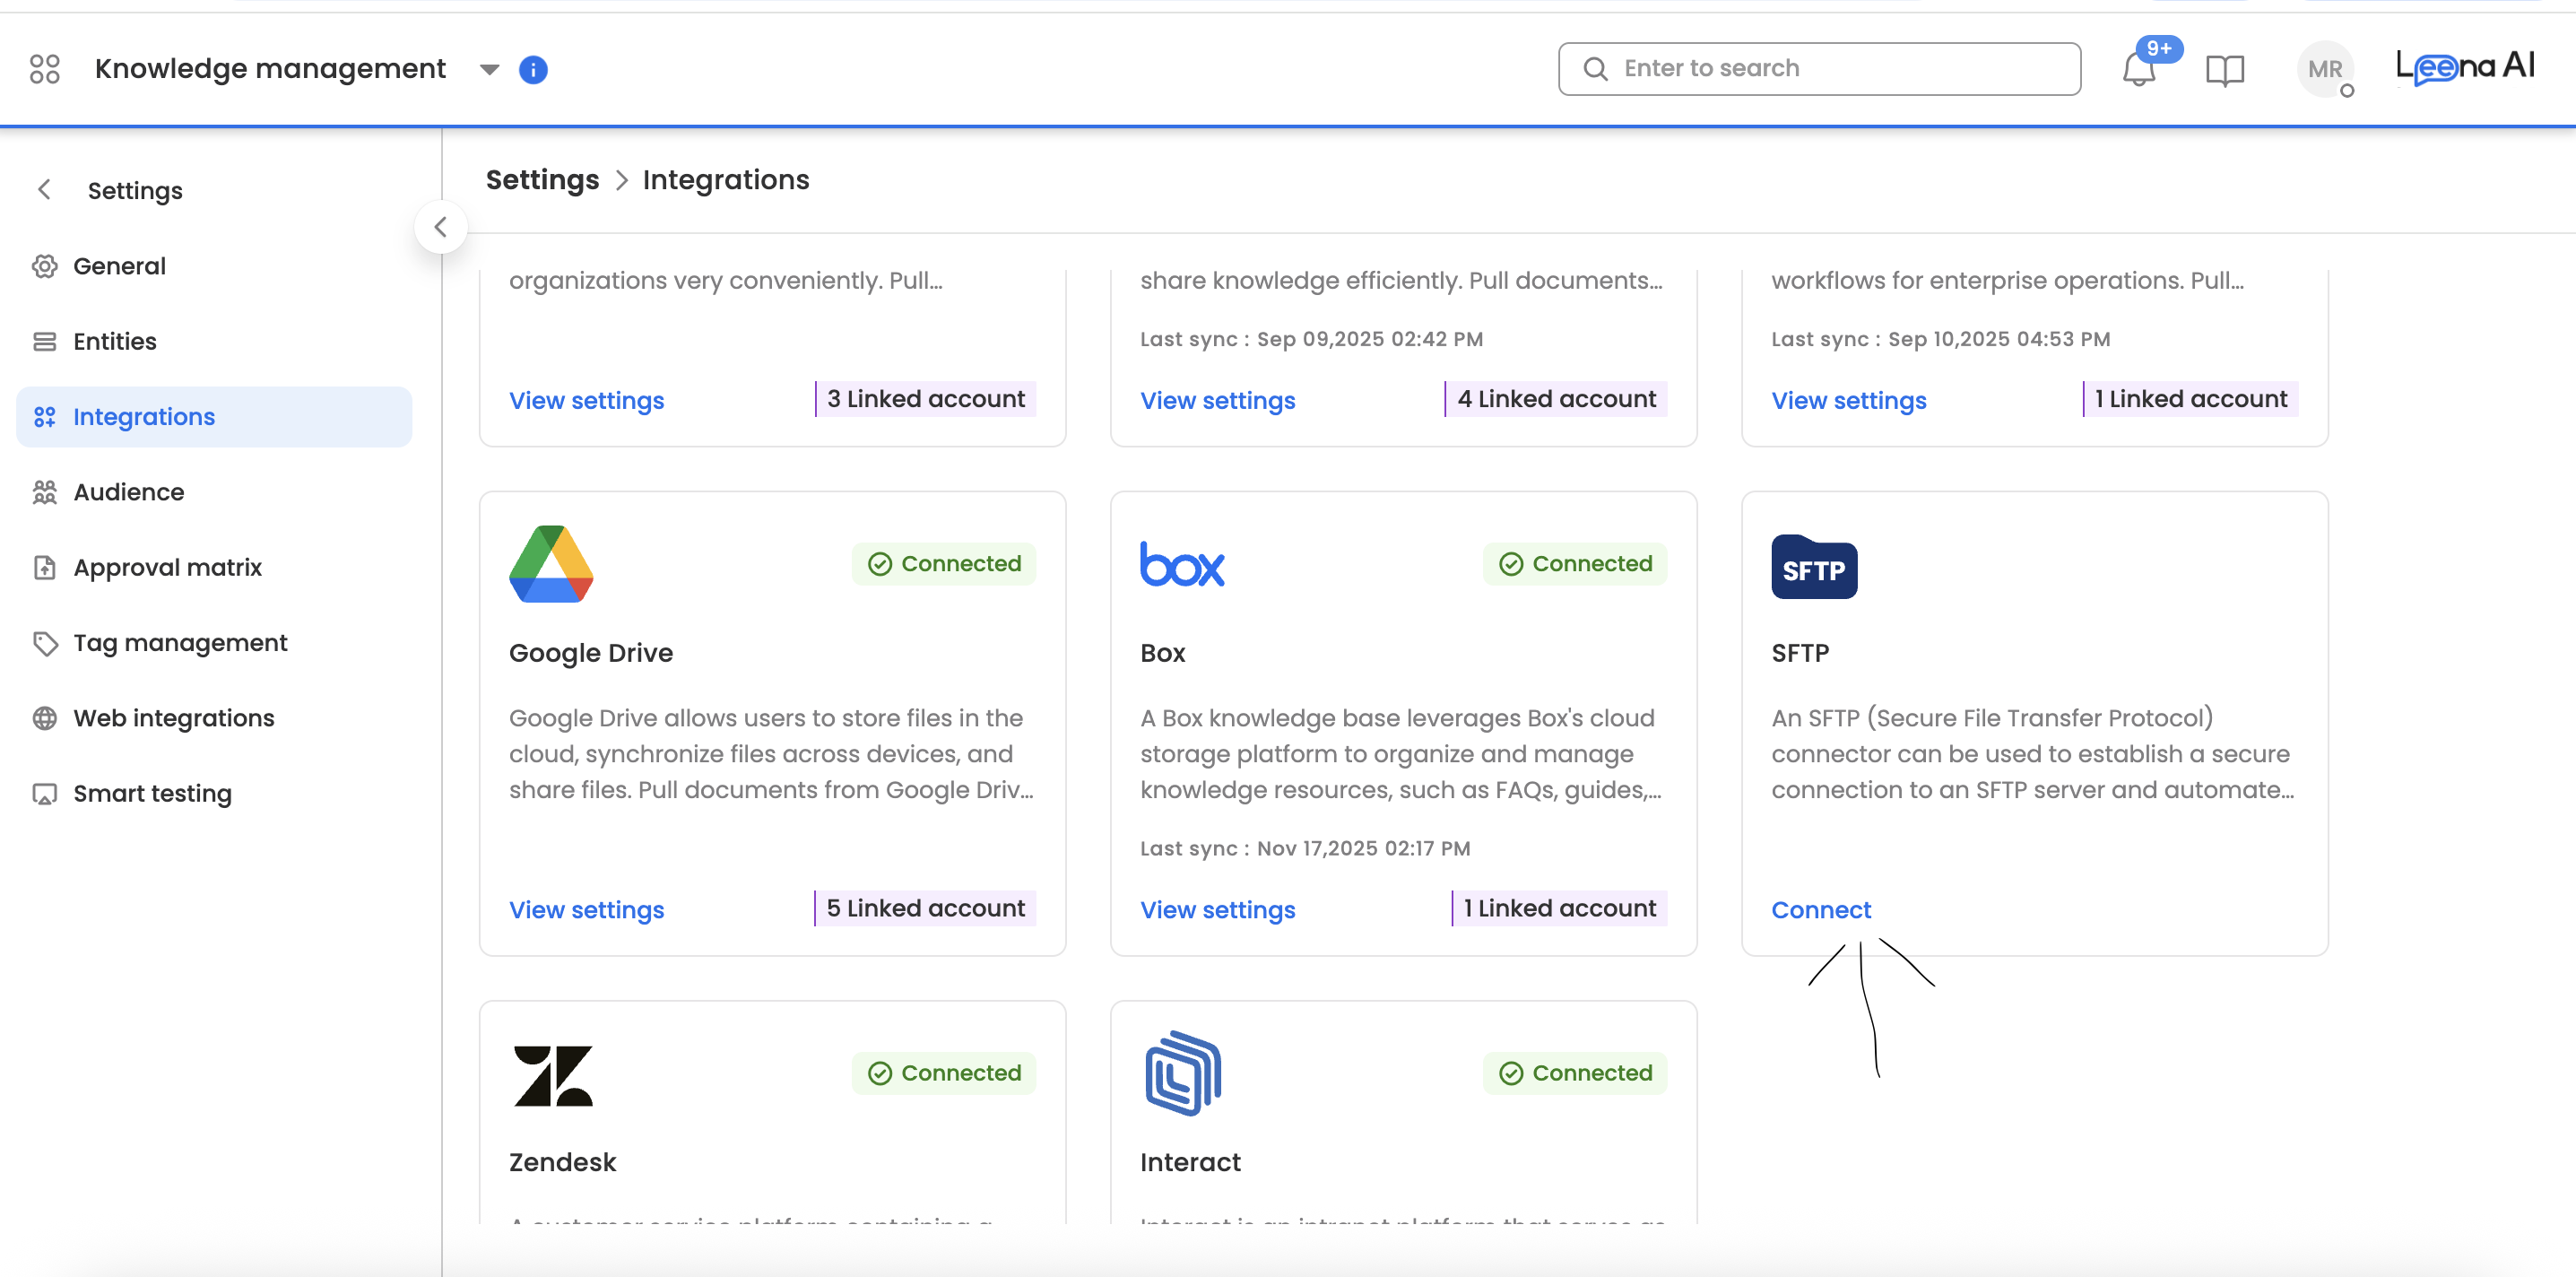
Navigate to the Integrations page from the main menu.
-
Find the connector you wish to set up (e.g., "Confluence") and click Connect.
-
A side sheet will open, prompting you to enter the necessary credentials and configuration details.
-
Once saved, your first instance will be active.
Step 2: Adding Additional Instances (2nd to 5th)
Once you have at least one instance active, you can add more.
-
From the Integrations page, click on the card of the connector that is already configured. This will take you to the management screen for that connector.
-
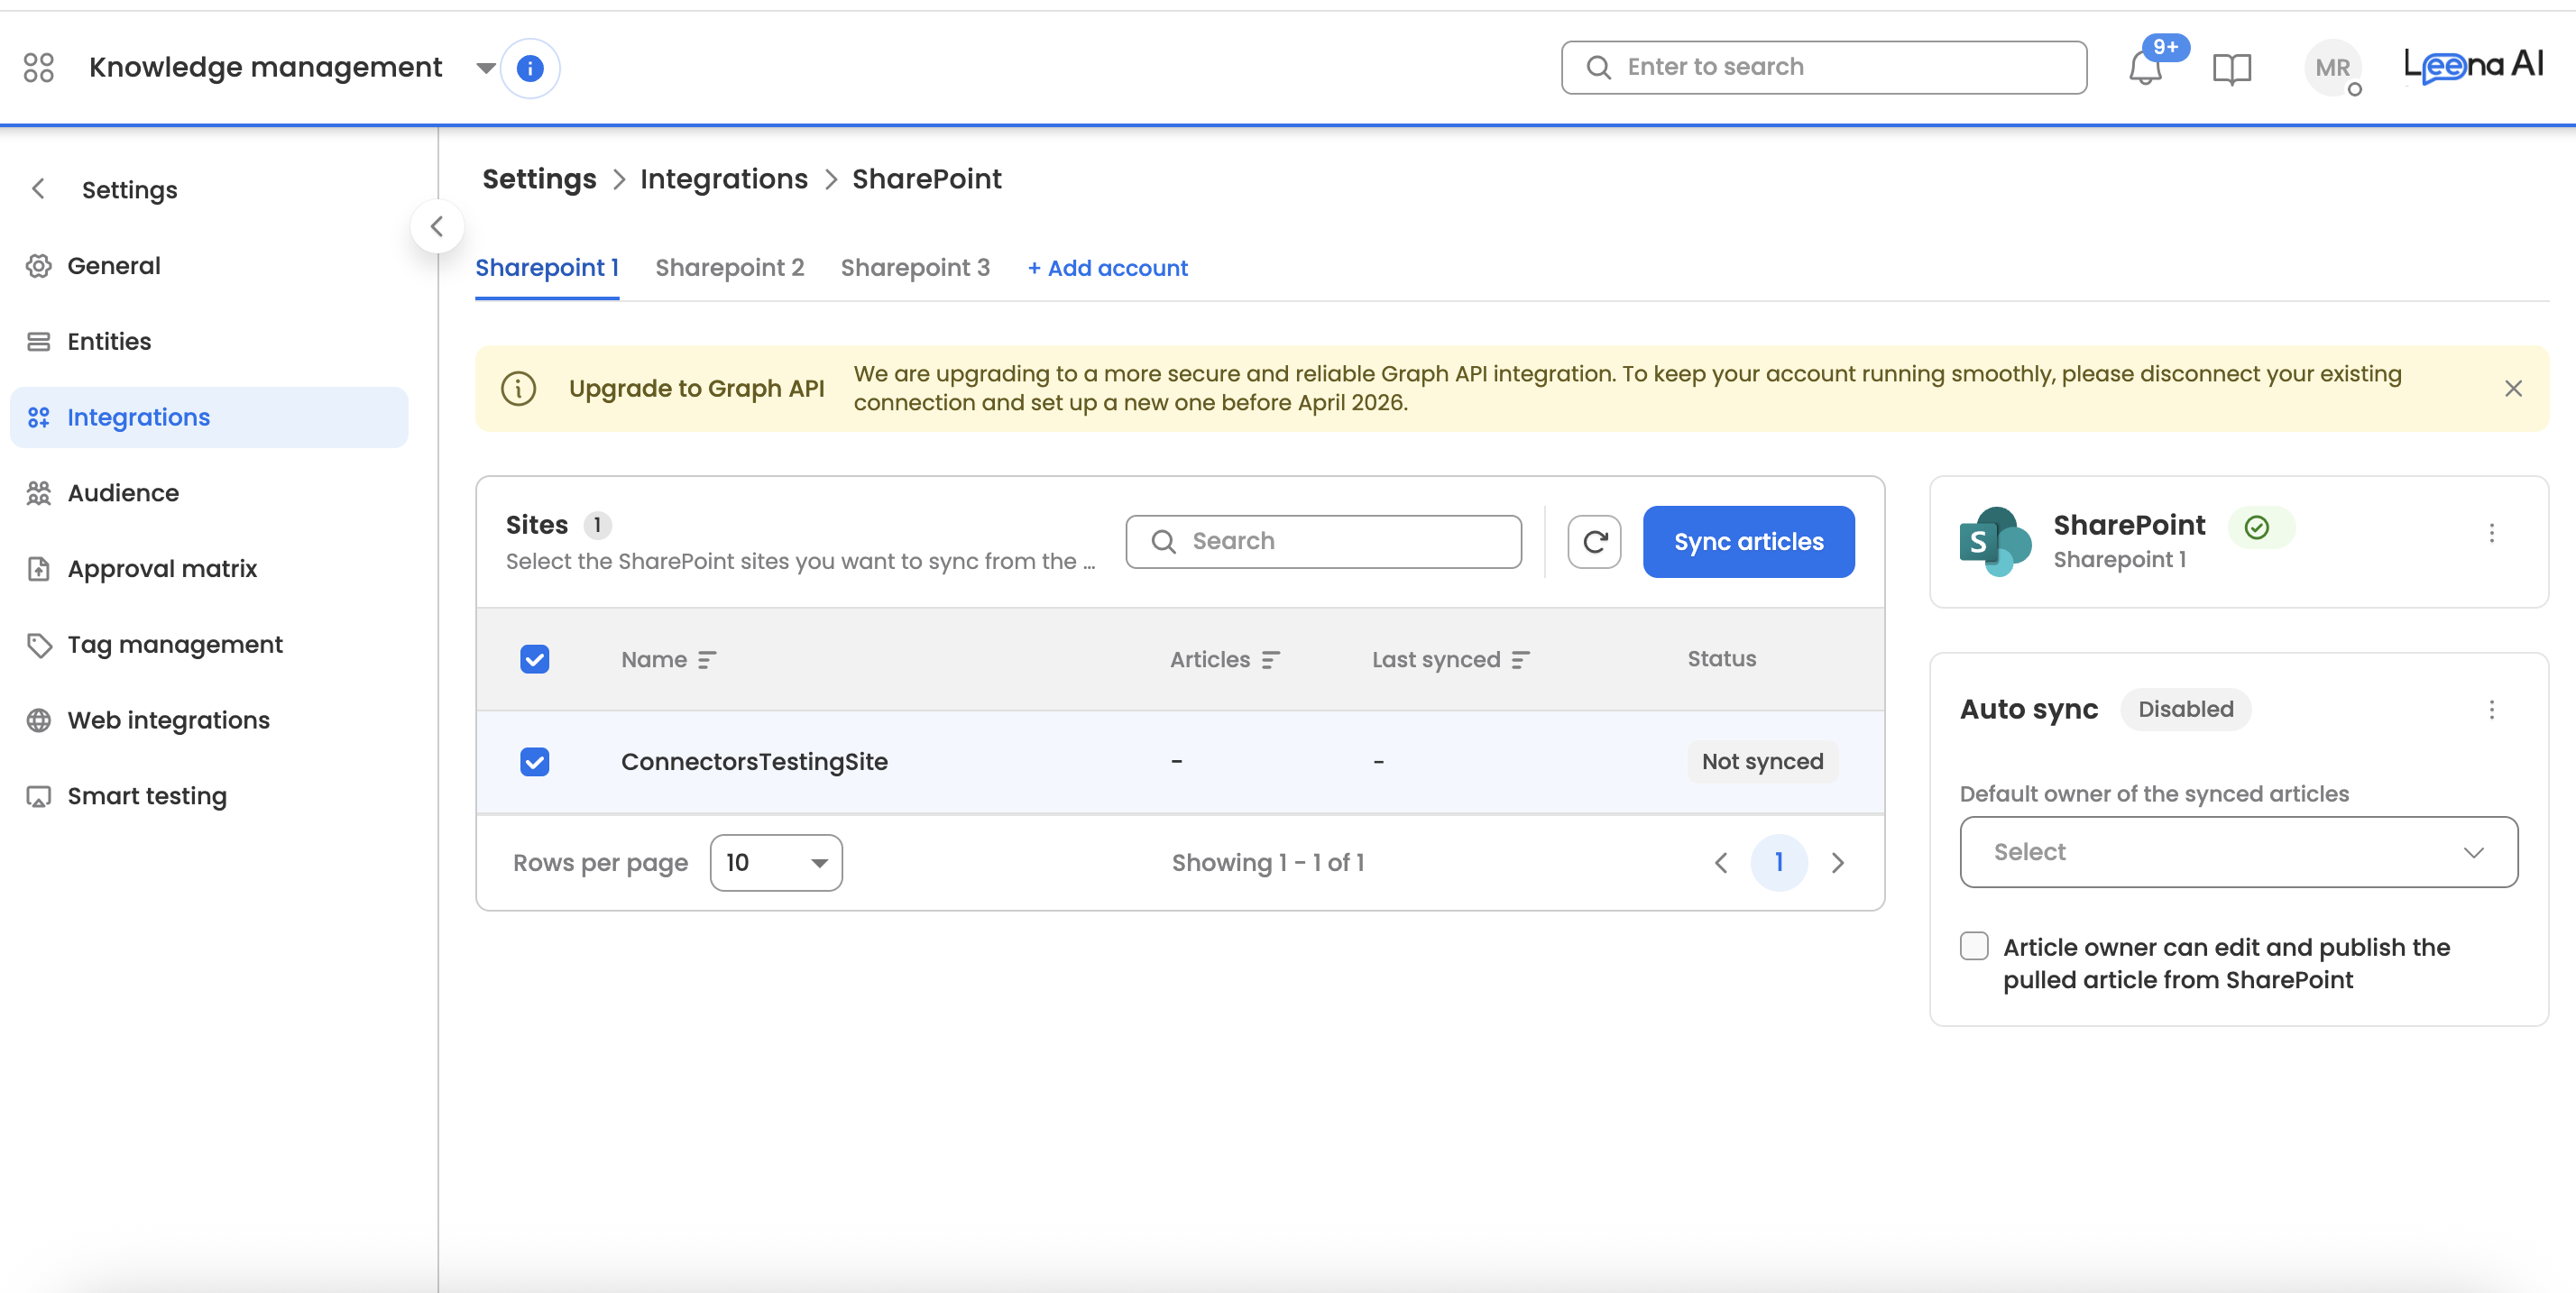
On the management screen, click the + Add Account button.
-
The system will now present you with options for creating the new instance:
-
Option A: Establish a New Connection (Standard Flow)
- Choose this to configure the connector from scratch.
- A side sheet will open, allowing you to enter the new credentials for your second source (e.g., the details for the Marketing SharePoint site).
- This is the default flow if no pre-configured instances are available from other environments.
-
Option B: Pull from UAT (If Available)
- You will only see the "Pull from UAT" option if a pre-configured, available instance exists in your User Acceptance Testing (UAT) environment.
- Selecting this allows you to import the configuration directly from UAT, saving you from re-entering the details.
-
-
Complete the chosen flow. Your new instance will now appear on the management screen with an appended number in its name (e.g., "Confluence - 2").
Step 3: Managing Your Active Instances
The connector's management screen provides a centralized view of all your active instances. Here, you will see a list where each instance displays its name. For further information, such as syncing frequency and sync statuses, you may visit ‘Sync Logs’.
From this screen, you can perform actions on each individual instance, such as triggering a manual sync, editing its configuration, or deleting the connection.
4. Frequently Asked Questions (FAQ)
Q: Why can't I add a sixth instance of a connector?
A: The system is designed with a hard limit of five instances per connector type to ensure optimal performance and manageability.
Q: I received a "duplicate credentials" error. What should I do?
A: This error means the credentials you entered are already being used for another instance of this connector, possibly in the UAT environment. You must provide a unique set of credentials for each new instance.
Q: Why don't I see the "Pull from UAT" option when I click "+ Add Account"?
A: This option is only visible if there is a configured and available connector instance in your UAT environment that has not already been pulled into Production. If none exist, you will only see the option to establish a new connection.