
Self-Service Email Reports
How to Configure Self-Service Email Reports
This guide explains how to use the Self-Service Email Report module. This tool allows you to create, manage, and schedule your own customized email reports in Excel format. You can select which data to include, filter for specific tickets, rename columns, and set an automatic delivery schedule, all without needing developer assistance.
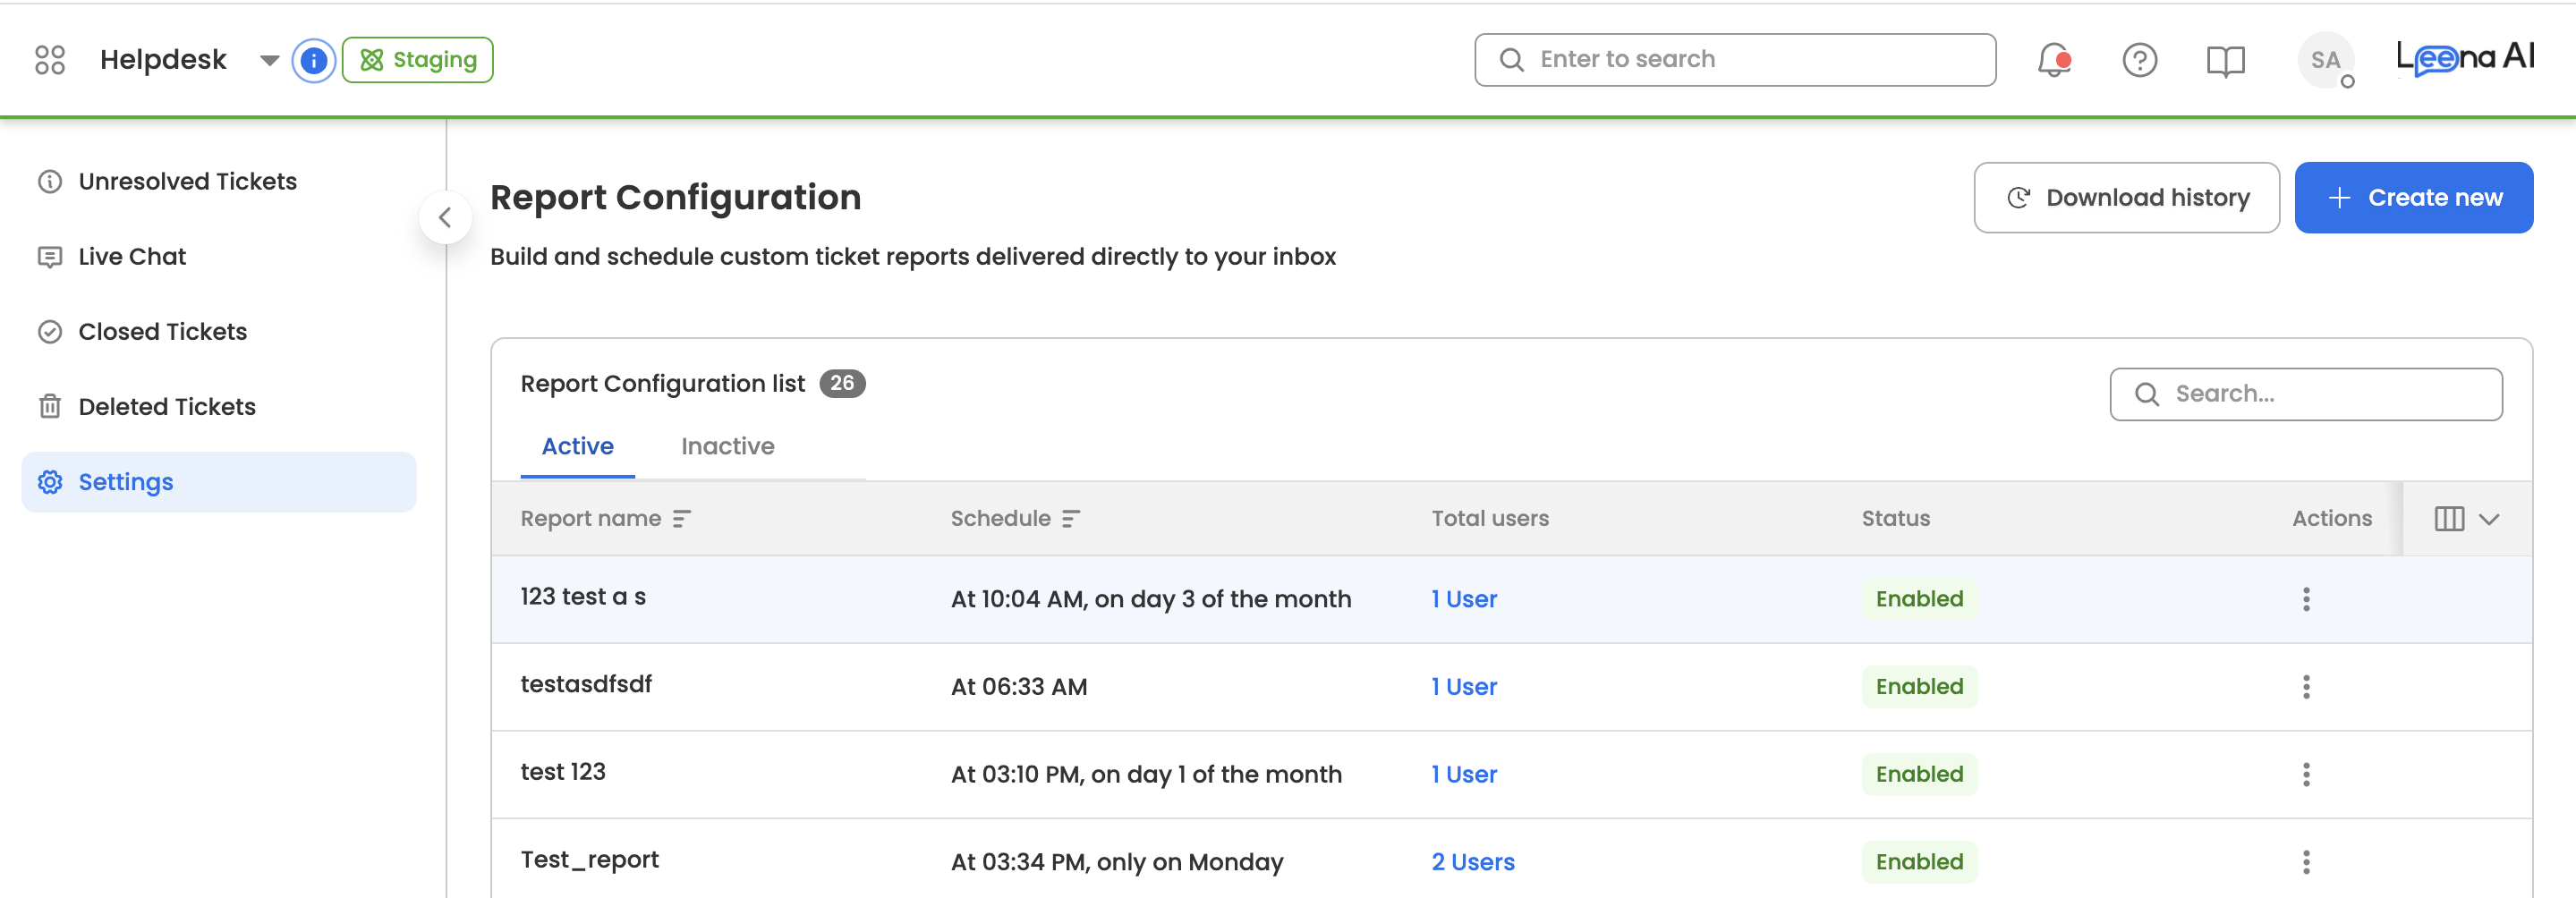
1. The Reports Dashboard
When you navigate to Settings → Reports Configuration, you will see the main dashboard. This page lists all the report configurations you have access to.
For each report, you can see its:
- Report Name: The custom name you gave the report.
- Subject: Subject of the email for the report.
- Users: List of people you would like to share the report with.
- Schedule method: How often the report is set to run (e.g., "Daily at 9:00 AM").
From this dashboard, you can perform several key actions:
-
Create: Start building a new report from scratch.
-
Edit: Click on a report to modify an existing report's settings.
-
Enable/Disable: Use the toggle to switch between active or Inactive reports. A disabled report will not run.
-
Download History: See a log of past report runs, their status (Success/Failure), and any error messages.
2. Creating or Editing a Report
When you click Create New or Edit, you will be taken to the report configuration form. This form is organized into logical sections.
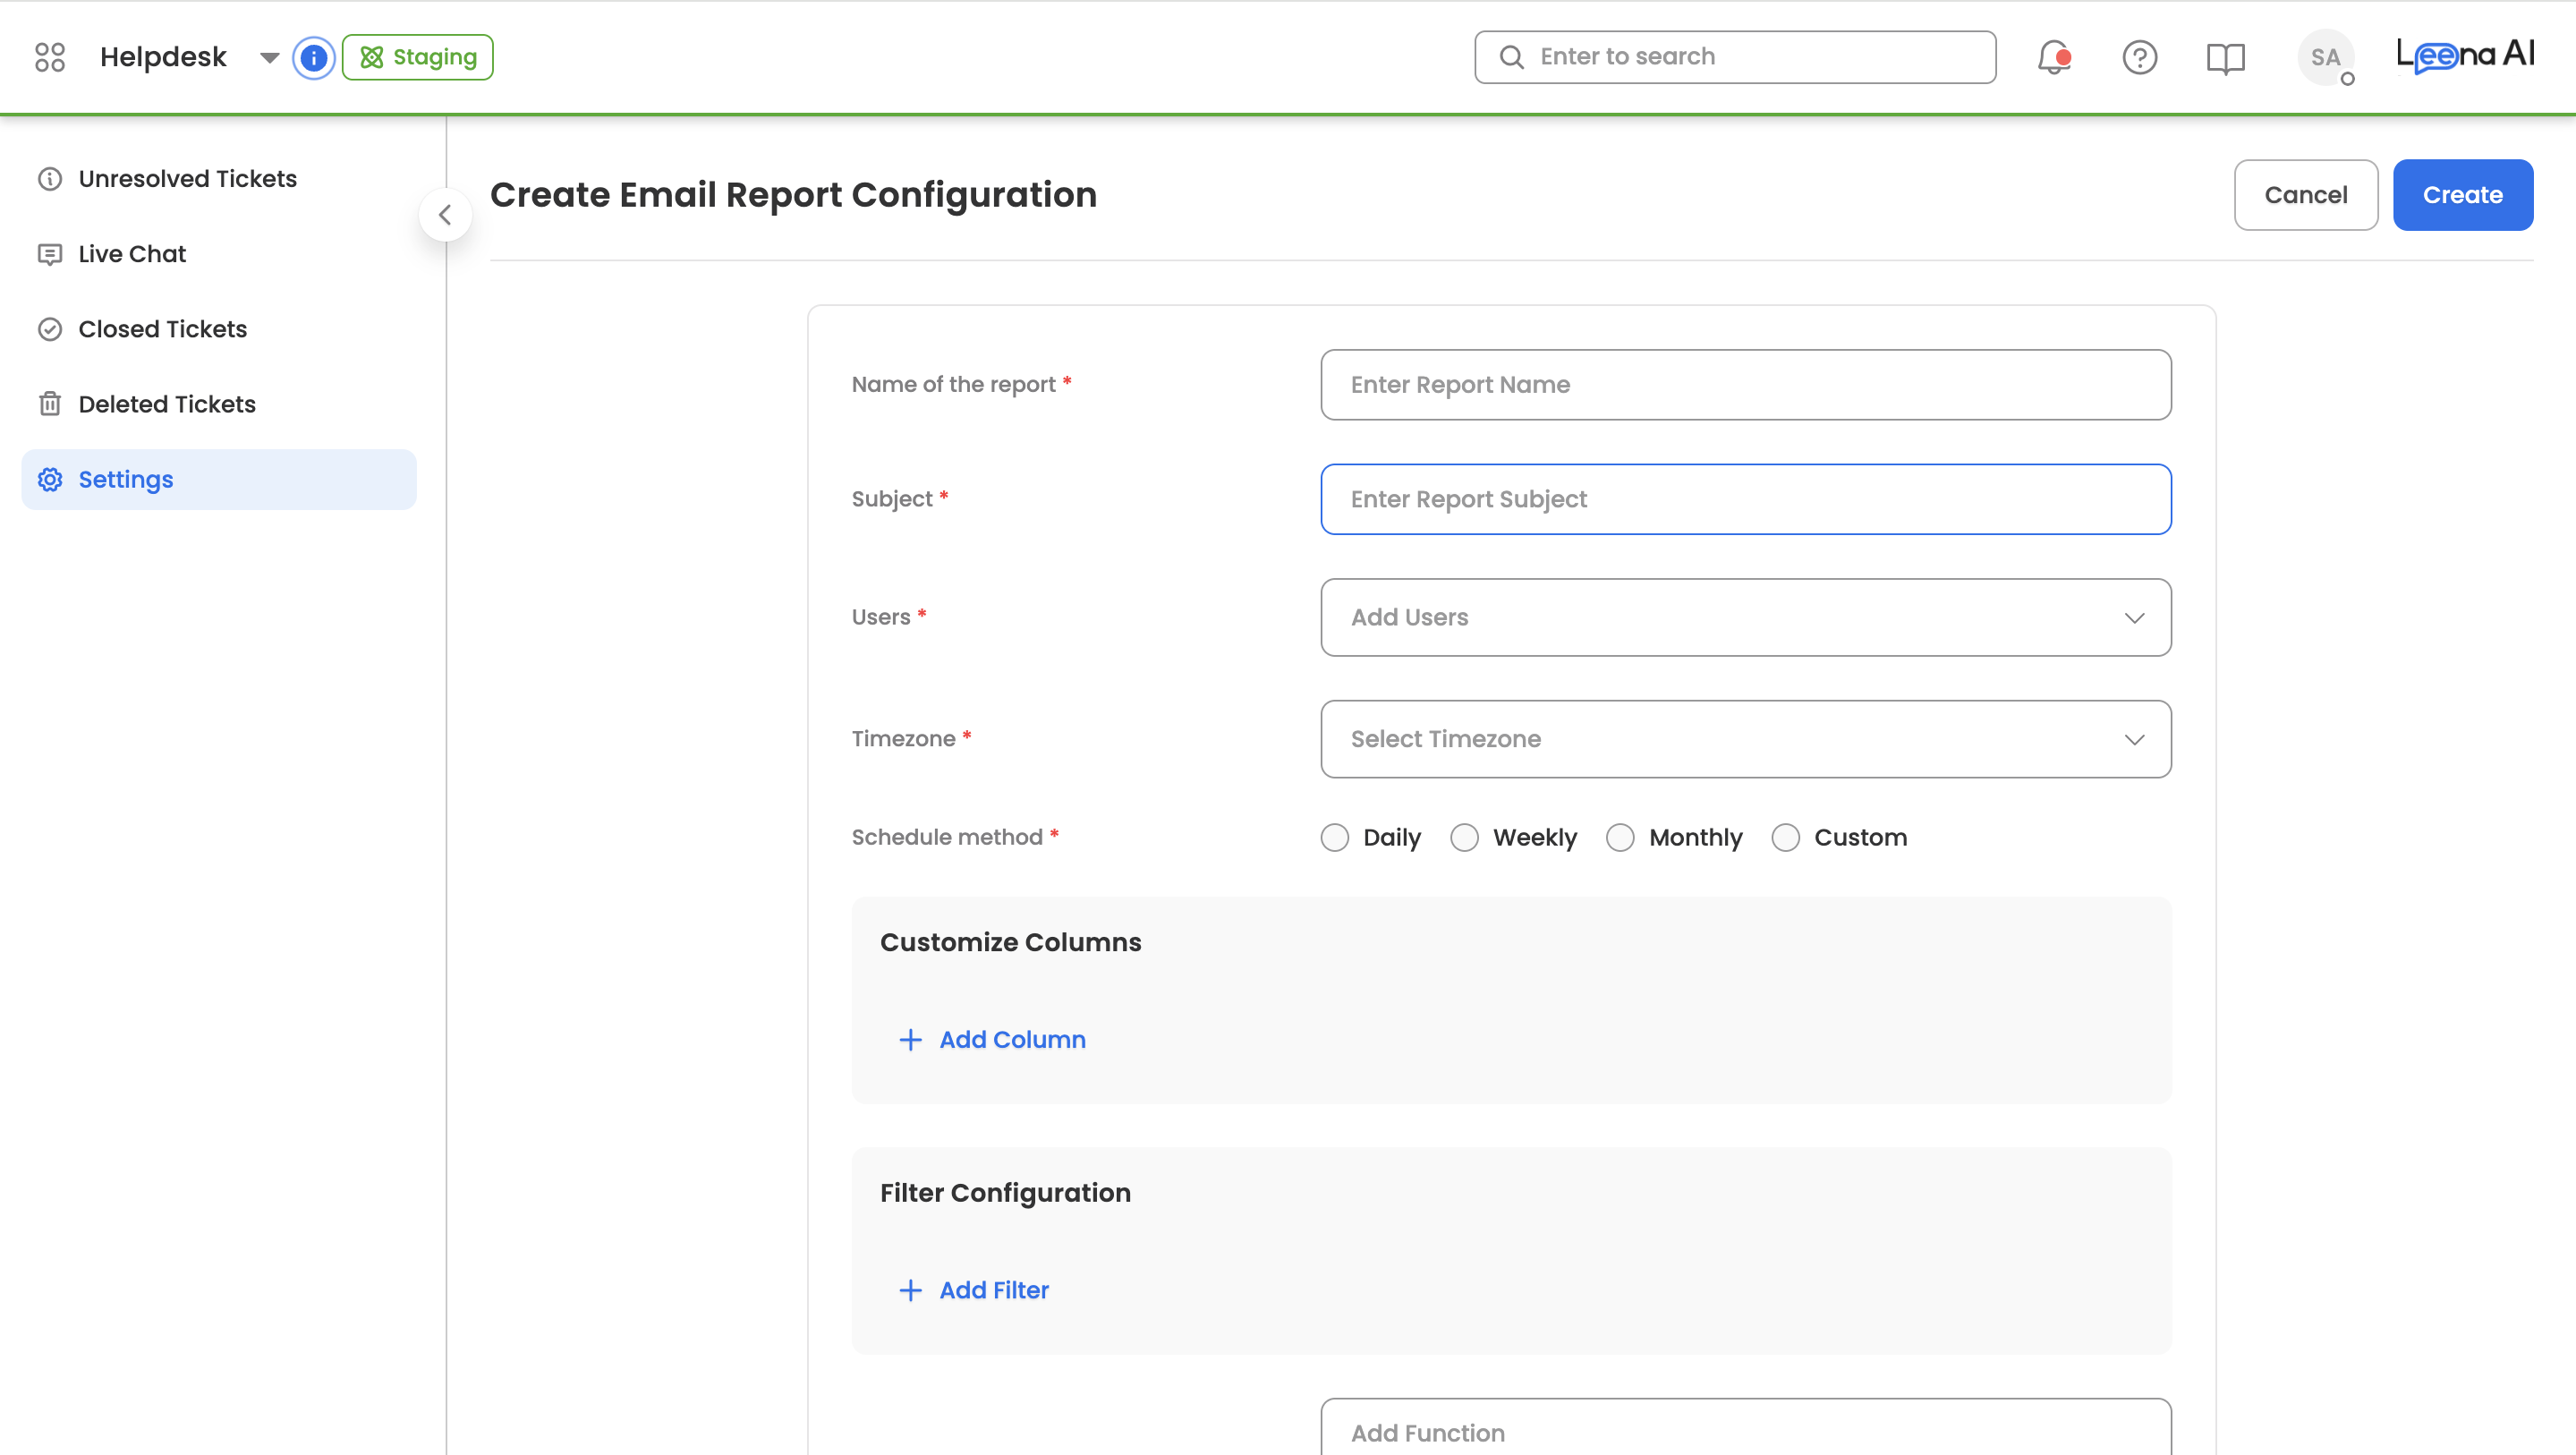
1. Basic Settings
This section covers the report's identity and delivery.
- Report Name: Enter a clear, descriptive name (e.g., "Daily Open Tickets - Support Team").
- Email Subject: Set the subject line for the email that recipients will see. You can use dynamic placeholders like
{{ReportName}}or{{Date}}to automatically insert the report's name or the date it was generated. - Recipients: Add one or more email addresses to receive the report. You can add multiple addresses by separating them with a comma.
2. Schedule
Define when and how often the report should be automatically generated and sent.
- Daily: Runs every day at a specific time you set.
- Weekly: Runs on a specific day of the week (e.g., Monday) at a specific time.
- Monthly: Runs on a specific day of the month (e.g., the 1st) at a specific time.
Note: All times are based on your system's default timezone (e.g., UTC), which will be clearly displayed next to the time selection.
3. Column Configuration
This is where you choose what data appears in your report and what the columns are called.
- Select Columns: In the "Available Fields" list, choose all the data fields you want to include in your report (e.g.,
ticket.id,user.name,status). - Add Column Name: For each column you select, you can set a custom header name.
- Example: You can change the default field
user.employeeIdto have an alias of "Raised by Ecode". - If you leave the alias blank, the default field name will be used.
- Example: You can change the default field
4. Configure Filters
Define the rules to ensure the report only includes the data you need. You will use a simple query builder to add filter conditions. Each condition consists of a Field, an Operator, and a Value.
- Field: The data field you want to filter by (e.g.,
status). - Operator: The rule to apply (e.g., In, Equals, Greater Than, Not Equals).
- Value: The data you want to match (e.g., 'Open', 'Acknowledged').
You can add multiple filter conditions. All conditions are joined by an AND logic, meaning a ticket must match all of your conditions to be included in the report.
Sample Filter Setup:
(Field:
status) (Operator:In) (Value:'Open', 'Blocked') AND (Field:deleted) (Operator:Equals) (Value:'false') AND (Field:timestamp) (Operator:Greater Than) (Value:[Date picker selection])
5. (Advanced) Column Transformation (Custom Functions)
For advanced use cases, you can apply functions to transform the data in a column instead of just displaying the raw value.
For any column, you can select a transformation type:
- Direct Mapping: (Default) Shows the value exactly as it is in the database.
- Pre-built Functions: Select from a list of common functions like Concatenate (to join two fields), Date Format (to change how a date looks), or Case Change (to make text uppercase).
- Custom Expression: (Advanced) Write your own simple logic to calculate a new value based on other fields in the row.
6. Save and Preview
Once your configuration is complete, click Create (or Save) to finalize the report.
Updated 5 months ago