
Employee sync via Workflows
Watch the tutorial
1. What is Employee Sync via API?
Employee Sync via API helps keep your employee list in Leena AI aligned with your source system (HRMS or another employee database) using an automated process.
In the Unified Dashboard, “API sync” typically works like this:
- Workflow: You configure a Custom API sync by selecting an Employee Sync utility app (a workflow app set up by your implementation team).
- Automation: On a schedule, the platform triggers that app to fetch employee data from the source system.
- Data Integrity: Employee records are updated in Leena AI’s Employee Master / Employee Data, which supports:
- Access control: (e.g., terminated users shouldn’t remain active)
- Attributes: Accurate org/employee attributes used across experiences.
- Reliability: A reliable employee directory for downstream use cases.
You configure and monitor this from the Unified Dashboard → Employee Sync (Emp sync / User Sync).
2. Prerequisites
Before setting up API sync, ensure:
- Correct Dashboard Access: You need system admin/config manager access for the bot
- Field Mapping Defined: Field mapping must exist and include mandatory fields required by Leena AI. This controls which attributes are stored and validated.
- Utility App Availability: The “Custom API end point” must be selected from a list of approved apps. If no option appears, contact your implementation team to publish/enable the utility app for your bot.
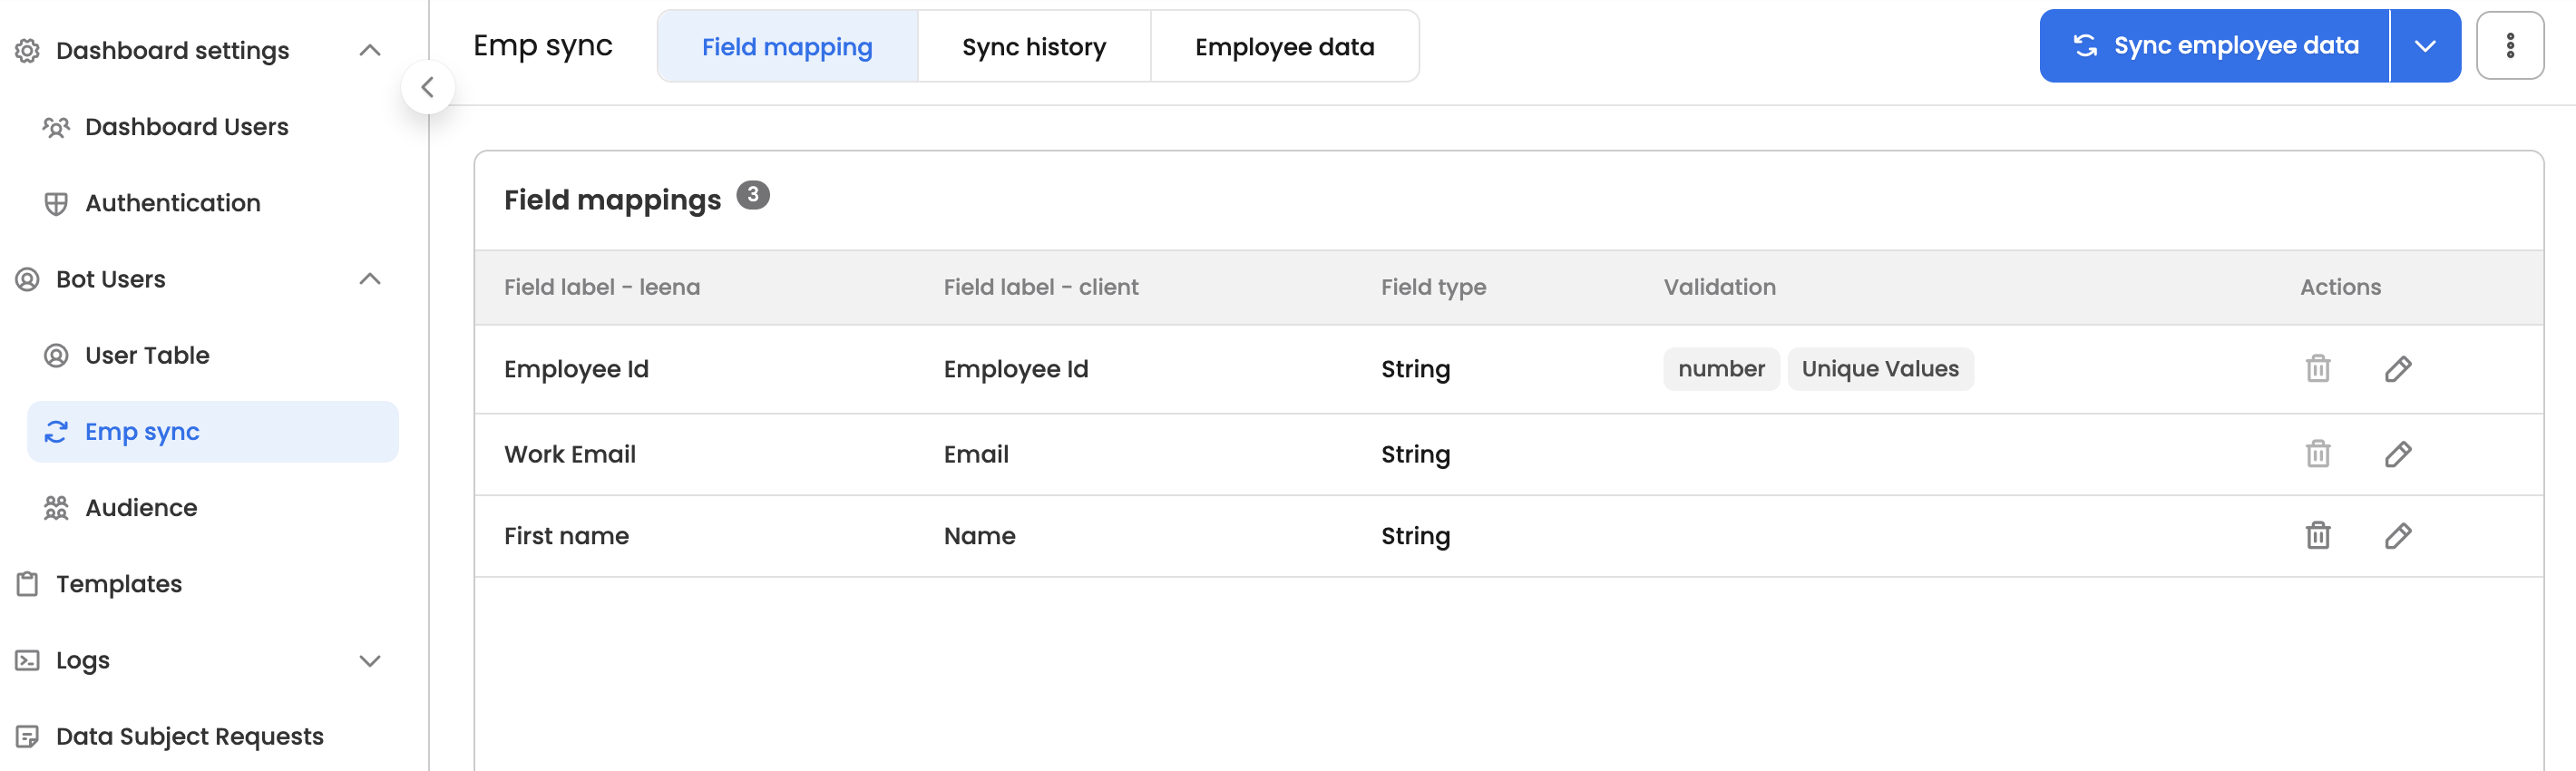
3. Navigation
- Log in to the Unified Dashboard.
- Navigate to your bot and open: Settings → Bot Users → Emp Sync
- You will typically see three main tabs:
- Field mapping
- Sync history
- Employee data
4. High-Level Process Flow
- Field Mapping: Defines what employee fields exist and how they are validated.
- Custom API Schedule: Tells the system which utility app to run and when to run it.
- Sync History: Records every run for auditing.
- Employee Data: Allows review of the final state (Active vs. Terminated).
5. Step-by-Step Setup
Step 1: Create or Review Field Mapping
- Go to the Field mapping tab.
- If it's a first-time setup, select Via API as the sync method to create the mapping context.
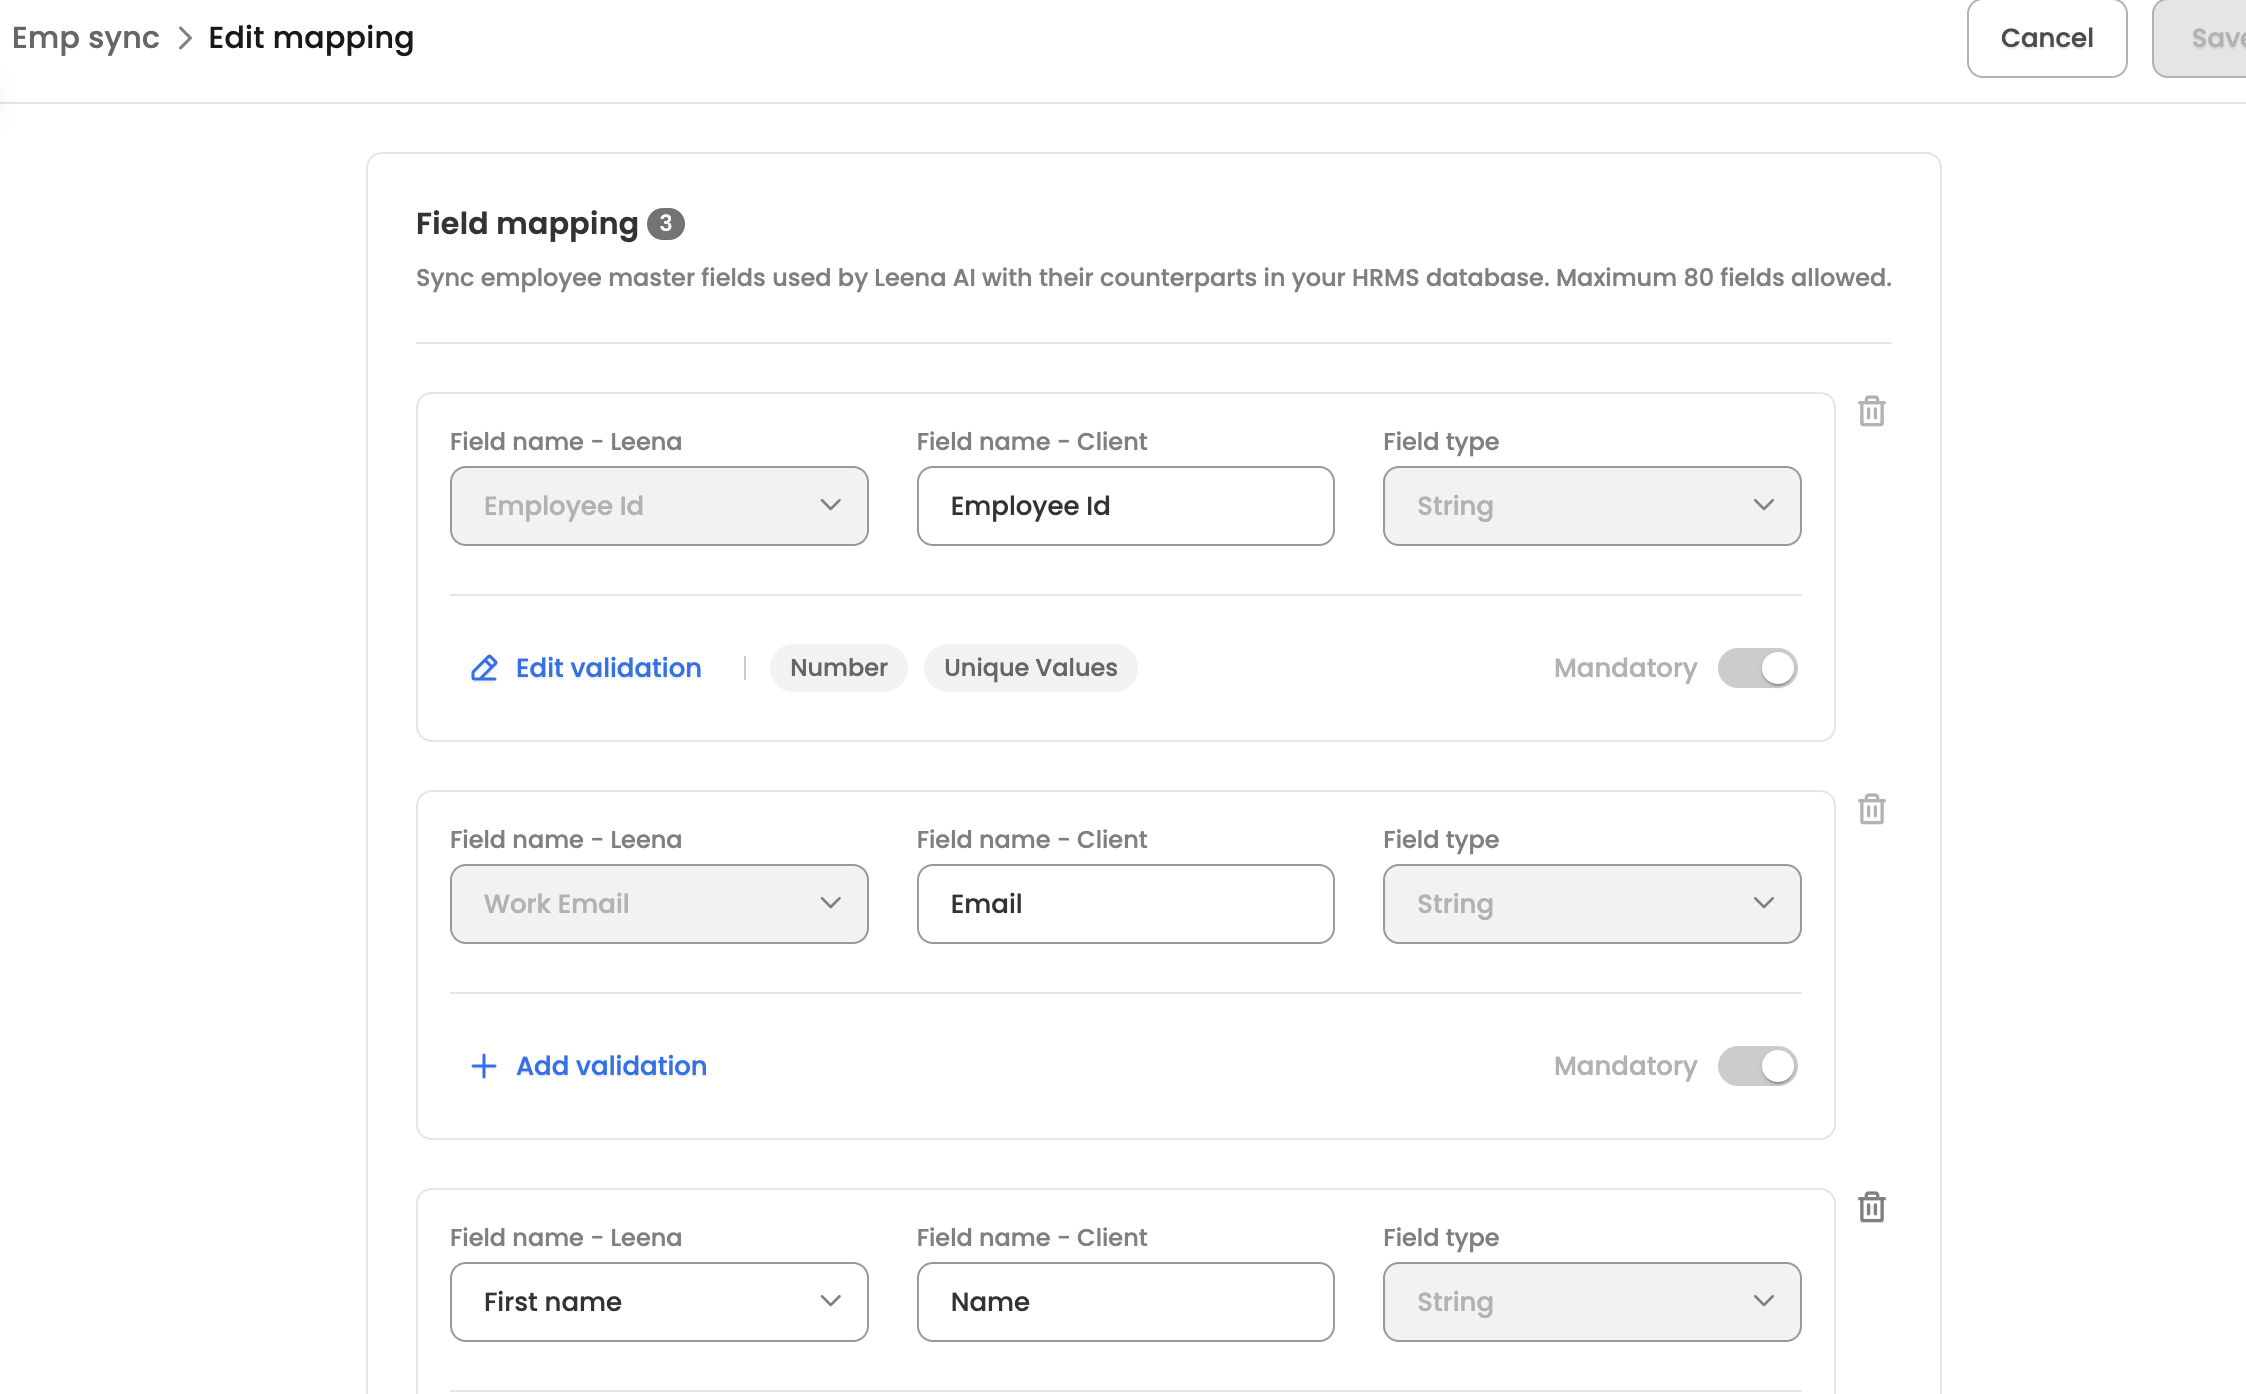
- For each field, configure the following:
| Configuration | Description |
|---|---|
| Field name – Leena | Select from existing Leena fields or “Add New” for custom fields. |
| Field name – Client | The source system field name (must not contain . or $). |
| Field type | e.g., String, Number, Date, Boolean, or Phone. |
| Validations | Set regex, allowed values, email domains, or uniqueness. |
| Mandatory Toggle | Mark whether a value must exist for every employee. |
Note: System-mandatory fields cannot be deleted. The UI supports version history, allowing you to Restore older mapping versions.
Step 2: Configure "Custom API" Schedule
-
From Field mapping, click Sync employee data.
-
Choose Custom API to open the configuration panel.

-
Configure your sync (up to 3 schedules/mappings):
-
Custom API Endpoint: Select the utility app from the dropdown.
-
Schedule Method: Choose Daily, Weekly (select day), or Custom (every N days).
-
Time: Select the sync hour in UTC. The UI provides a local time conversion hint.
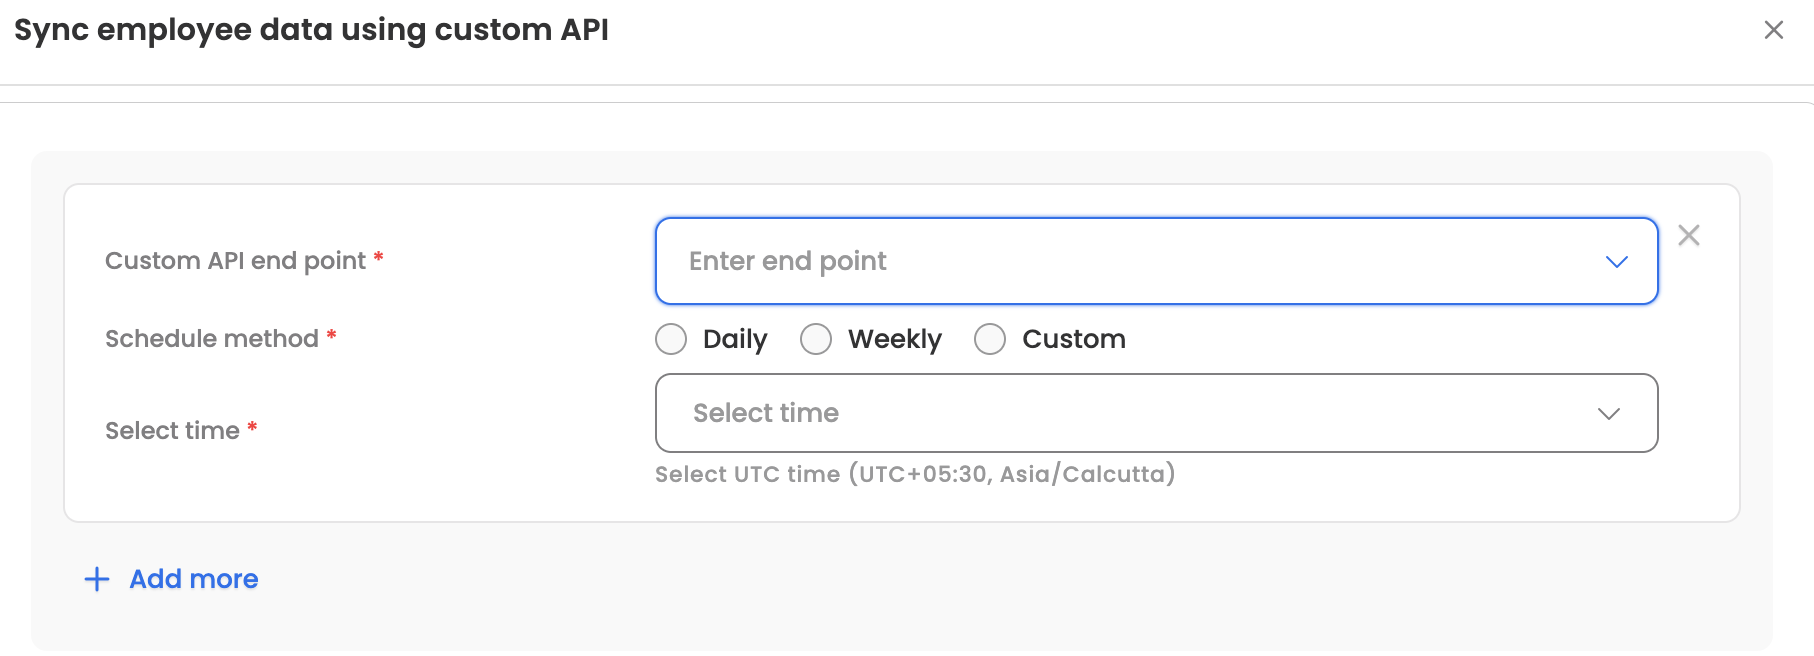
- Click Sync to save. (If in view mode, click Edit first).
Important: Upon saving, the system attempts an immediate manual sync. If a manual sync was performed recently, a 1-hour cooldown applies.
Step 3: Manage Scheduled Syncs
Once a schedule is active, an Auto sync info bar will appear. Under Manage schedule, you can:
- View/Edit the schedule.
- Pause or Resume the sync.
- Delete the configuration entirely.
Step 4: Validate Results
- Sync History: Check the status of runs. Columns include Synced on, Type, Cause (Manual/Scheduled), Status, and Total Employees.
- Employee Data: Review the lists of Active and Terminated employees. Use search and sorting to spot-check specific records.
6. Monitoring & Troubleshooting
6.1 Sync History Checks
Regularly monitor the Sync history to confirm:
- Runs occurred at the expected UTC time.
- The Cause matches the intended trigger (e.g., Scheduled).
- The Status is "Successful" and the employee count aligns with your HRMS data.
Would you like me to create a summary checklist for your admins to use during their weekly sync reviews?