Slack Setup
User Guide: Setting Up Your Custom Slack Integration
Watch the tutorial
Introduction
This guide provides step-by-step instructions for creating a custom Slack application and integrating it with the unified dashboard. The process involves configuring settings on the dashboard, creating the application using a manifest file in the Slack API portal, and exchanging credentials to finalize the connection.
Prerequisites
Before you begin, please ensure you have the following:
- Access to the unified dashboard with the Config Manager role assigned to your user profile.
- Administrative or app installation permissions for your target Slack workspace.
Part 1: Generate the App Manifest from the Dashboard
In this section, you will define your application's branding and generate the necessary configuration file (manifest) from the unified dashboard.
- Log in to the unified dashboard.
- Navigate to the settings module, and go to Settings > Channels > Slack.
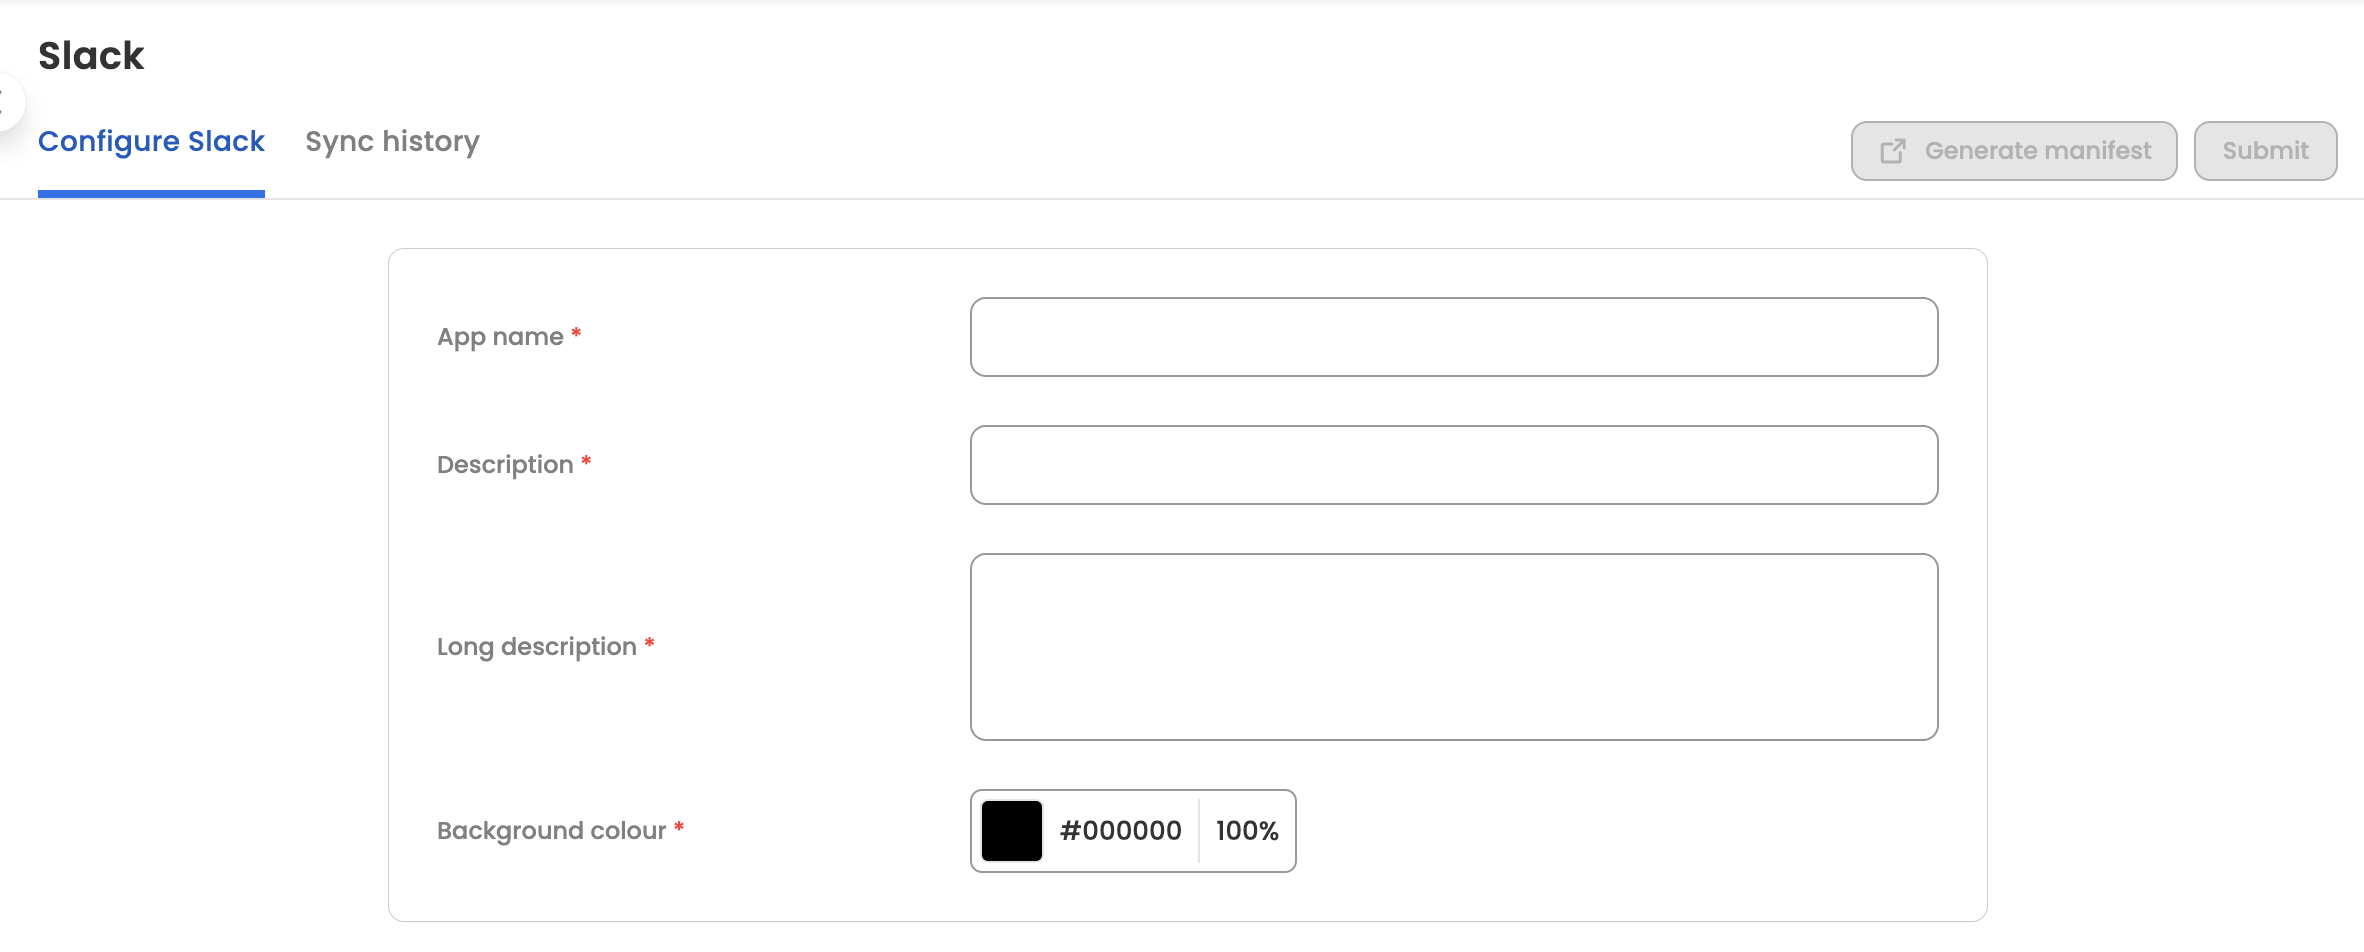
- Fill in the Branding Details for your application:
- App Name: The name that will be displayed in Slack.
- Description: A short description of the app's purpose.
- Long Description: A more detailed explanation of its features.
- Background Color: The hex code for the app's theme color.
- Click Submit to save these branding details.
- Next, copy the entire manifest content to your clipboard.
Part 2: Create the Application in Slack
Using the manifest you just copied, you will now create the application within your Slack workspace.
- Open a new browser tab and navigate to the Slack API portal: https://api.slack.com/apps.
- Log in using your official Slack credentials.
- Click the Create New App button.
- In the creation window, select the From an app manifest option.
- Choose the target Slack workspace from the dropdown menu where you want to install the app and click Next.
- Under the JSON tab, delete any placeholder content and paste the manifest code you copied from the dashboard.
- Click Next to review the summary, then click Create to build the application.
Part 3: Exchange Credentials and Install the App
This final stage involves transferring security keys between the Slack API portal and the dashboard to authorize the connection and then installing the app.
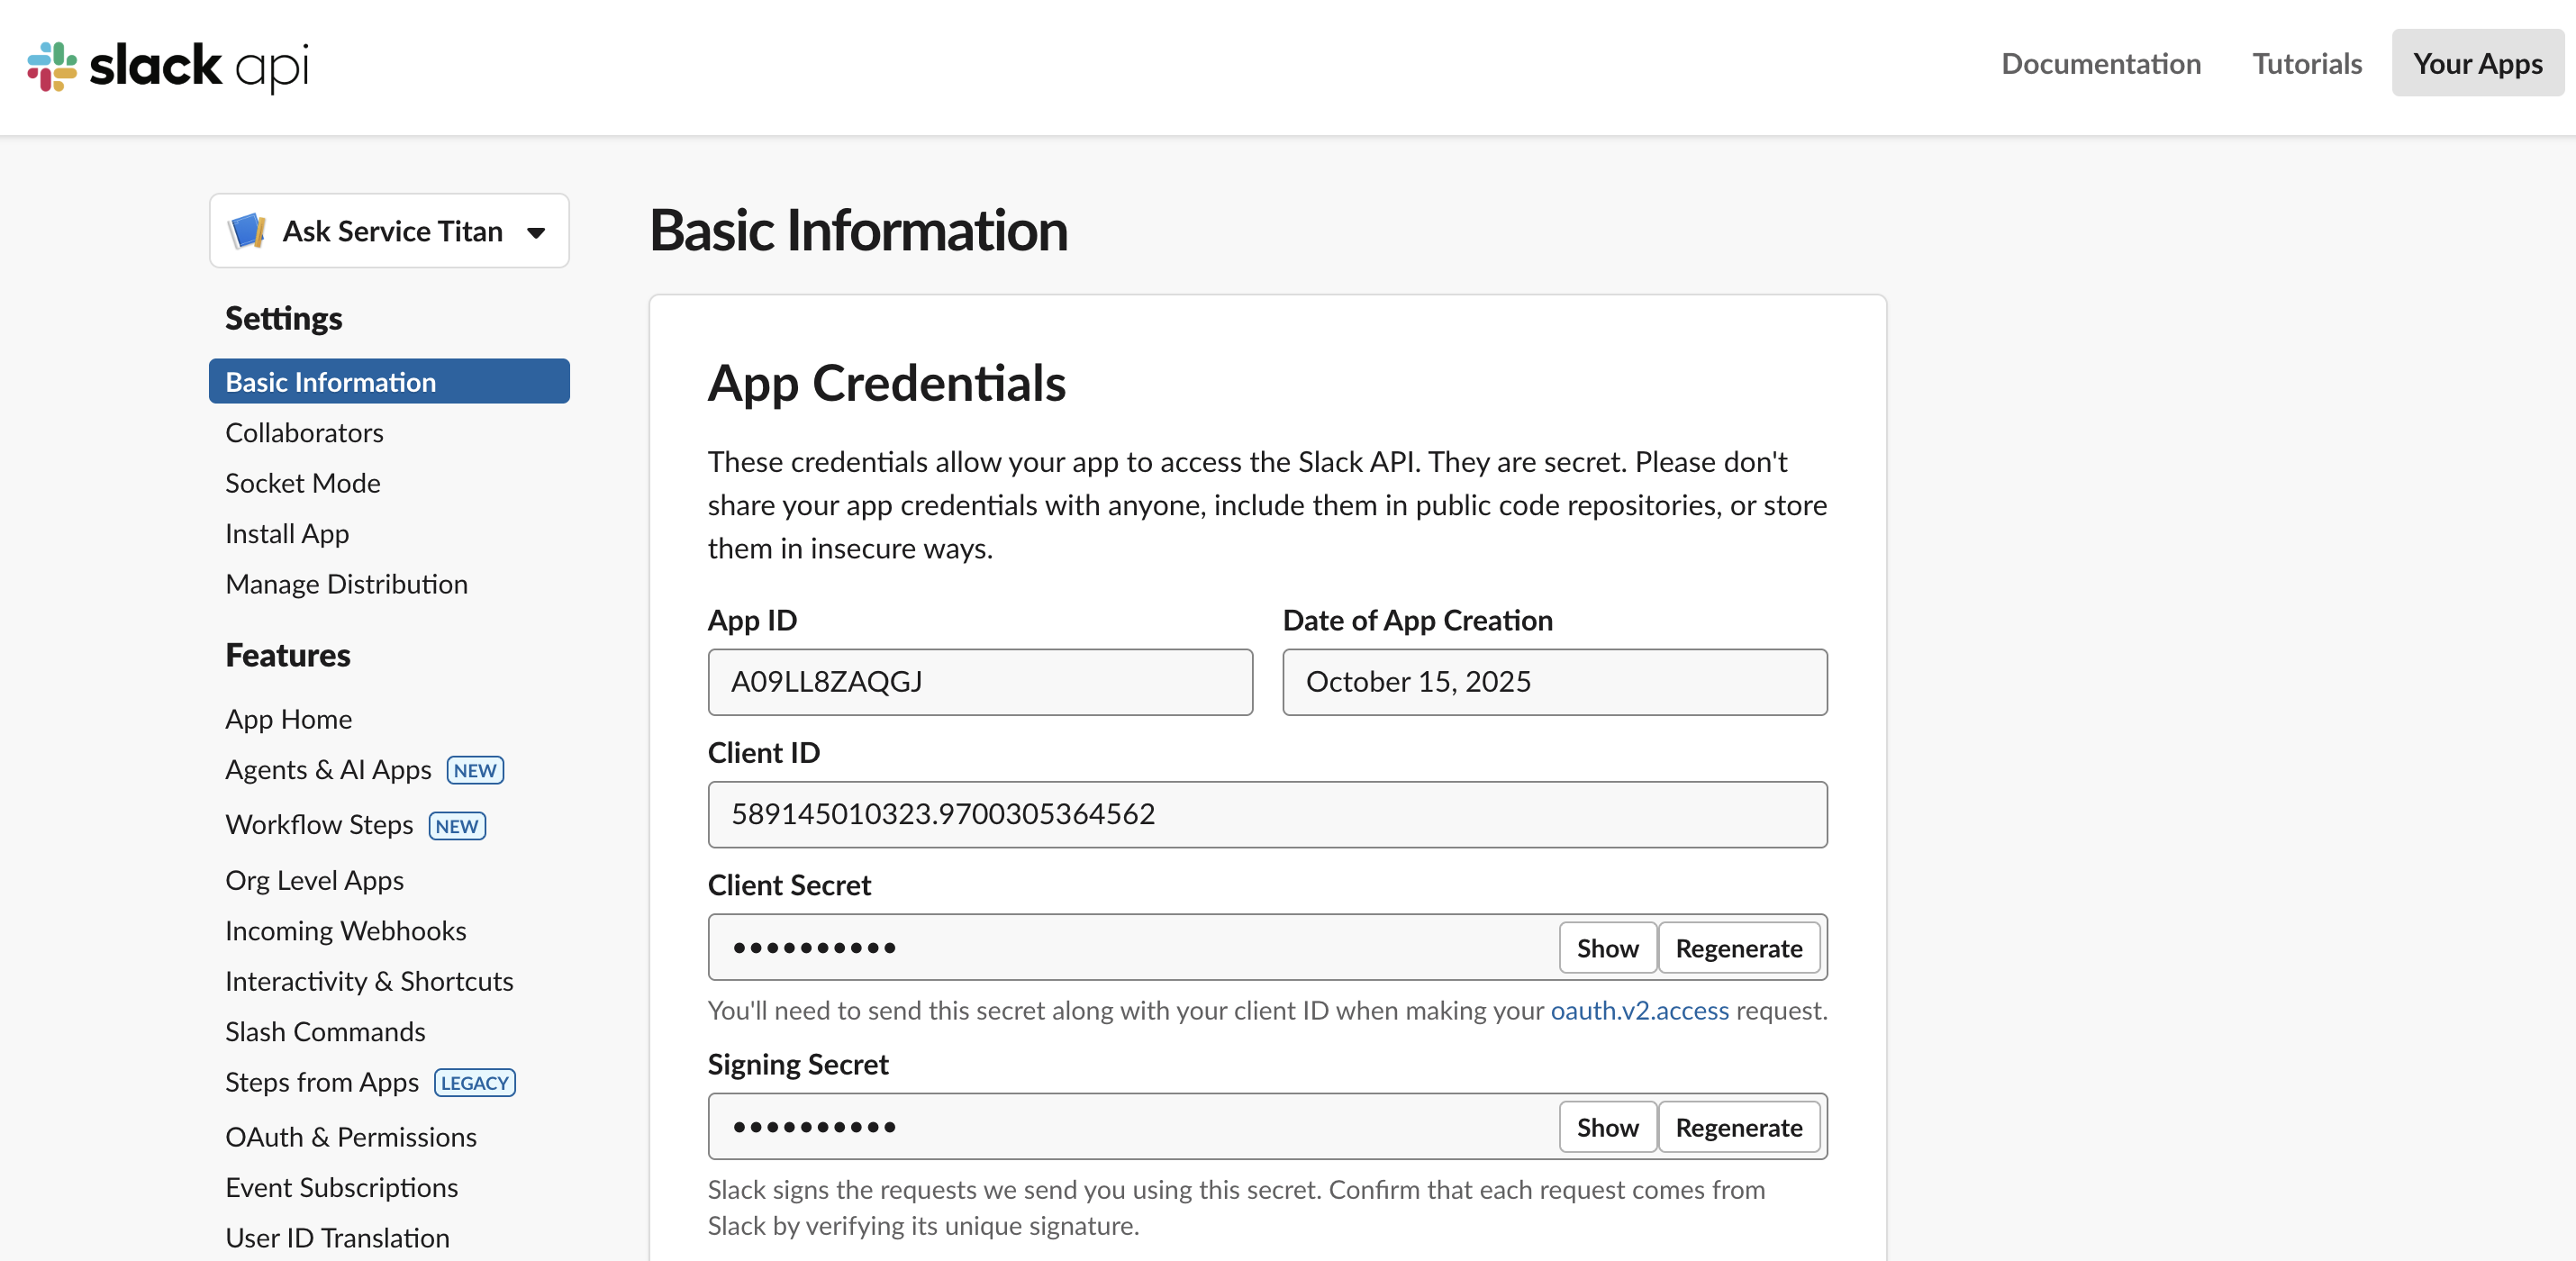
After creation, you will land on the app's Basic Information page in the Slack API portal.
- Locate the App Credentials section.
- Copy the App ID and paste it into the corresponding App ID field back on the unified dashboard's Slack configuration page.
- Copy the Signing Secret (you may need to click 'Show') and paste it into the Signing Secret field on the dashboard.
- Now, in the Slack API portal's left-hand menu, navigate to Features > Install App.
- Click the Install to Workspace button and follow the prompts to authorize the application.
- Note: If your workspace requires administrative approval for new apps, you will need to submit a request. The installation will only complete after an admin approves it.
- Once the app is successfully installed, navigate to the Features > OAuth & Permissions section in the left-hand menu.
- Under the OAuth Tokens for Your Workspace section, you will see a Bot User OAuth Token.
- Copy this token and paste it into the OAuth Token field on the unified dashboard.
Part 4: Finalize Configuration
Return to the unified dashboard. All three fields (App ID, Signing Secret, and OAuth Token) should now be filled.
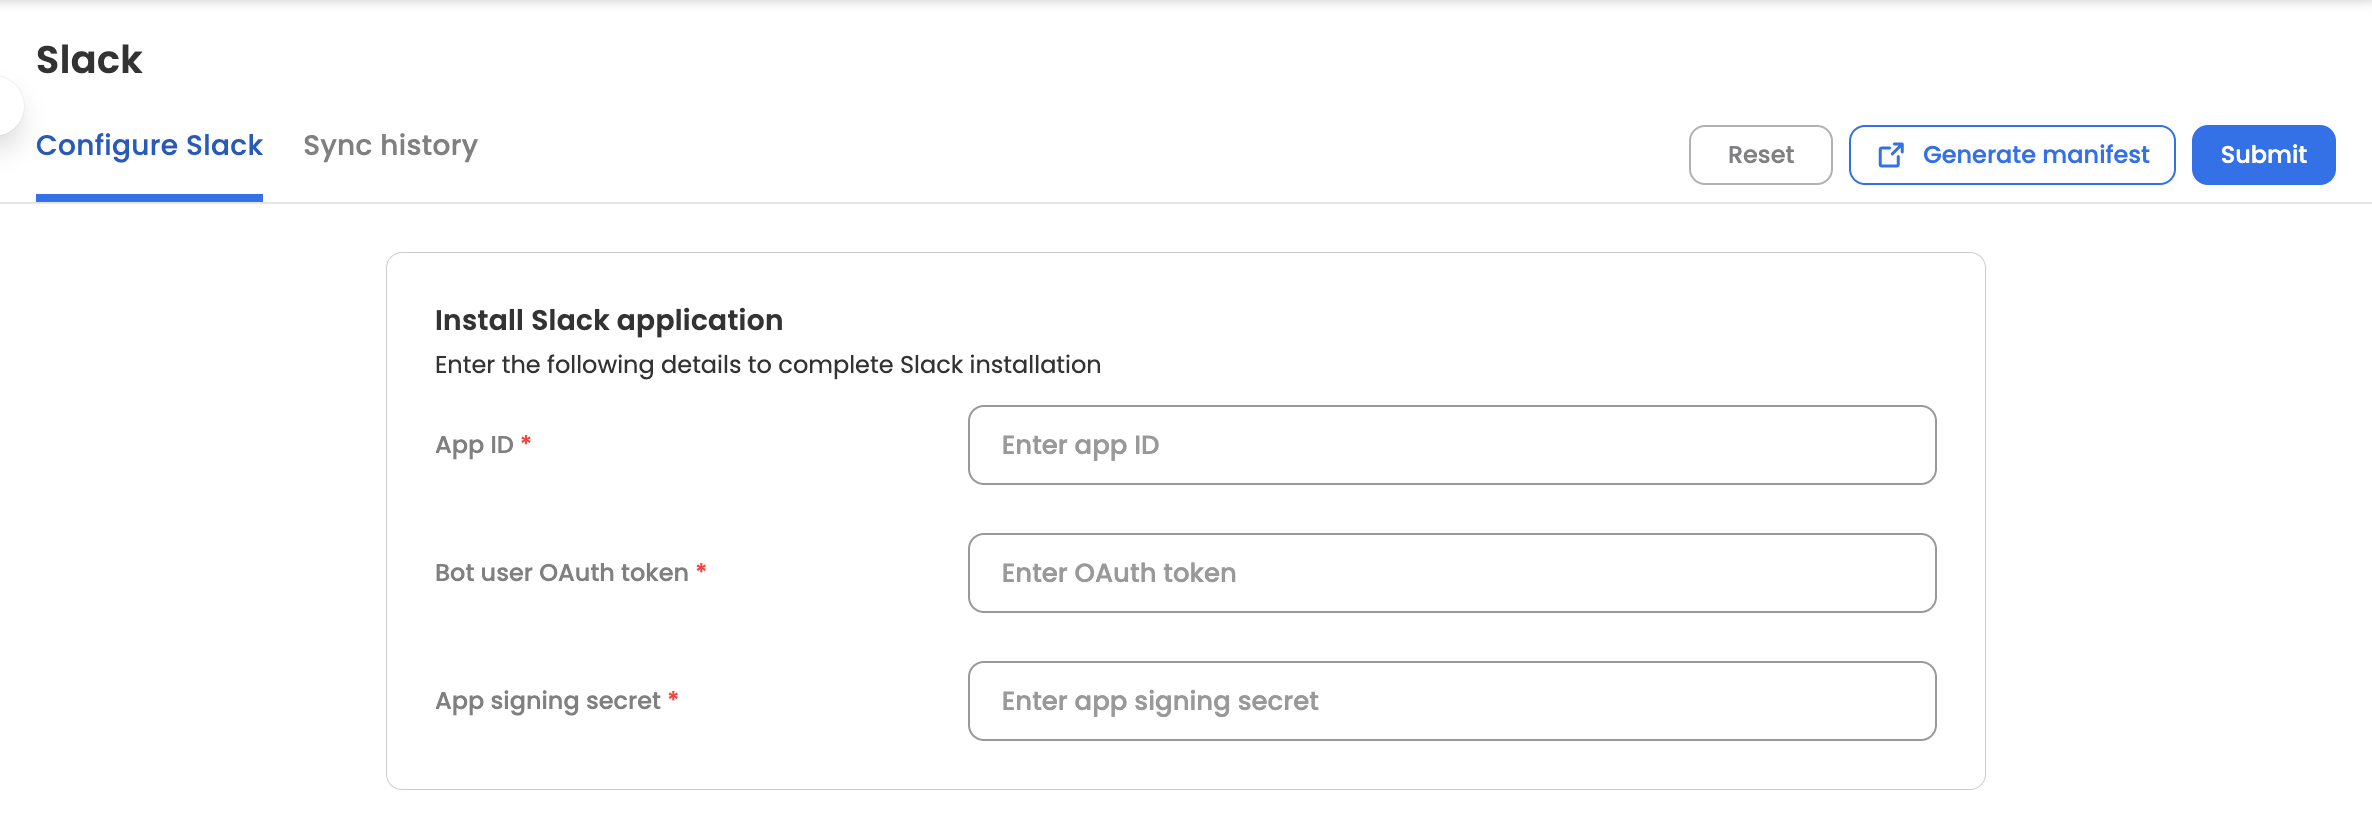
- Click the final Submit button to save the integration.
Your Slack application is now fully configured and ready for use!
Pro Tip: Add a Custom App Icon
To enhance your app's visibility and branding within Slack, you can add a custom icon. In the Slack API portal, navigate to Settings > Basic Information and scroll down to the Display Information section. Here, you can upload an icon that will represent your app across the Slack workspace.
Frequently Asked Questions
How do I change the Slack App's display name or description after it has been installed?
You can easily update the branding (App Name, Description, and Icon) directly within the Slack API portal.
- Navigate to your Slack App management page at https://api.slack.com/apps.
- Select the application you wish to modify.
- In the left-hand navigation menu, ensure you are on the Settings > Basic Information page.
- Scroll down to the Display Information section.
- Edit the App Name, Short Description, or Full Description fields as needed.
- Click Save Changes at the bottom of the section to apply the new branding to your Slack workspace.
What is the new "Assistant Mode"?
It is a major upgrade provided by slack (and supported by Leena AI) that gives the bot an enhanced user experience while conversing with an AI agent
- Dedicated "History" tab to view previous conversations. Also enables Leena AI to respond directly in main chat instead of thread
- Real-time response streaming
- Native status indicators (like 'thinking...')
- Input blocking when previous request is being processed
- Show starter prompts along with introduction message
- Add AI agent to a channel or start a group chat with the agent.
How do I enable Assistant Mode?
Follow these simple steps:
Slack Configuration: Go to the Slack API Portal > Select your App > Under Features in left navigation > Agents & AI Apps > Toggle ON the "Assistant Tab"
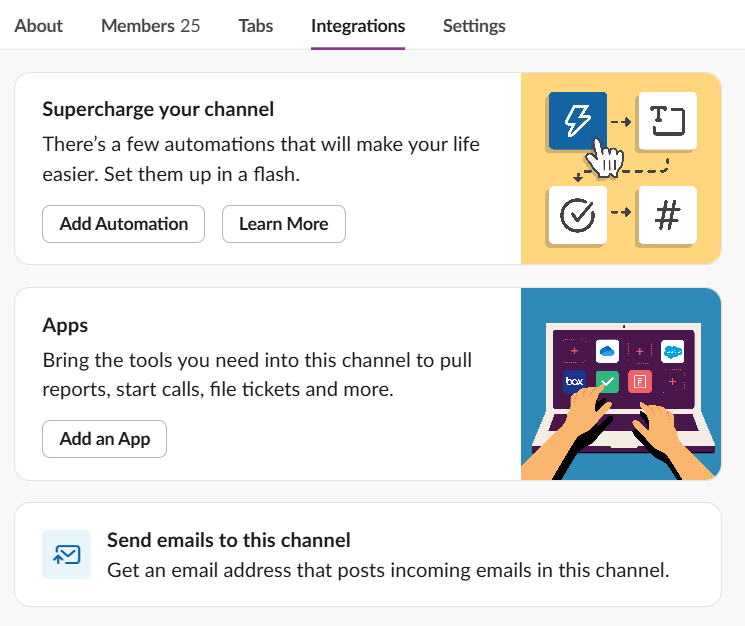
How do I add the Assistant to a channel?
You can do either of the following
-
Type
/invite @[Agent Name]on the channel -
Click on the channel name and navigate to
Integrationstab. Then you can add the agent using theAdd an Appbutton present inAppssection