
Employee sync via Excel
1. What is Employee Sync via Excel?
Employee Sync via Excel allows you to keep your employee list in Leena AI aligned with your source system by uploading a spreadsheet file (.xls, .xlsx, or .csv) containing employee data.
This method is ideal when:
- Your HRIS does not have an API available for automated sync.
- You need to perform a one-time bulk data load or correction.
- You want a quick way to update employee attributes without setting up a full integration.
2. Prerequisites
Before setting up Excel sync, ensure:
- Correct Dashboard Access: You need system admin or config manager access for the bot.
- Prepared Spreadsheet: Your file must be in
.xls,.xlsx, or.csvformat and must not exceed 50 MB in size. - Clean Headers: Column headers in your file must not be empty and must not contain special characters like
.or$.
3. Navigation
-
Log in to the Unified Dashboard.
-
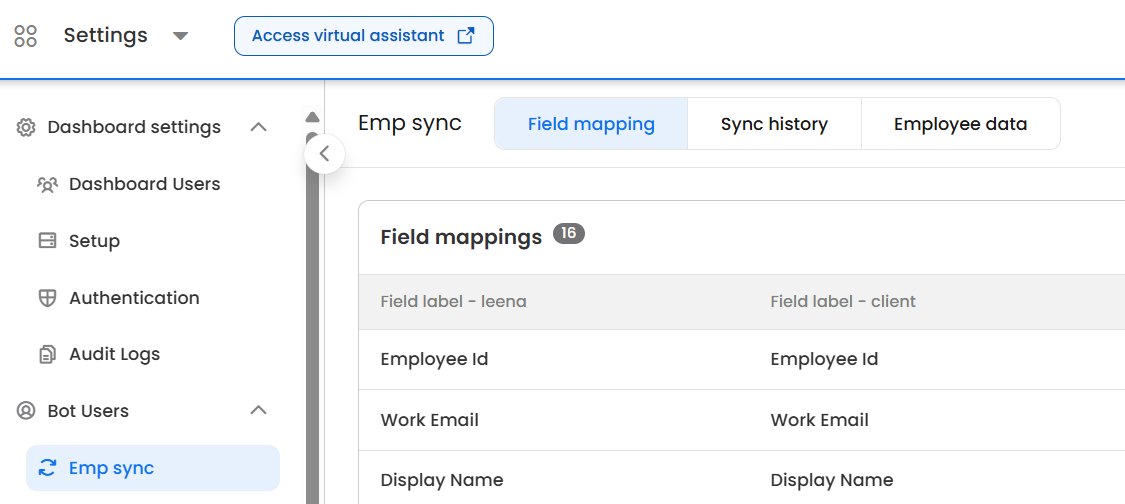
Navigate to your bot and open: Settings → Bot Users → Emp Sync.
-
You will see three main tabs:
- Field Mapping — Define and manage your column-to-field mappings.
- Sync History — View past sync runs and their outcomes.
- Employee Data — Browse the current state of Active and Terminated employees.
4. High-Level Process Flow
- Create Field Mapping: Define which spreadsheet columns map to which Leena AI fields and set validation rules.
- Download Template: Get an Excel template pre-filled with the correct column headers based on your mapping.
- Upload File: Upload your filled spreadsheet; the system parses and stores the data temporarily.
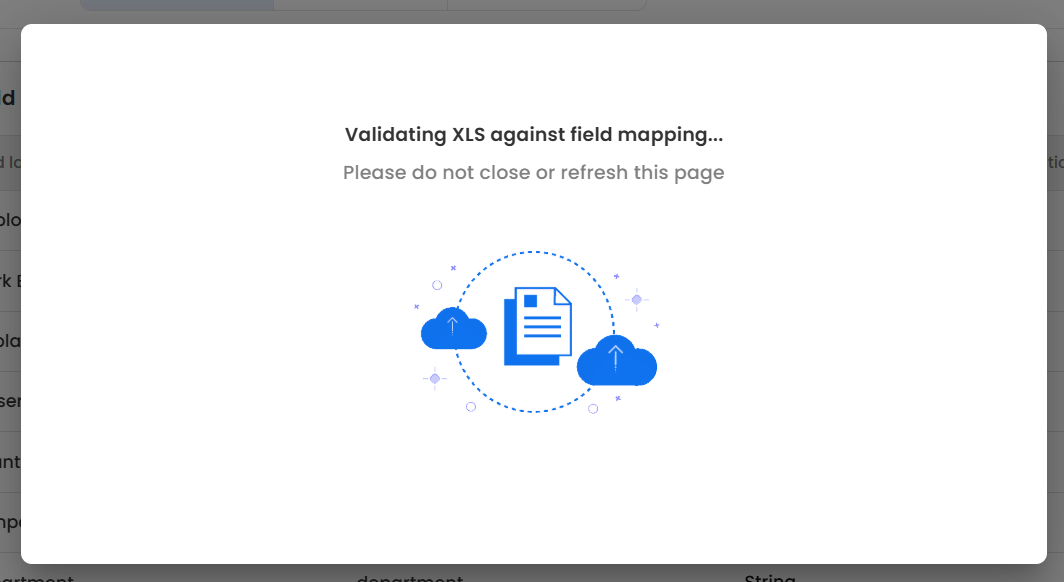
- Validate Data: The system checks every row for mandatory fields, data types, uniqueness, and formatting.
- Review Errors (if any): View and resolve validation issues — either fix the file and re-upload, or remap fields.
- Sync to Employee Database: Trigger the final sync; records are processed asynchronously in batches.
- Monitor Results: Check Sync History for status, and review Employee Data for the final state.
5. Step-by-Step Setup
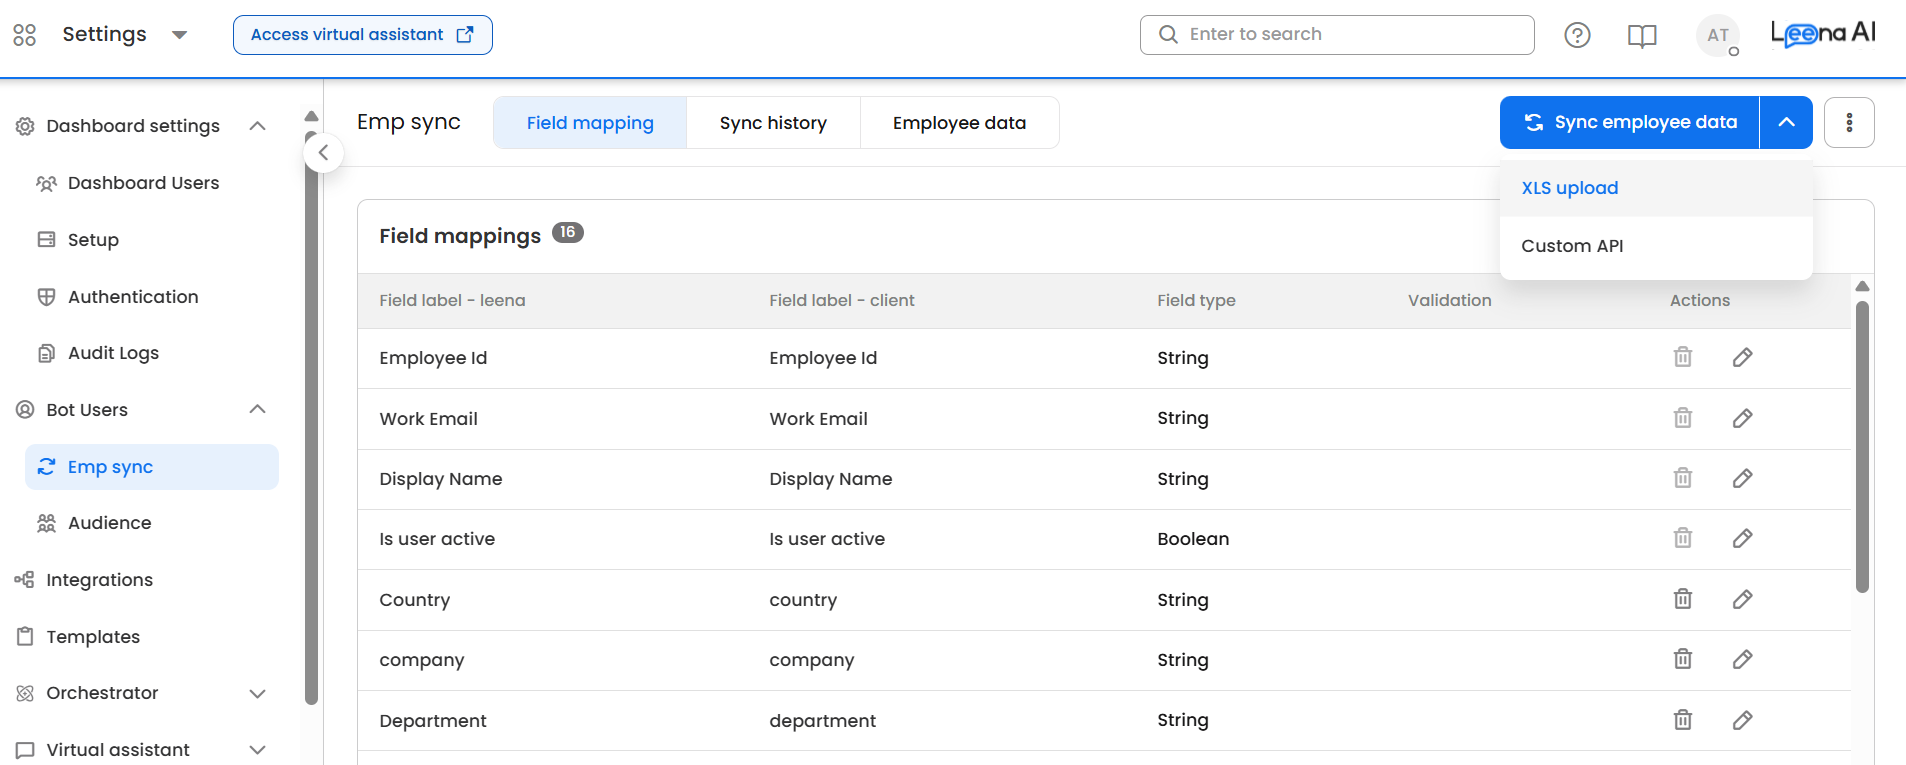
Step 1: Create or Review Field Mapping
-
Go to the Field Mapping tab.
-
If this is a first-time setup, select XLS Upload as the sync method to create a new mapping.
-
For each field, configure the following:
| Configuration | Description |
|---|---|
| Field name – Leena | Select from existing Leena fields (Master or Bot-specific), or click "Add New" for custom fields. |
| Field name – Client | The column header name in your spreadsheet. Must not contain . or $. |
| Field type | Data type of the field — e.g., String, Number, Date, Boolean, Phone, or Email. |
| Validations | Optional rules such as regex patterns, allowed email domains, date formats, or allowed values. |
| Mandatory | Toggle on if a value must exist for every employee row. |
| Unique | Toggle on if values in this column must be unique across the file (e.g., Employee ID). |
Note: System-mandatory fields (such as
employeeId) cannot be removed from the mapping. The system supports version history — you can Restore a previous mapping version at any time, which creates a new version entry.
Step 2: Download the Template
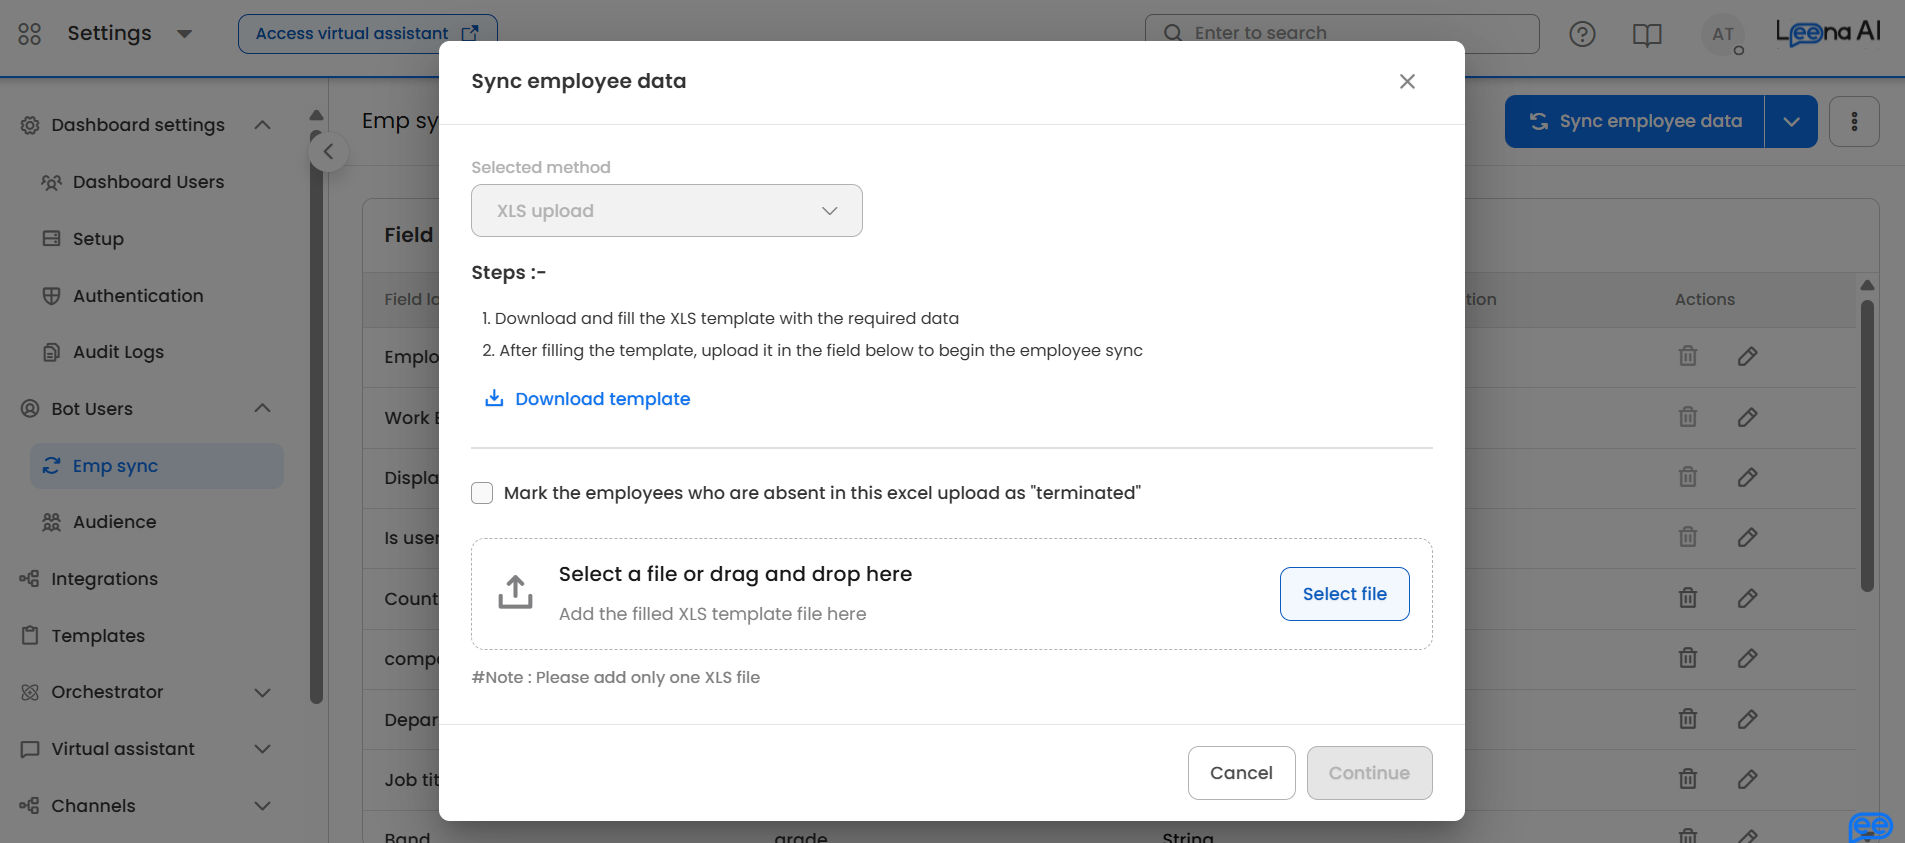
- After saving your field mapping, click the Download Template button.
- The system generates an Excel file with column headers that match the
clientFieldNamevalues in your mapping. - Fill in the template with your employee data, ensuring all mandatory fields have values and data formats match the configured field types.
Tip: Always use the latest downloaded template to ensure headers match your current mapping version.
Step 3: Upload Your File
-
From the Field Mapping section, click Sync Employee Data.
-
Choose the XLS Upload method.
-
You will see the upload interface where you can:
- Drag and drop your file, or click to browse and select it.
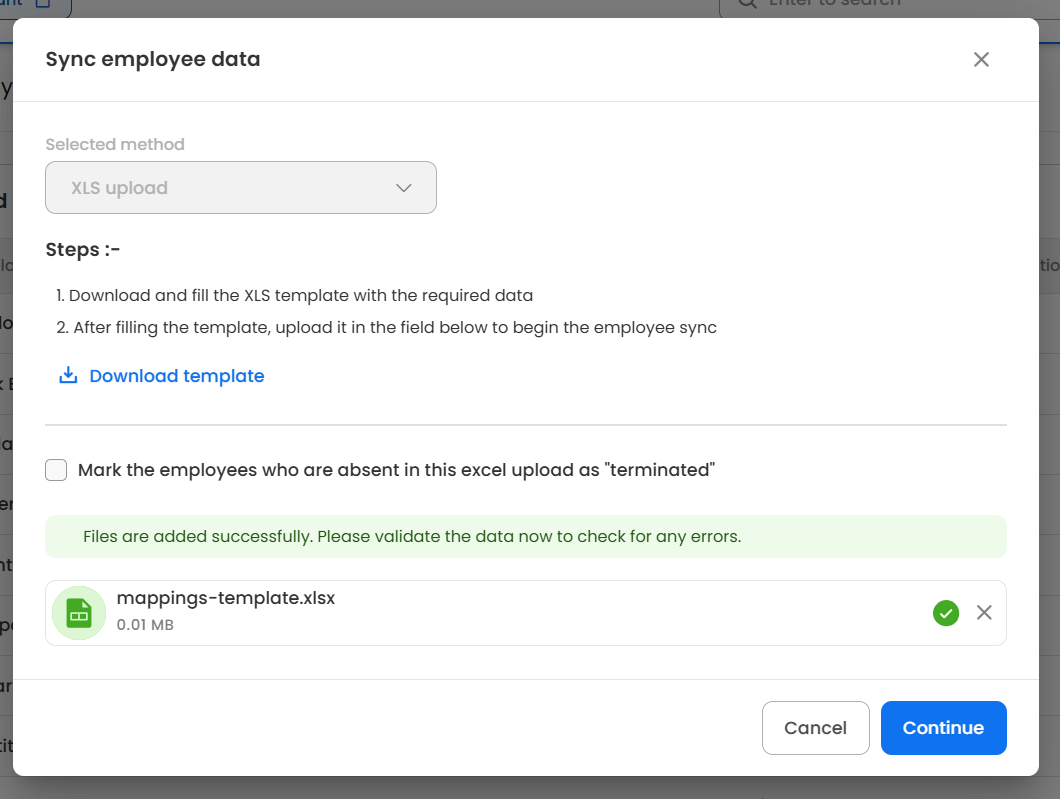
- Check the "Terminate absent employees" option — If enabled, any employees currently in Leena AI who are not present in your uploaded file will be marked as Terminated after the sync completes.
-
Click Continue to upload. The system accepts
.xls,.xlsx, and.csvfiles up to 50 MB.
Important: Only upload one file at a time. The upload replaces the previous temporary data.
Step 4: Validate the Data
After upload, the system automatically validates your data against the field mapping rules:
- Mandatory checks: Ensures required fields are not empty.
- Uniqueness checks: Identifies duplicate values within the file for fields marked as unique.
- Type validation: Checks formatting for phone numbers (regex), dates (format string), emails (including domain restrictions), booleans, and numbers.
Validation outcomes:
| Outcome | What It Means |
|---|---|
| All fields mapped successfully | Headers matched perfectly. You can proceed to sync. |
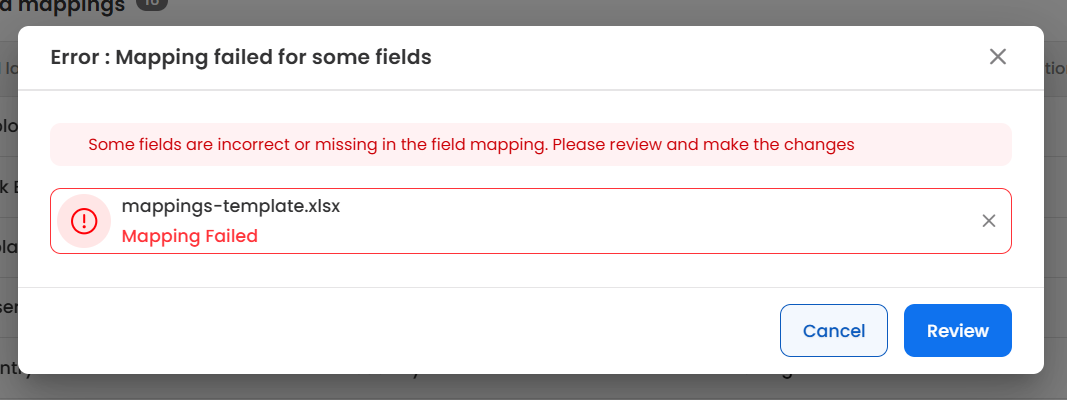
| Mapping failed / Errors found | Some columns didn't match, or row-level validation errors were found. You must review before syncing. |
Step 5: Review and Resolve Errors
If validation produced errors:
-
Click Review to open the validation results screen.
-
You will see a table of your uploaded employee records. Rows or cells with errors are highlighted with a warning icon — hover over it to see the specific error message.
-
Use the filter chips (All, No Errors, Error) to focus on problematic rows.
-
You can also Download the error-annotated spreadsheet — this adds an
errorFieldscolumn showing which fields failed validation and why.
To resolve errors, you have two options:
- Fix and re-upload: Correct the issues in your spreadsheet offline and upload a new file.
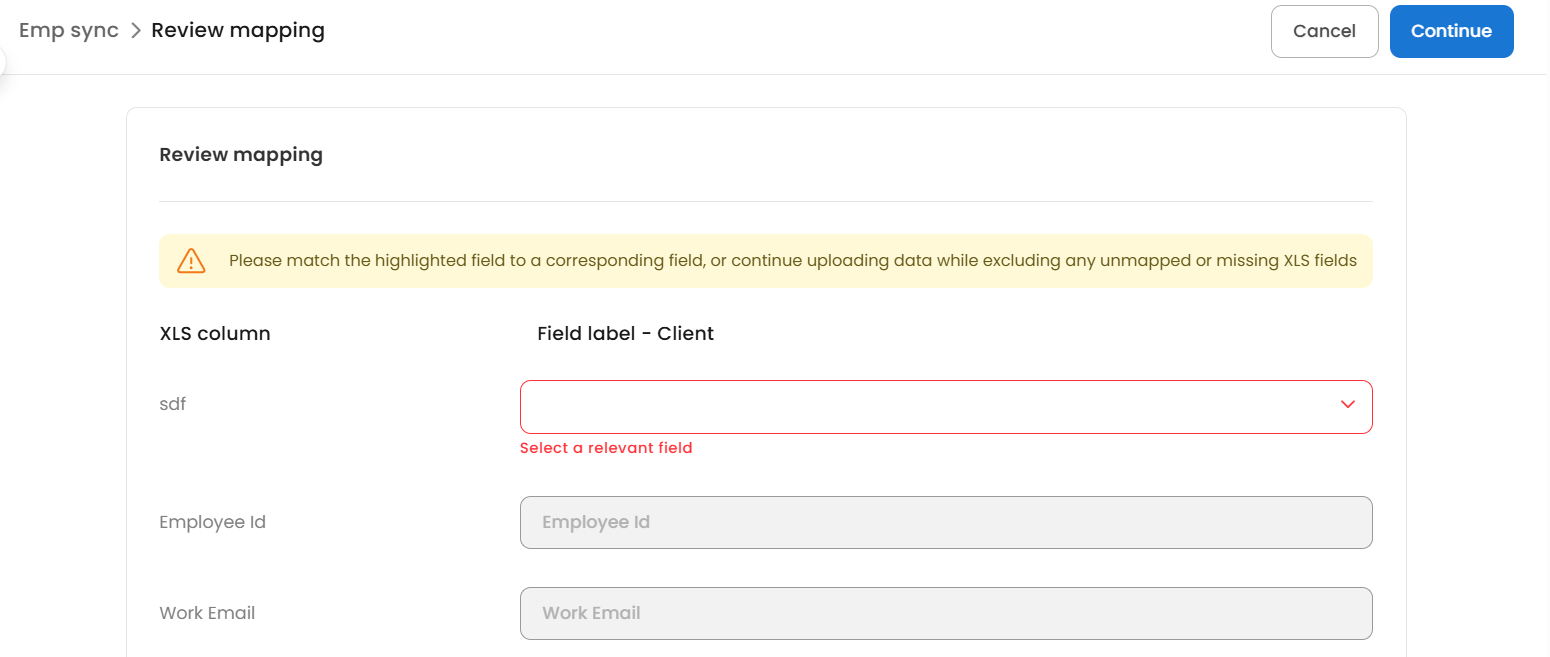
- Remap fields: If column headers didn't match your mapping, use the Review Mapping interface to manually link columns to Leena fields for this specific upload.
Step 6: Sync to the Employee Database
Once validation passes (or you choose to proceed with partial data):
-
Click Save or Continue to trigger the sync.
-
If there are some rows with errors, a confirmation dialog will inform you that only records without errors will be synced. Confirm to proceed.
-
The system splits your data into batches of 1,000 records and processes them asynchronously in the background.
-
You will be redirected to the Sync History tab.

Note: During sync, if "Terminate absent employees" was checked, any employees in the Leena AI database who are not present in the uploaded file will be marked as Terminated once all batches are processed. A safety guard prevents mass termination — if more than 15% of active employees would be terminated, the operation is paused.
Step 7: Validate Results
- Sync History: Check the status of your sync run. You will see:
| Column | Description |
|---|---|
| Synced on | Date and time of the sync. |
| Type | Always "Excel" for file-based syncs. |
| Cause | Manual (user-initiated upload). |
| Status | Successful, Sync with Errors, or In Progress. |
| Stats | Total records, Added, Modified, Failed, and Terminated counts. |
- Employee Data: Browse the Active and Terminated employee lists. Use search and sorting to spot-check specific records and confirm the sync updated data as expected.
6. Field Type Validation Rules
The following validation rules are applied based on the field type configured in your mapping:
| Field Type | Validation Applied |
|---|---|
| String | No special validation. |
| Number | Must be a valid numeric value. |
Must be a valid email format. Optionally restricted to specific domains (e.g., @company.com). | |
| Phone | Validated against the regex pattern defined in the field's validations. |
| Date | Must match the date format string configured in the mapping (e.g., yyyy-MM-dd). |
| Boolean | Accepts common truthy/falsy values: true, false, 1, 0, yes, no, y, n. |
7. Monitoring & Troubleshooting
7.1 Common Issues
| Issue | Cause | Resolution |
|---|---|---|
| "Header validation failed" | Column headers contain . or $, or are empty. | Rename headers to remove special characters and ensure no blank headers. |
| Rows marked as errors | Mandatory fields missing, incorrect data type, or duplicate unique values. | Download the error file, fix the flagged rows, and re-upload. |
| Sync stuck "In Progress" | A batch worker may have failed and exhausted retries. | Use the Change Sync Status option (admin utility) to mark the run as "Sync with Errors" so a new sync can start. |
| Mass termination blocked | Over 15% of employees would be terminated. | Verify your file is complete. If correct, contact your implementation team to override the safety threshold. |
7.2 Sync History Checks
Regularly monitor the Sync History tab to confirm:
- Sync runs completed as expected.
- The Status is "Successful" and the employee count aligns with your source data.
- The Added, Modified, and Terminated counts match your expectations.
8. Important Notes
- Data Retention: Raw uploaded data is automatically purged 7 days after upload, provided the sync has completed.
- Mapping Versions: Every time you save a mapping change, a new version is created. You can always restore a previous version.
- One Sync at a Time: Only one sync can be in progress per bot. If a sync is already running, you must wait for it to complete before starting a new one.
- Terminate Absent Employees: This is a powerful option — use it carefully. If your file is incomplete or filtered, employees missing from the file will be terminated in the system.
Updated about 2 months ago