Report Configuration
Report Types
Dashboard Reports
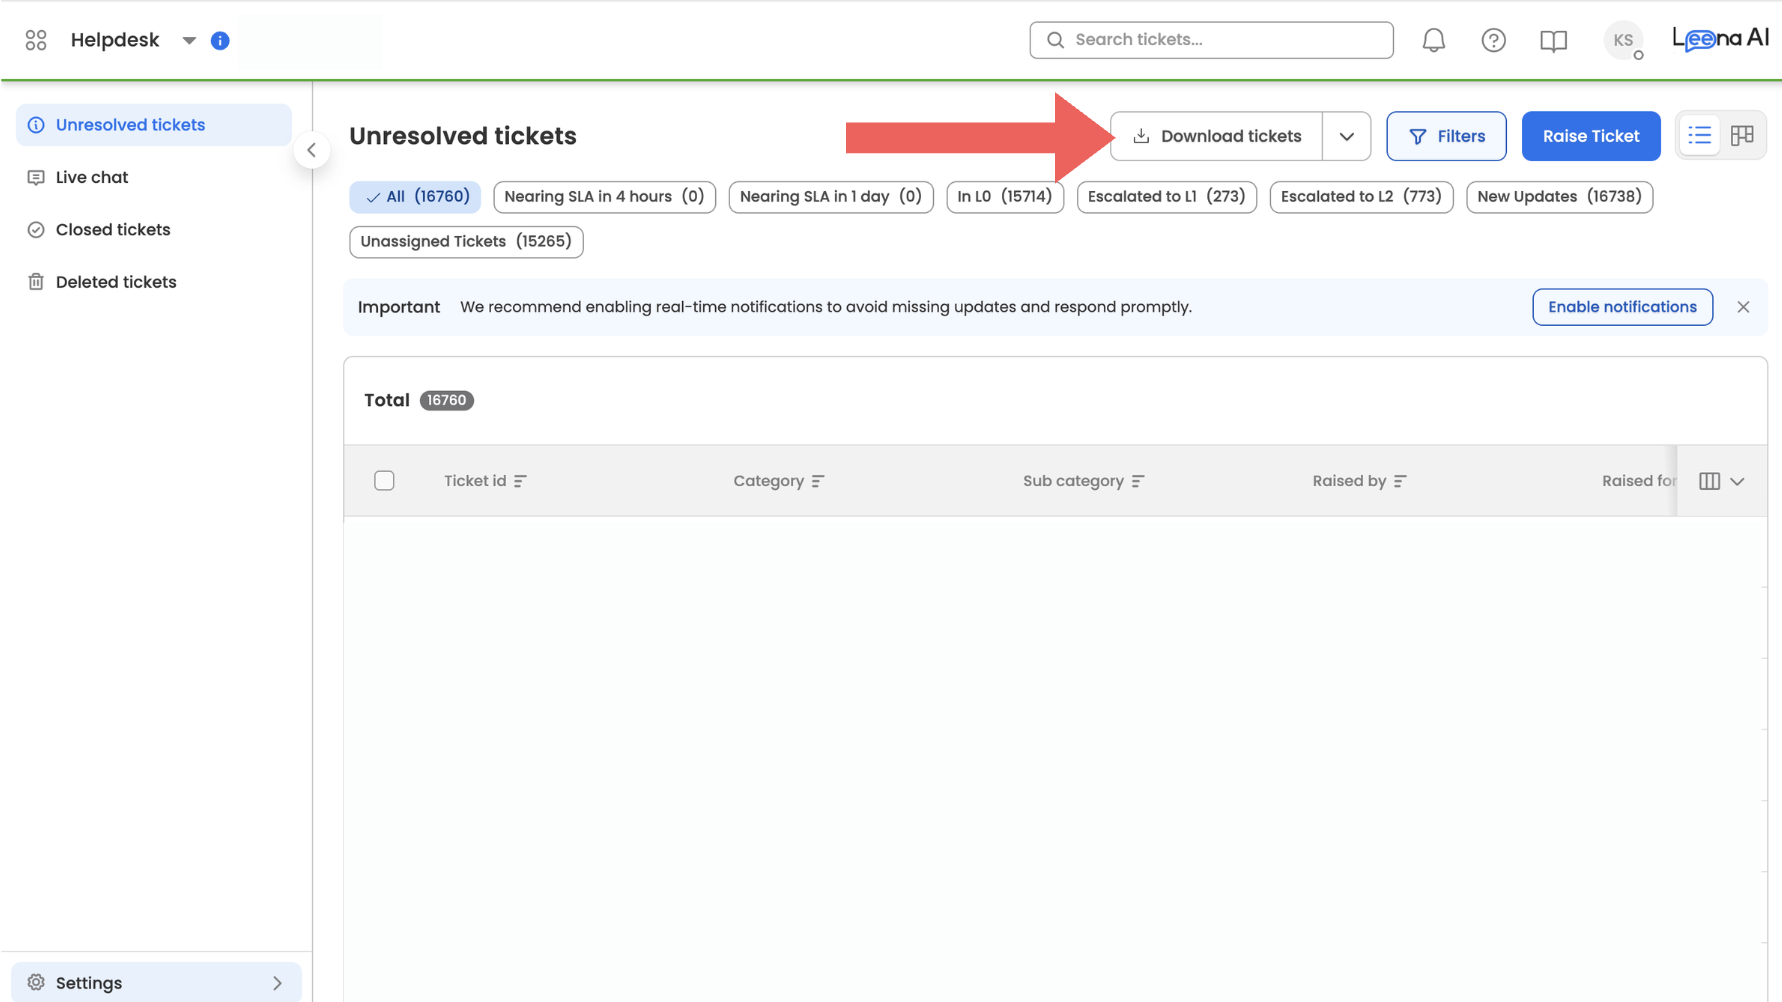
Dashboard Reports refer to the reports that can be downloaded directly from the Helpdesk Dashboard using the “Download Tickets” option.
These reports allow users to export ticket data based on the current filters and views applied on the dashboard.
Downloading Dashboard Reports
Users can download dashboard reports by:
- Navigating to the Helpdesk Dashboard
- Applying the required filters or date ranges (optional)
- Clicking the Download Tickets option
Behavior
- The downloaded report respects the filters, groups, and date ranges applied on the dashboard
- Additional columns configured by admins may be included in the downloaded report
- These additional columns do not affect the dashboard interface and appear only in the exported file
Custom Reports
Custom Reports are designed for advanced and detailed reporting needs.
They allow admins to configure reports with:
- Custom fields and columns
- Filters and conditions
- Scheduled report delivery
Custom Reports can also be scheduled to be automatically sent to specific users at defined intervals, making them useful for operational reviews, leadership reporting, or compliance needs.
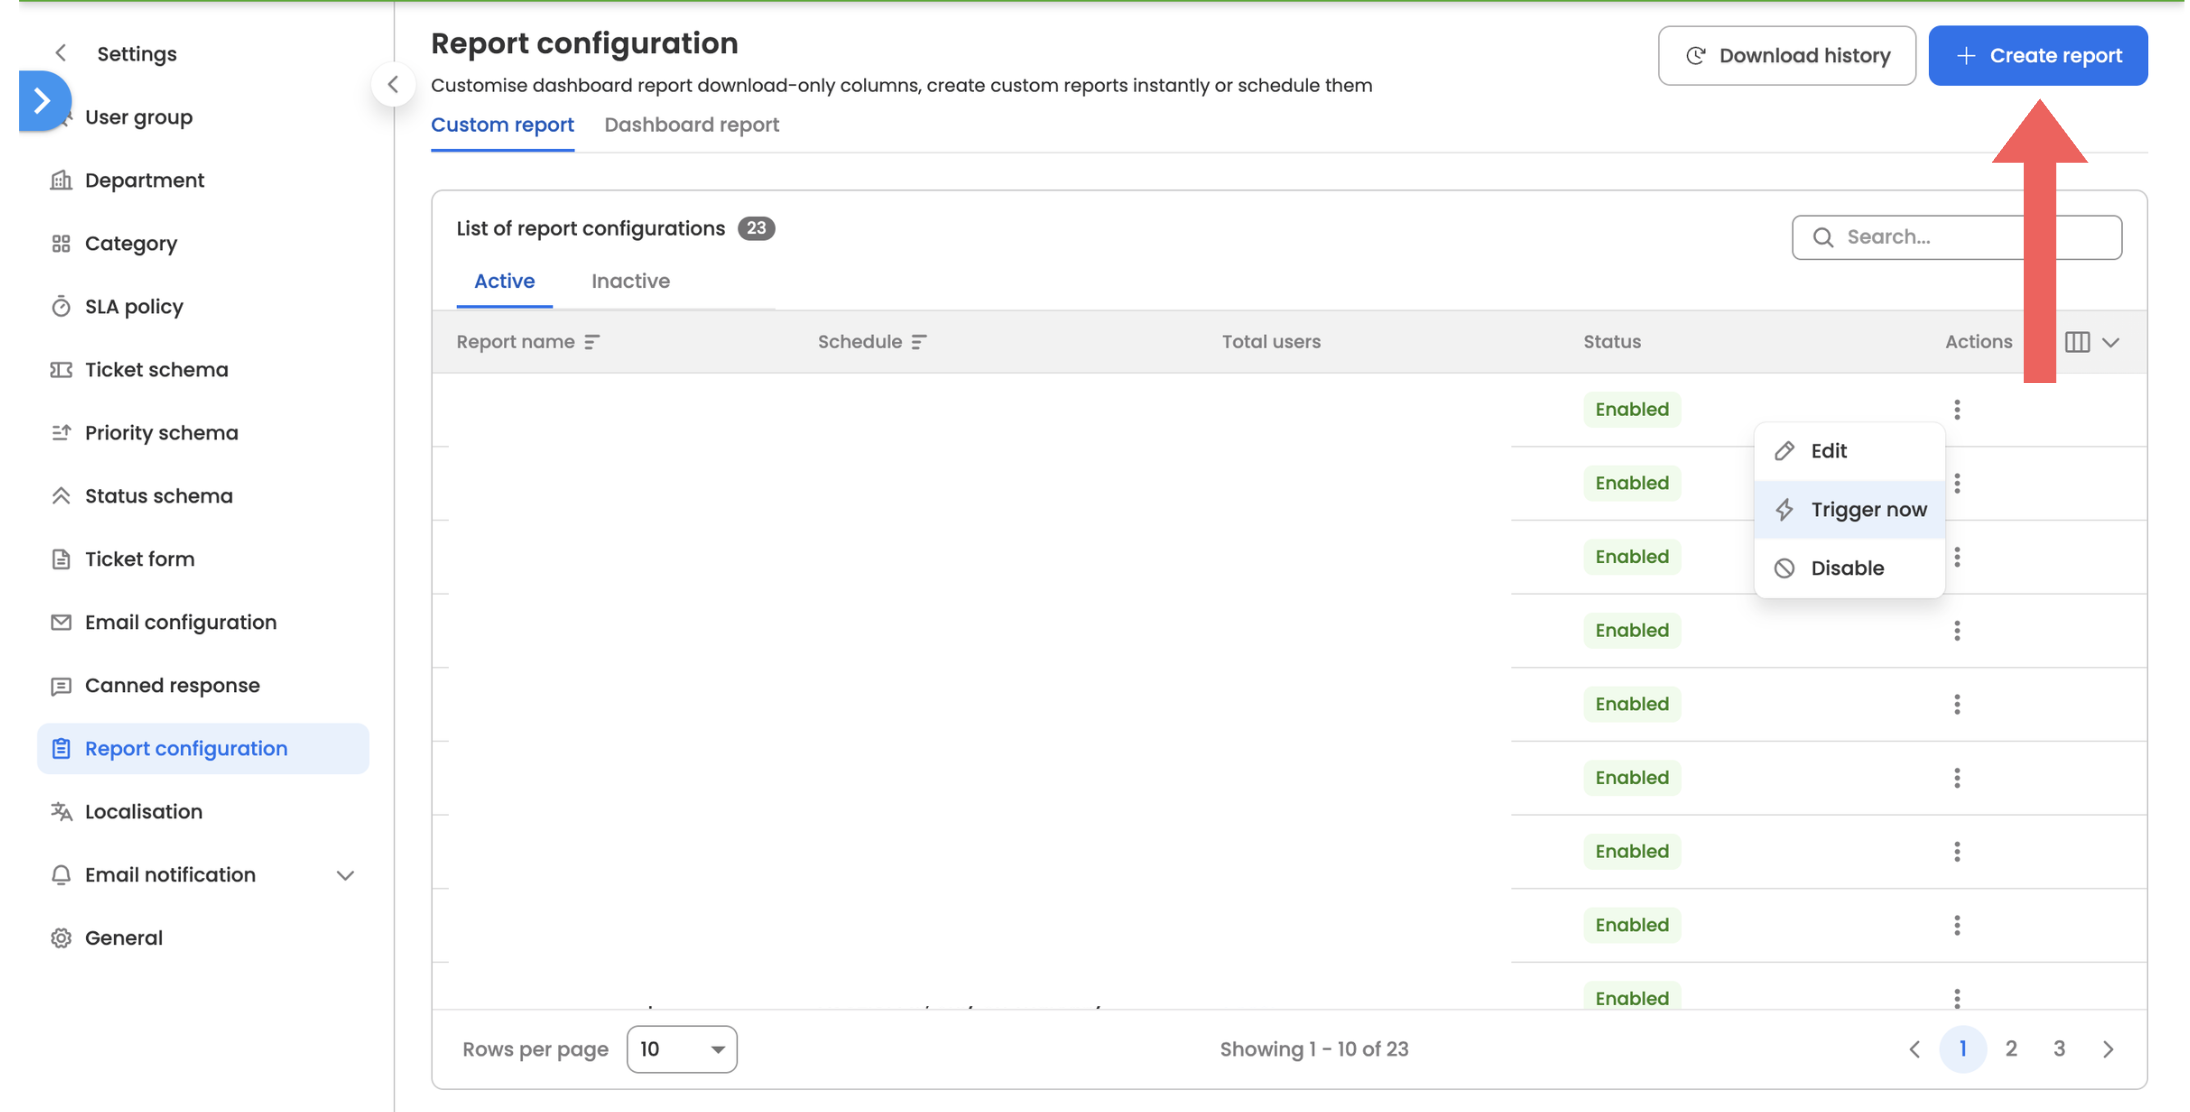
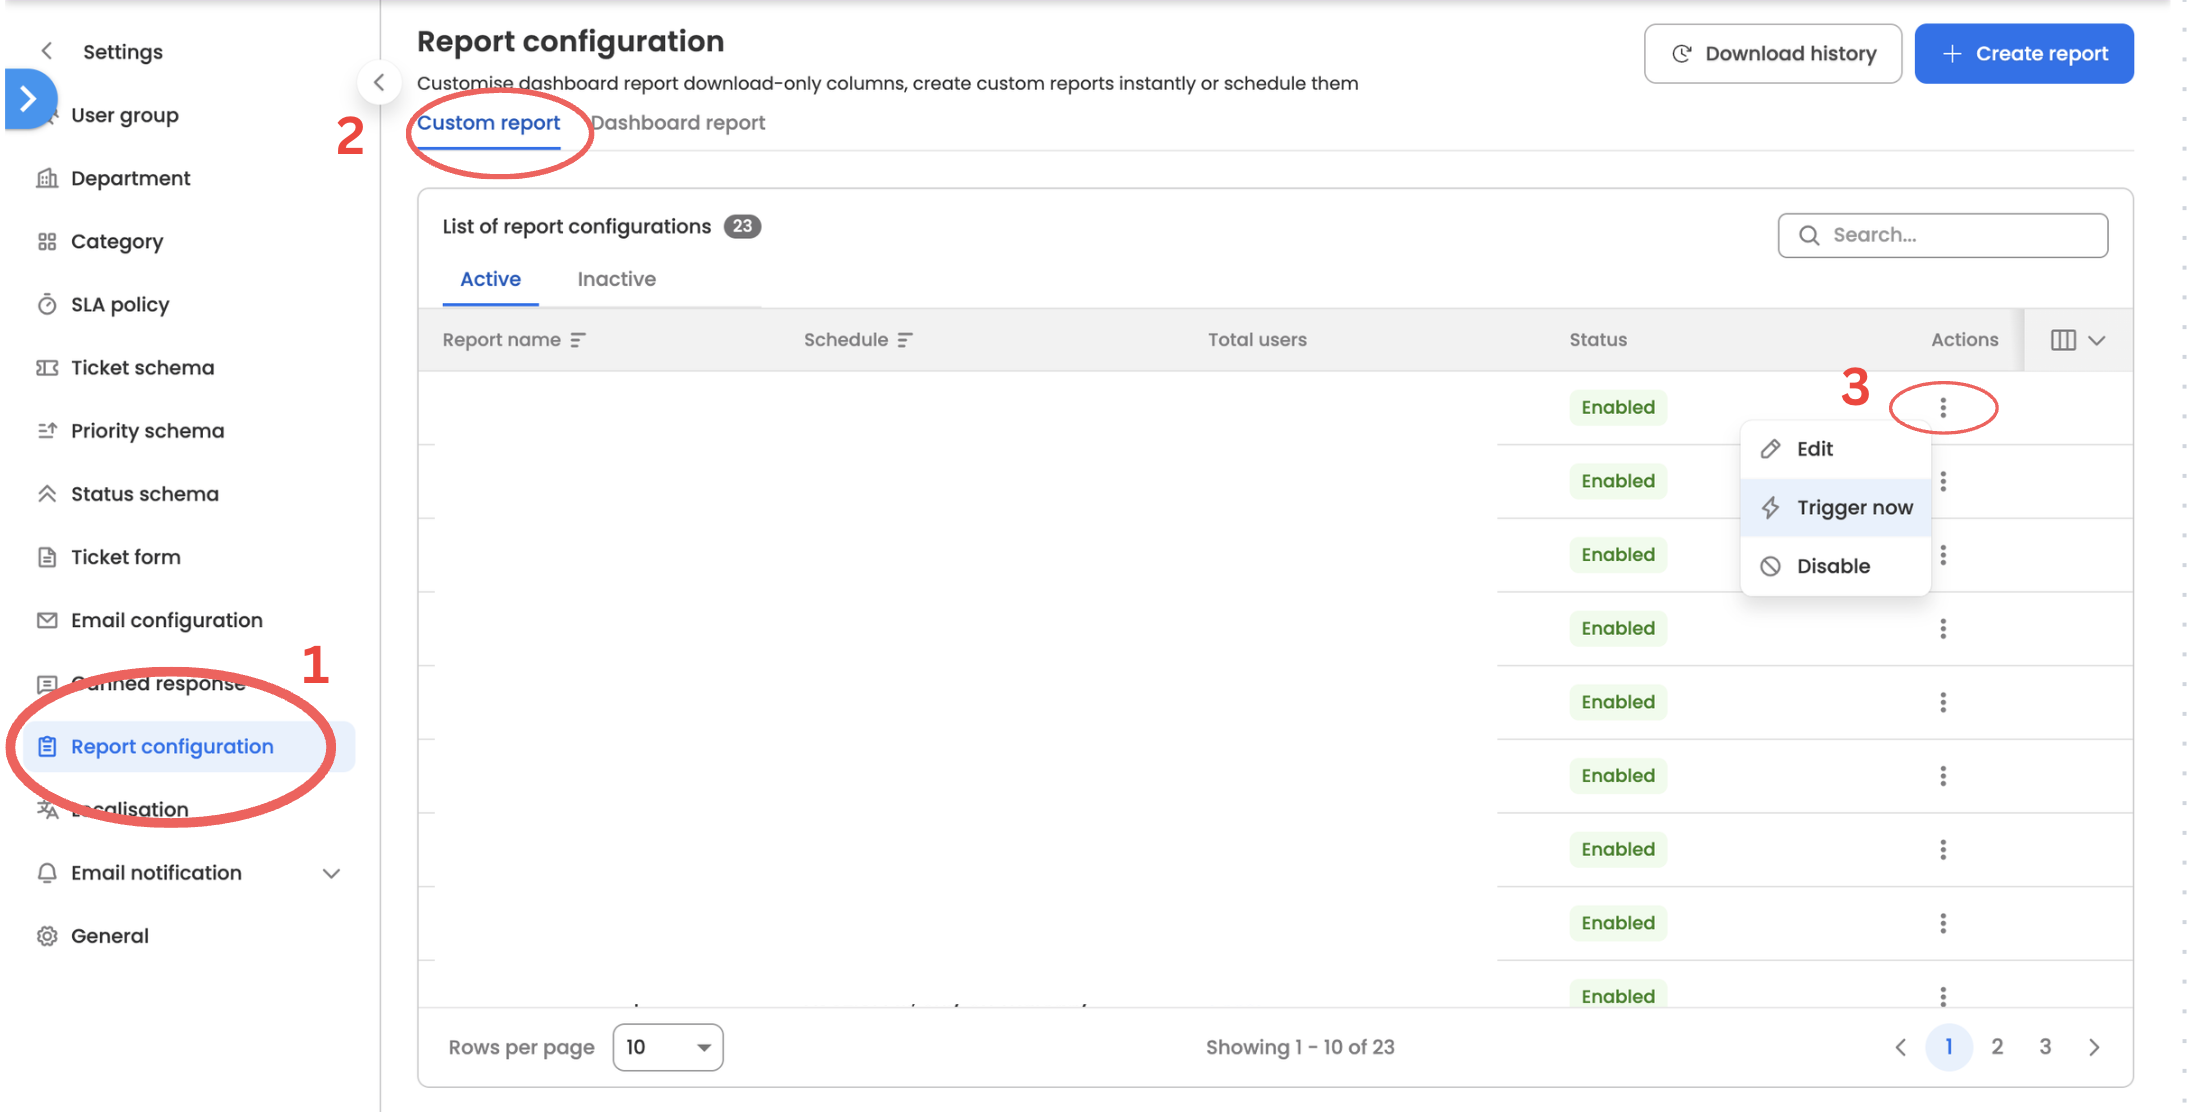
Trigger Custom Reports Instantly
Custom Reports support an on-demand download capability, allowing users to generate reports immediately using an existing configuration.
Steps to Instant Trigger a Custom Report
- Navigate to Report Configuration
- Open Custom Reports
- Select the desired report configuration
- Click on the three dots then click onTrigger Now
Behavior
- The downloaded report uses the same filters, columns, and logic defined in the report configuration
- Existing scheduled report deliveries remain unchanged
- Triggering a report manually does not modify or override scheduled reports
Configuration
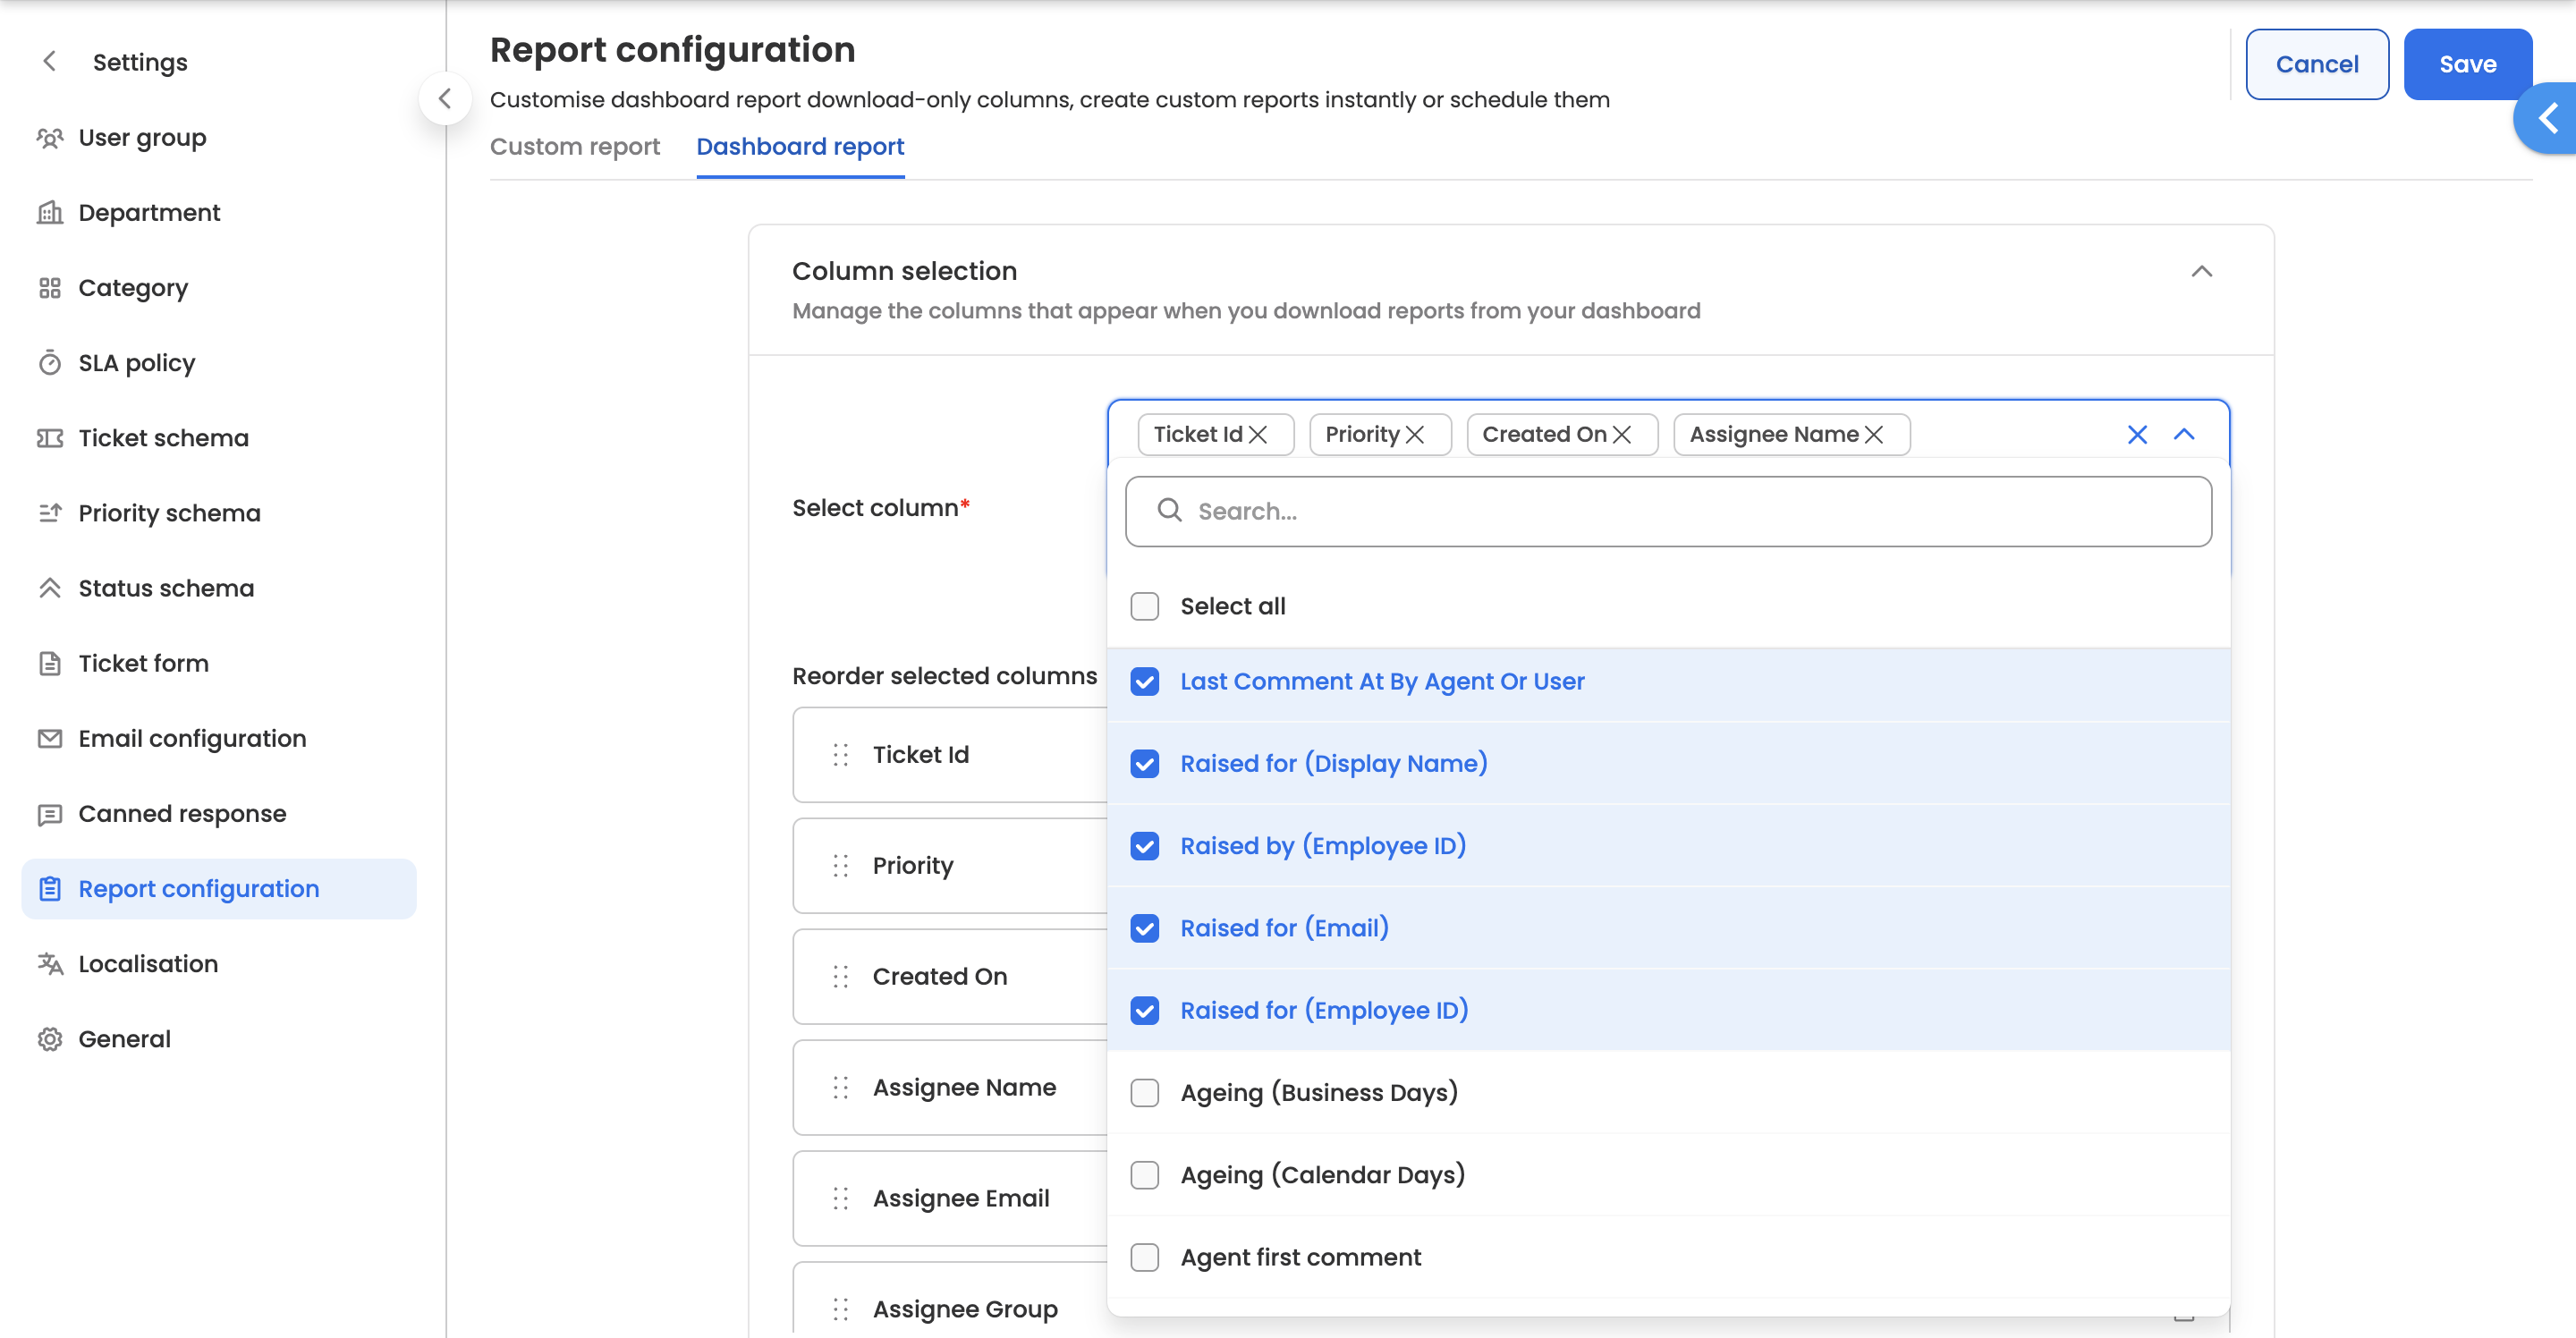
Configuring Columns for Dashboard Report Downloads
Admins can configure which fields should appear when a Dashboard Report is downloaded.
Steps
- Go to Settings
- Navigate to Report Configuration
- Select the Dashboard Report configuration
- Select the columns that should appear in downloaded reports and arrange them in the desired order
- Save the configuration
Important
- The selected columns will appear only in downloaded reports
- They will not change or affect the dashboard view
This allows admins to include more detailed information in exports without impacting the dashboard experience.
Creating a Custom Report
Admins can create Custom Reports to generate detailed reports based on specific configurations.
Steps
- Go to Report Configuration
- Navigate to Custom Reports
- Click on Create Report
- Fill in the required fields and configure the report as needed
- Click Create to save the report configuration