
Additional settings
Introduction
Additional settings is a group of advanced configuration pages for the onboarding module, collected under the Additional Settings section (gear icon) in the onboarding settings navigation. Use these pages to fine-tune how candidate data is mapped, how the dashboard behaves, what emails and reminders go out, how documents are handled, and more.
Additional settings is available in onboarding only; the group isn't shown in offboarding settings.
The group contains the following pages:
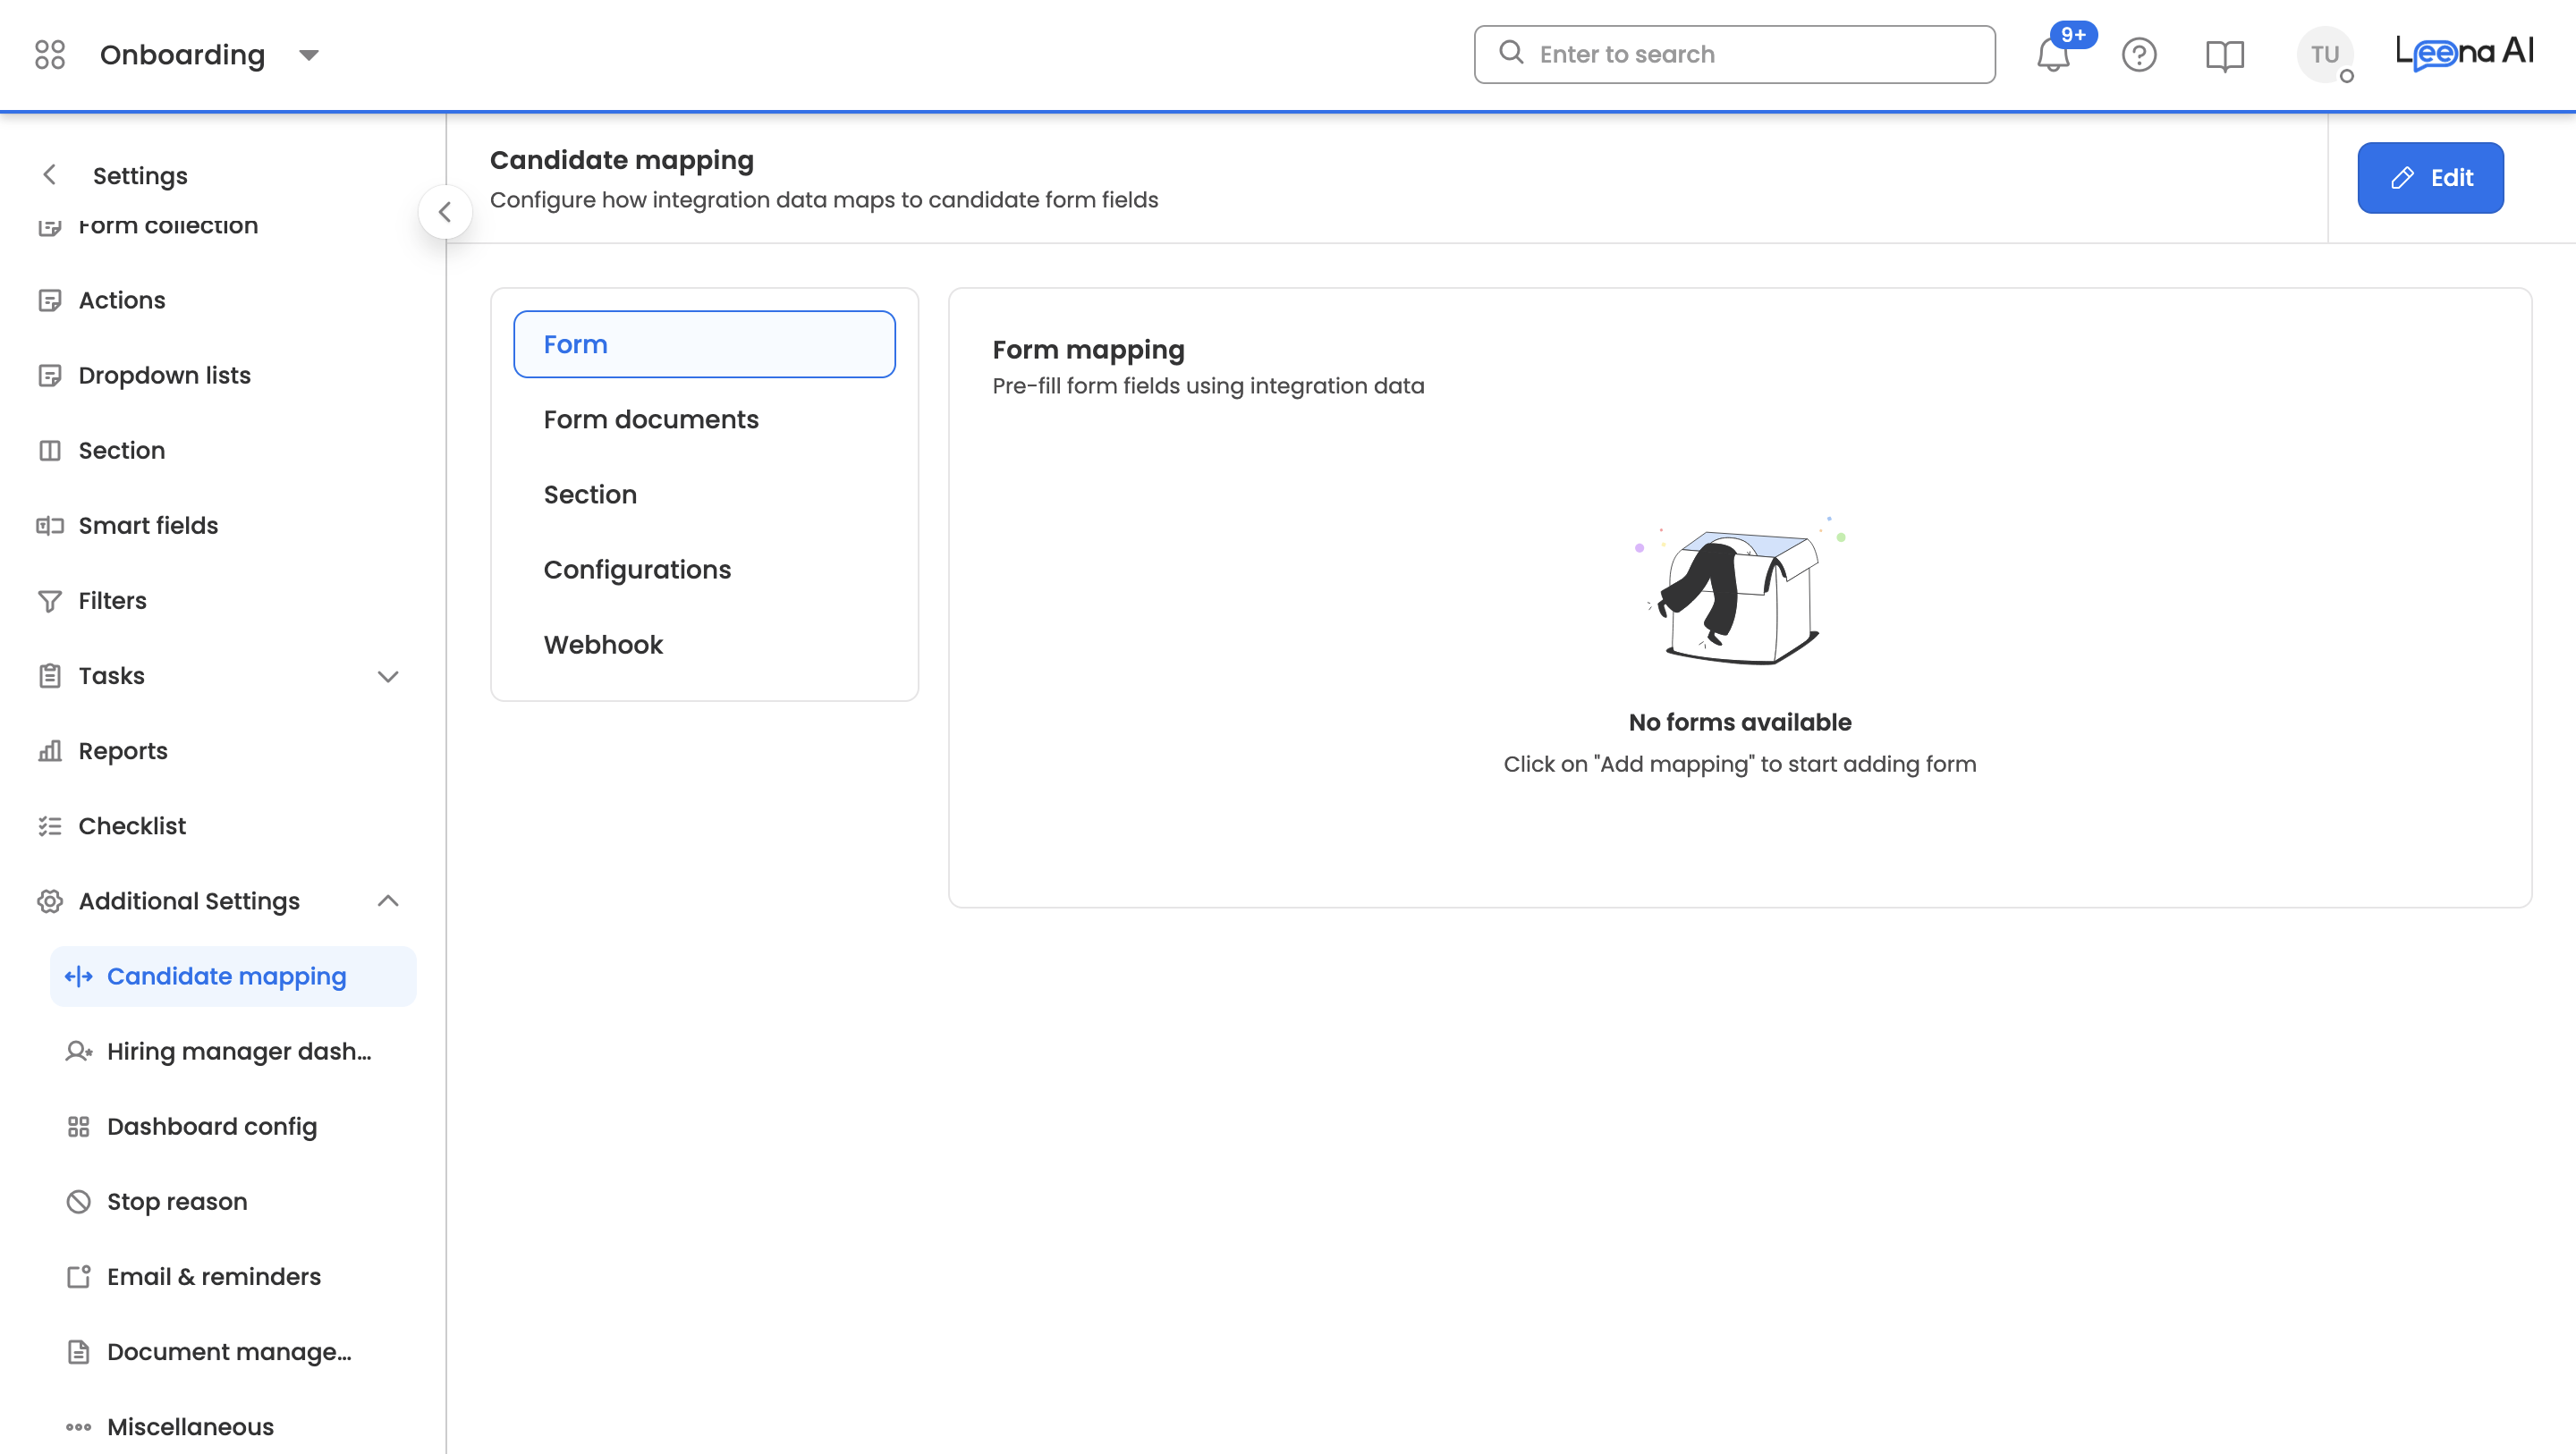
- Candidate mapping — Configure how integration data maps to candidate form fields.
- Hiring manager dashboard — Set up a webview for hiring managers to monitor candidate onboarding progress.
- Dashboard config — Customise columns, status mapping, re-initiate behaviour, and Excel templates for the candidate dashboard.
- Stop reason — Build the form candidates and admins use when onboarding is stopped.
- Email & reminders — Configure emails and reminders at various stages in the journey.
- Document management — Control how onboarding documents are collected, stored, and delivered to candidates.
- Miscellaneous — General configuration settings for onboarding workflows and integrations.
How these settings pages work
Most Additional settings pages (all except Stop reason) share the same view → edit → draft → publish model, so once you learn one, you know them all.
Layout
Each page opens in a read-only view of the currently published configuration. The page has a left-hand vertical navigation listing that page's sections, and a content panel on the right showing the selected section's fields. A subtitle under the page title explains what the page controls.
View and edit
- Edit: In read-only view, click Edit (top-right) to start making changes.
- Cancel: Discards unsaved edits and returns to the read-only view.
- Draft badge: When a page has unpublished draft changes, a Draft status pill appears next to the page title.
Save, publish, and discard
While editing, the following actions are available in the header:
- Save as draft: Saves your changes as a draft without making them live. You can come back and continue editing later.
- Publish: Makes your changes live. A confirmation appears ("This will make your changes live…") before publishing. After publishing, the page returns to read-only view.
- Discard draft: Available from the three-dot menu. Permanently deletes the current draft and reverts to the published version. A confirmation appears ("This will permanently delete this draft. This can't be undone.") before discarding.
Switch between the sections in the left navigation at any time; each section keeps its values while you move around, and Save as draft / Publish apply across the whole page.
Candidate mapping
Configure how integration data maps to candidate form fields. This page has five sections.
Form
Pre-fill form fields using integration data. Mappings are managed as a list — click Add mapping to open the detail screen, and open any existing row to edit it (or delete it). Each mapping has:
- Form name (required): The form this mapping applies to.
- Mapping (required): A JSON object of key/value pairs used to pre-fill the form (for example,
{ "status": "approved" }). It must be valid JSON. - Skip approved candidates (default off): When on, forms that are already approved are skipped for pre-fill data.
- Status function (optional): A JavaScript function used to evaluate the approval state — for example, a function that returns
truewhendata.status === "approved".
Form documents
Map documents using integration data. This works exactly like Form (a list of mappings with the same fields — Form name, Mapping, Skip approved candidates, and Status function), but the mappings apply to documents rather than form data.
Section
Update candidate profile section data with integration data. It has two lists:
- Field mapping (click Add mapping): Each row maps one profile field to integration data.
- Section key (required): The profile section field to fill with integration data.
- Integration value / Integration label: The integration key value (required) and label that populate the selected section key.
- Date format mapping (click Add mapping): Converts date formats between the integration and how they're stored. Each row has:
- Input format: The format the date arrives in from the integration — one of
MMM-DD-YYYY,DD-MM-YYYY,MM-DD-YYYY,DD-MMM-YYYY,YYYY-MM-DD. - Input integration key: The section key the format applies to.
- Output format: The format the date is saved in — same options as Input format.
- Input format: The format the date arrives in from the integration — one of
Configurations
Additional candidate-mapping behaviour:
- Allow rehire (default off): Treats a user as a new candidate when data comes from an integration with a different user ID.
- Unique key: A section key used to identify a unique candidate, if you don't want to use the default user ID.
- Allow data update on sync (default off): Allows existing candidate data to be updated on sync.
- Default status of new candidate: The status a newly synced candidate starts in — Pending or In-progress.
- Re-initiate stopped candidate (default off): When on, any stopped candidate coming from sync is re-initiated, and reveals:
- Section key: The field used to evaluate the re-initiate condition.
- Difference in days (default 1): The day threshold for the condition.
- Status: The candidate status that triggers re-initiation.
- Reset actions (default off): Allows actions that normally run once to be triggered again.
Webhook
Configure webhooks for candidate data. There are two blocks with identical structure:
- Webhook import — Configure the API endpoint to pull candidate data into the form.
- Webhook mapping — Map the webhook response fields to candidate form sections.
Each block contains:
- Select method (required):
GET,POST,PUT,PATCH, orDELETE. - Enter request URL (required): The endpoint to call.
- Headers / Params / Body (tabbed):
- Headers and Params: Add name/value pairs.
- Body: Choose Add body =
NONEorJSON; whenJSON, a JSON payload code editor appears.
Hiring manager dashboard
Set up a webview that lets hiring managers monitor candidate onboarding progress. Three sections.
Basic
Set the manager email key and page header for the webview:
- Hiring manager emails (required): One or more section keys that map to manager email addresses (multiple supported).
- Page heading (required, max 50 characters): The heading of the webview page.
- Page sub-heading (max 50 characters): The sub-heading of the webview page.
Status chart
Configure the status pie chart:
- Heading (required, max 50 characters): Heading of the chart section.
- Sub-heading (max 50 characters): Sub-heading of the chart section.
- Status field (required): The section key that holds the candidate's status.
- Status mapping (click Add status; rows are draggable): Defines how status values are displayed. Each row:
- Status (required, must be unique): The raw status value (for example,
SUBMITTED). - Display name (required, must be unique): The label shown in the chart.
- Color (required): The colour used for that status in the chart.
- Status (required, must be unique): The raw status value (for example,
Candidates list
Configure how the candidate list looks in the webview:
- Candidate profile photo key (required): The section key that holds the candidate's profile photo.
- Fields (click Field to add): The columns shown in the list. Each column:
- Field (required, must be unique): The section field to display.
- Display name (required): The column label.
- Type (required):
URL,Employee,Status,Date, orString. - Sort key: The field used when sorting on this column.
- URL label (shown only when Type =
URL, required): The label for the URL.
Dashboard config
Customise how the candidate dashboard looks and behaves. Four sections.
List page columns
The columns visible on the candidate listing pages; drag to reorder. Click Add column to add one. Each column:
- Label (required, max 50 characters): The column header text.
- Field (required): The underlying dashboard field.
- Field type (required):
String,Percentage,Date,Enum, orURL. - URL label (shown only when Field type =
URL, required): The label for the URL.
Status mapping
Map the candidate statuses used in the journey to how they display on the dashboard. Click Add to add a row (rows are draggable). Each row:
- Status (required): The candidate status.
- Type (required): The display style —
Success,Primary,Error, orAcknowledged. - Label (required): The text shown for the status.
Re-initiate settings
Control what happens when onboarding is re-initiated for a candidate:
- Actions (required): One or more actions allowed to re-trigger.
- Delete keys: Section keys to delete on re-trigger.
- Forms (click Add form; rows are draggable): The action taken on each form when onboarding is re-initiated. Each row:
- Form (required): One or more forms.
- Action type (required):
Delete entire dataorUpdate status. - Status to update (shown only when Action type =
Update status, required):Pending,Approved,Asked for Re-Submitting, orNot Submitted.
Excel templates
The endpoints used to add or update candidate data via Excel import:
- Add new candidate URL (required): The endpoint called when a new candidate is created via Excel import.
- Update existing candidate URL (required): The endpoint called when an existing candidate record is updated via Excel import.
Stop reason
Build the form used to capture why a candidate's onboarding is stopped. Unlike the other Additional settings pages, Stop reason uses the form builder (the same builder used elsewhere for onboarding forms) rather than the view/draft/publish model described above. The fields and reasons you configure here appear when a candidate's onboarding is stopped from the dashboard.
Email & reminders
Configure the emails and reminders sent at various stages of the journey. Two sections.
Form action templates
Three email triggers, each shown as a card with a Send mail toggle (off by default). When a toggle is on, it reveals a Template (required) and a Subject (required, max 100 characters) for that email:
- Form resubmit: Sent when an employee resubmits a form.
- Form approval: Sent when a form is approved by a reviewer.
- Bulk user documents: Sent when documents are shared with a group of employees in bulk.
Mail change communication
The email sent to a candidate when their onboarding email is changed. It uses the standard email block:
- Template (required): The base template used to format and style the email.
- Subject (required, max 100 characters): The subject line shown in the recipient's inbox.
- To / Cc / Bcc: Recipients, entered as email chips alongside a section key.
- Attachments: One or more files attached to the email.
Document management
Control how onboarding documents are collected, stored, and delivered to candidates. Three sections.
DMS
Enable document management system integration for syncing documents:
- Document sync (toggle): Automatically syncs completed onboarding documents to your connected DMS. When on, it reveals:
- DMS bot ID (required): The DMS bot to sync into.
- Folder mapping (click Add folder mapping): Maps document/upload fields into DMS folders. Each row:
- Folder: The destination folder (pulled from the DMS bot you entered).
- Form field: The document or upload form field to map (only document/upload fields are selectable).
- Access type: The access level for the synced document.
- Expired after (in days): Optional expiry in days.
Bulk download folders
The folder names used when documents are downloaded in bulk. Both lists support dynamic variables like {{candidate_name}} in folder names.
- User-level folder name (click Add folder name): One name per entry — each appears as a downloadable folder per user.
- Form-level folder name (click Add folder name): One name per entry — each appears as a downloadable folder per form.
Other settings
- Enable DocuSign:
- Auth settings (toggle): Controls how candidates verify their identity before signing documents. When on, it reveals:
- DocuSign for signature (toggle): Use DocuSign to collect e-signatures. When off, documents are sent without signature workflows.
- Auth settings (toggle): Controls how candidates verify their identity before signing documents. When on, it reveals:
- Auto rename document:
- Auto rename (toggle): Generated documents are automatically renamed when created.
Miscellaneous
General configuration settings for onboarding workflows and integrations. Three sections.
General
- Workflow version: The onboarding workflow version —
v0orv1. - Workflow bots: Bot IDs (entered as chips) used to execute workflows on other bots using this bot.
- Form templates URL: A URL pointing to downloadable form templates (must start with
http://orhttps://).
Employee data sync condition
Controls which employees are synced from the channel to integration users.
- Sync type:
Section Key,Candidate status, orTask Status. The selection reveals type-specific configuration:- Section Key → Section key (the employee attribute used to filter who gets synced), Include values (employees matching these values are synced), and Exclude values (employees matching these values are skipped).
- Candidate status → Status: The candidate status to sync on.
- Task Status → Task: The task whose status controls the sync.
Execute tasks on stopping onboarding
- Enable task execution on stop (toggle): When on, a selected task runs automatically when an onboarding is stopped, and reveals:
- Task to trigger (required): The task to run when onboarding is stopped.
Updated 3 months ago