
Checklist
Introduction
Checklist settings act as a central hub for managing the checklist that candidates use to track their onboarding (or offboarding) tasks. A checklist bundles the items a candidate needs to complete — forms, notifications, workflows, and similar tasks — into a single, ordered list, and gives you a shareable URL you can hand to candidates.
Each checklist is made up of:
- An Identifier that names the checklist (set once, at creation).
- An ordered set of tasks pulled from your configured forms, notifications, and workflows. The order you set is the order candidates see.
- Optional custom messages for form tasks, shown to candidates based on their form status.
Checklists are available in both onboarding and offboarding settings. The steps below use onboarding; the offboarding flow is identical, under offboarding settings.
Add a new checklist
Here's how to add a new checklist:
-
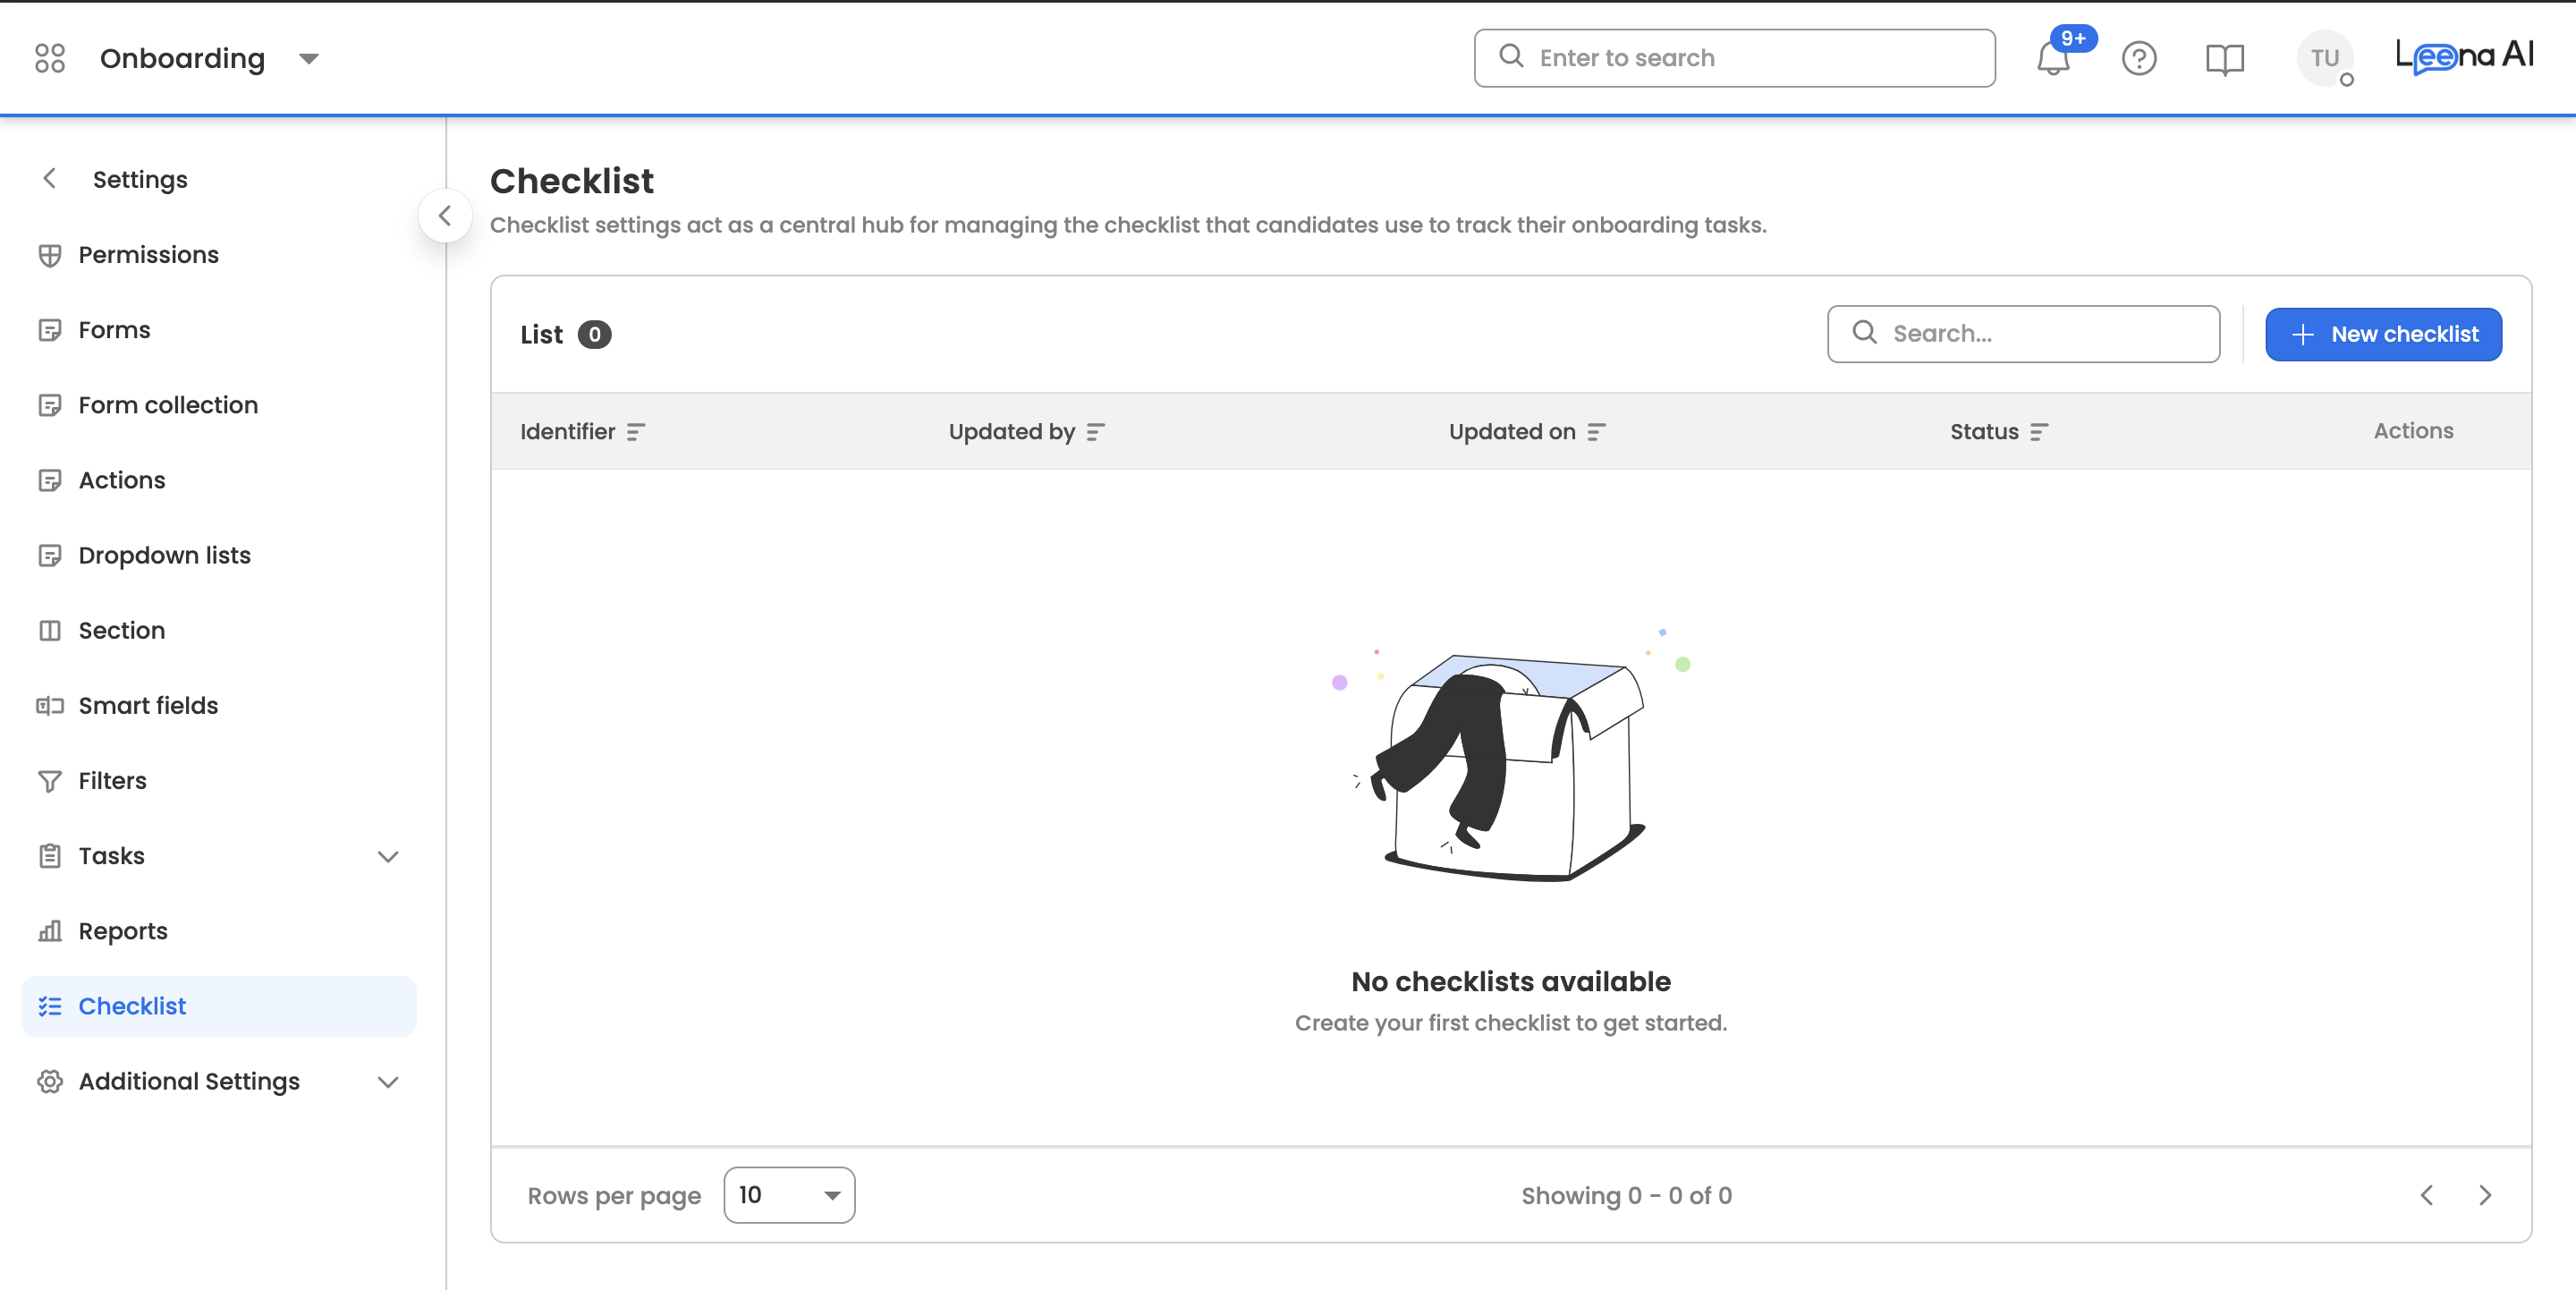
Go to Checklist within the onboarding settings.
-
Click the New checklist button located at the top-right corner of the table.
-
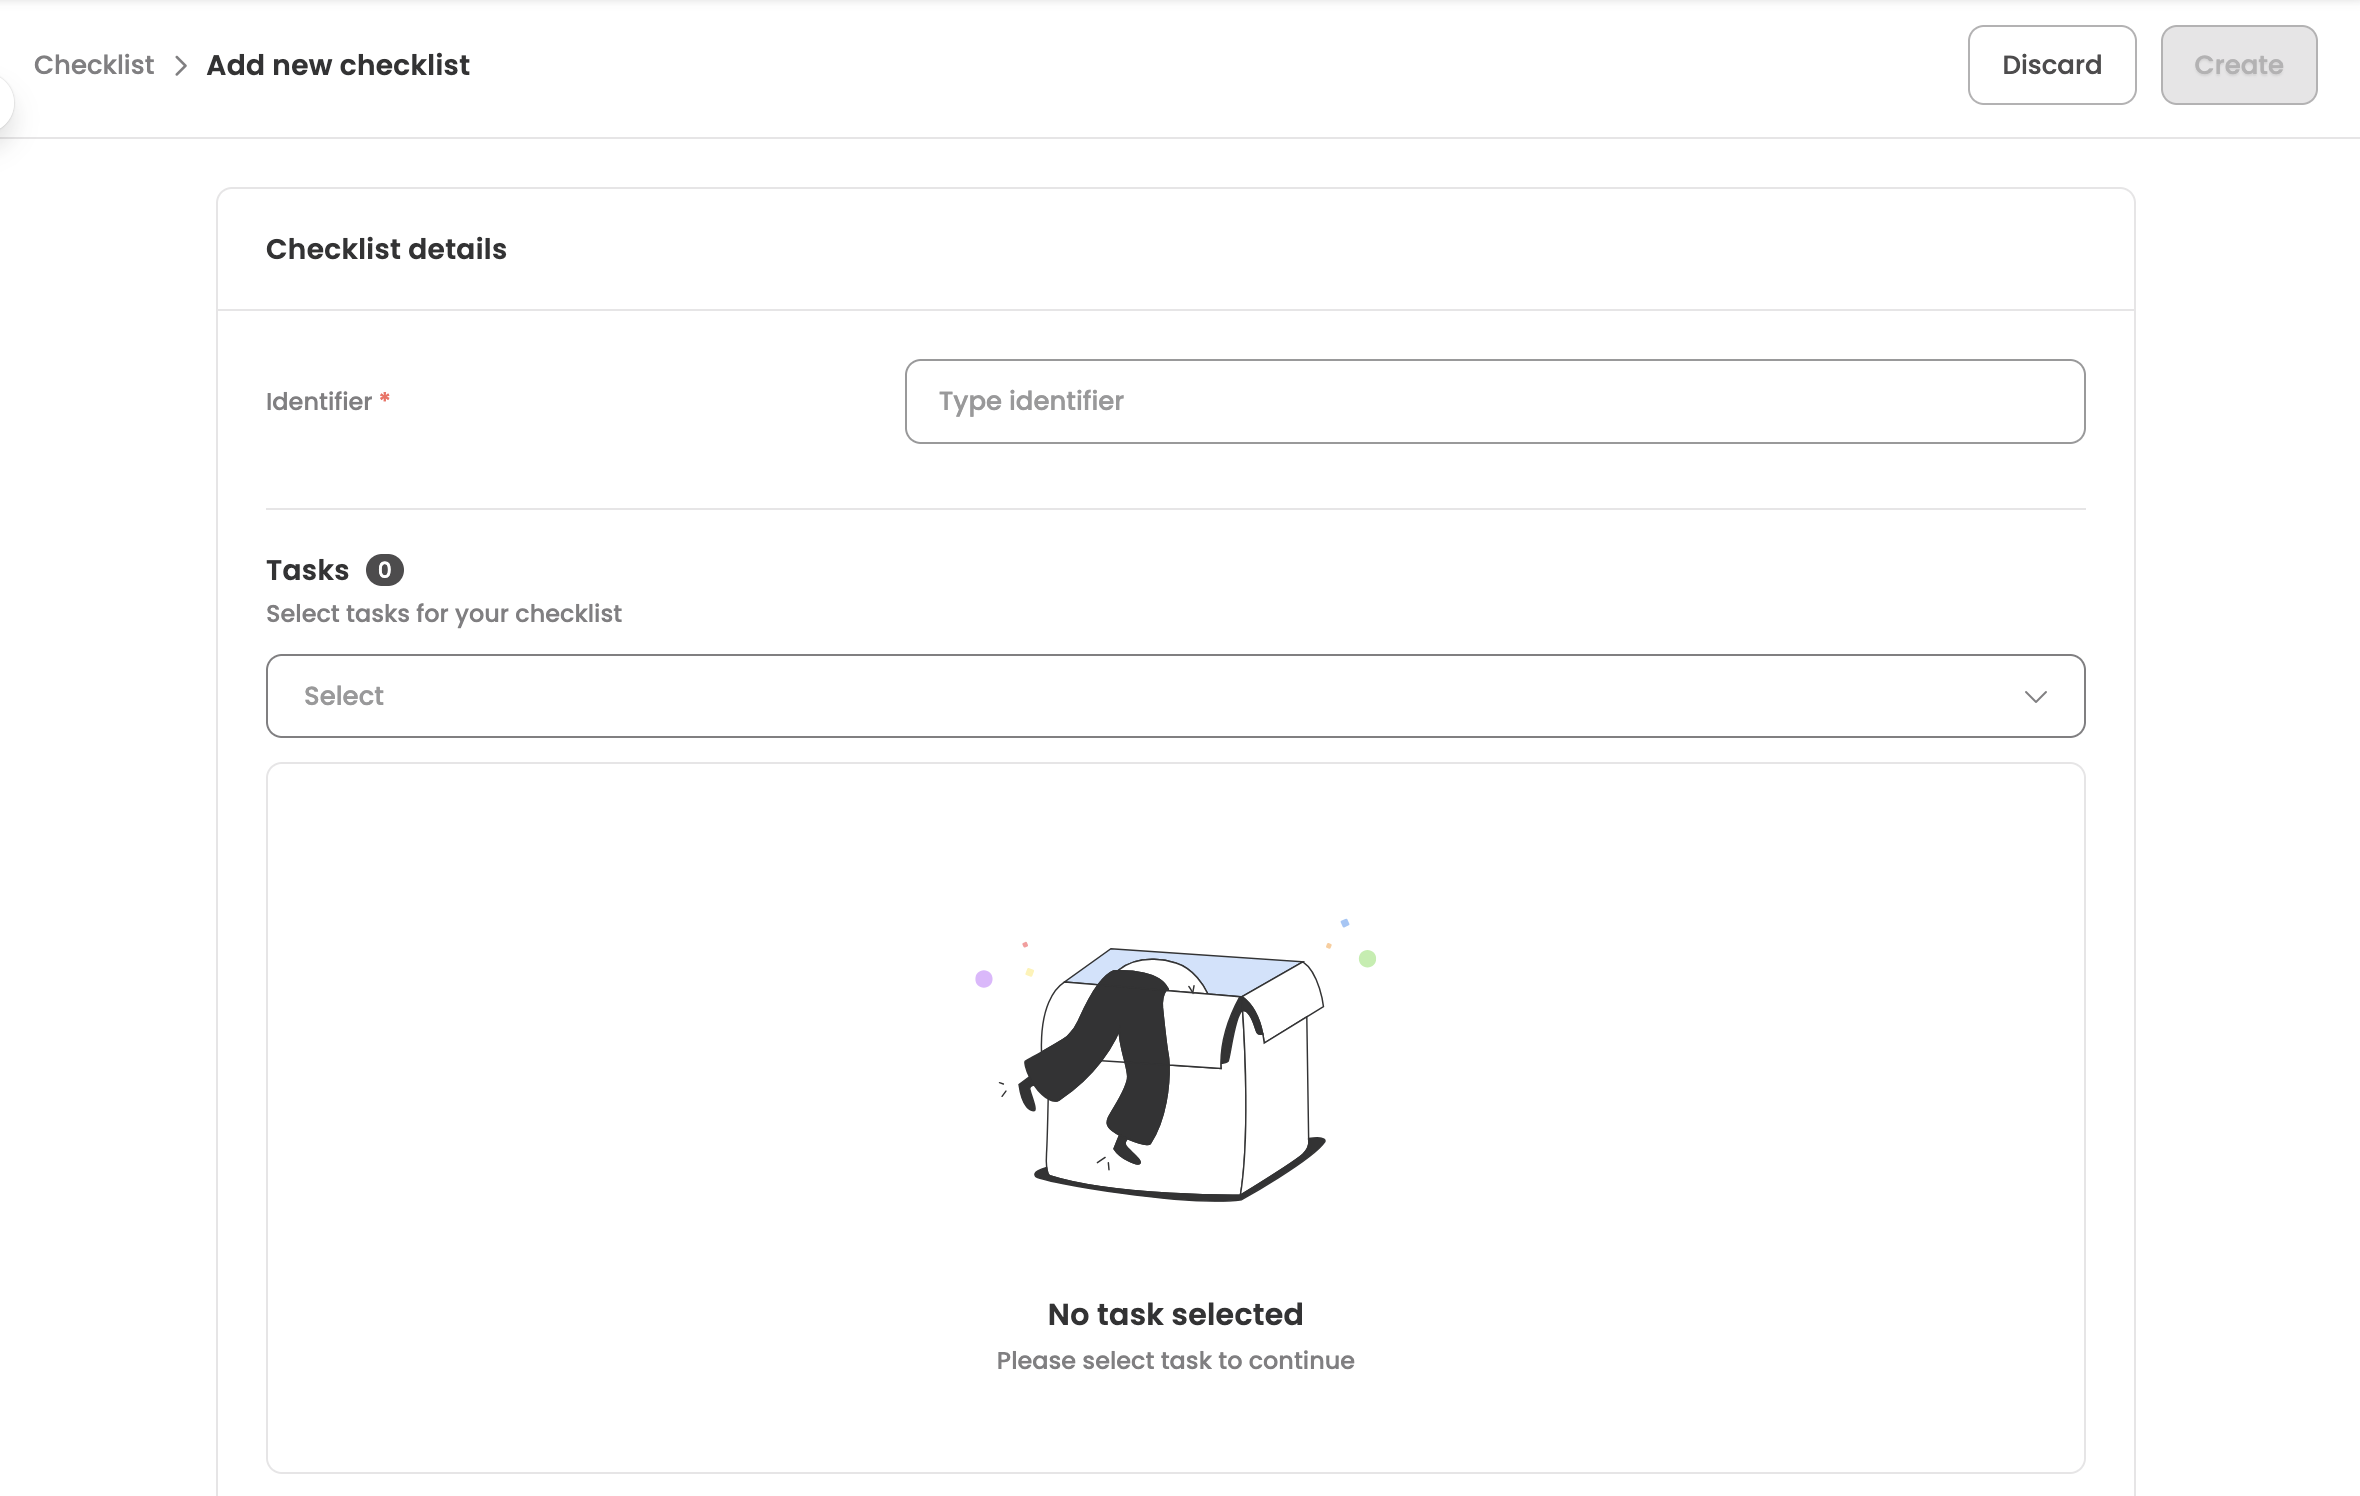
You'll be taken to the checklist builder, which opens on the Checklist details card. Configure the checklist details and tasks (below), then click Create to save.
Checklist details
-
Identifier: Enter a name for the checklist (required). The identifier uniquely names the checklist and can't be changed after the checklist is created, so choose it carefully.
-
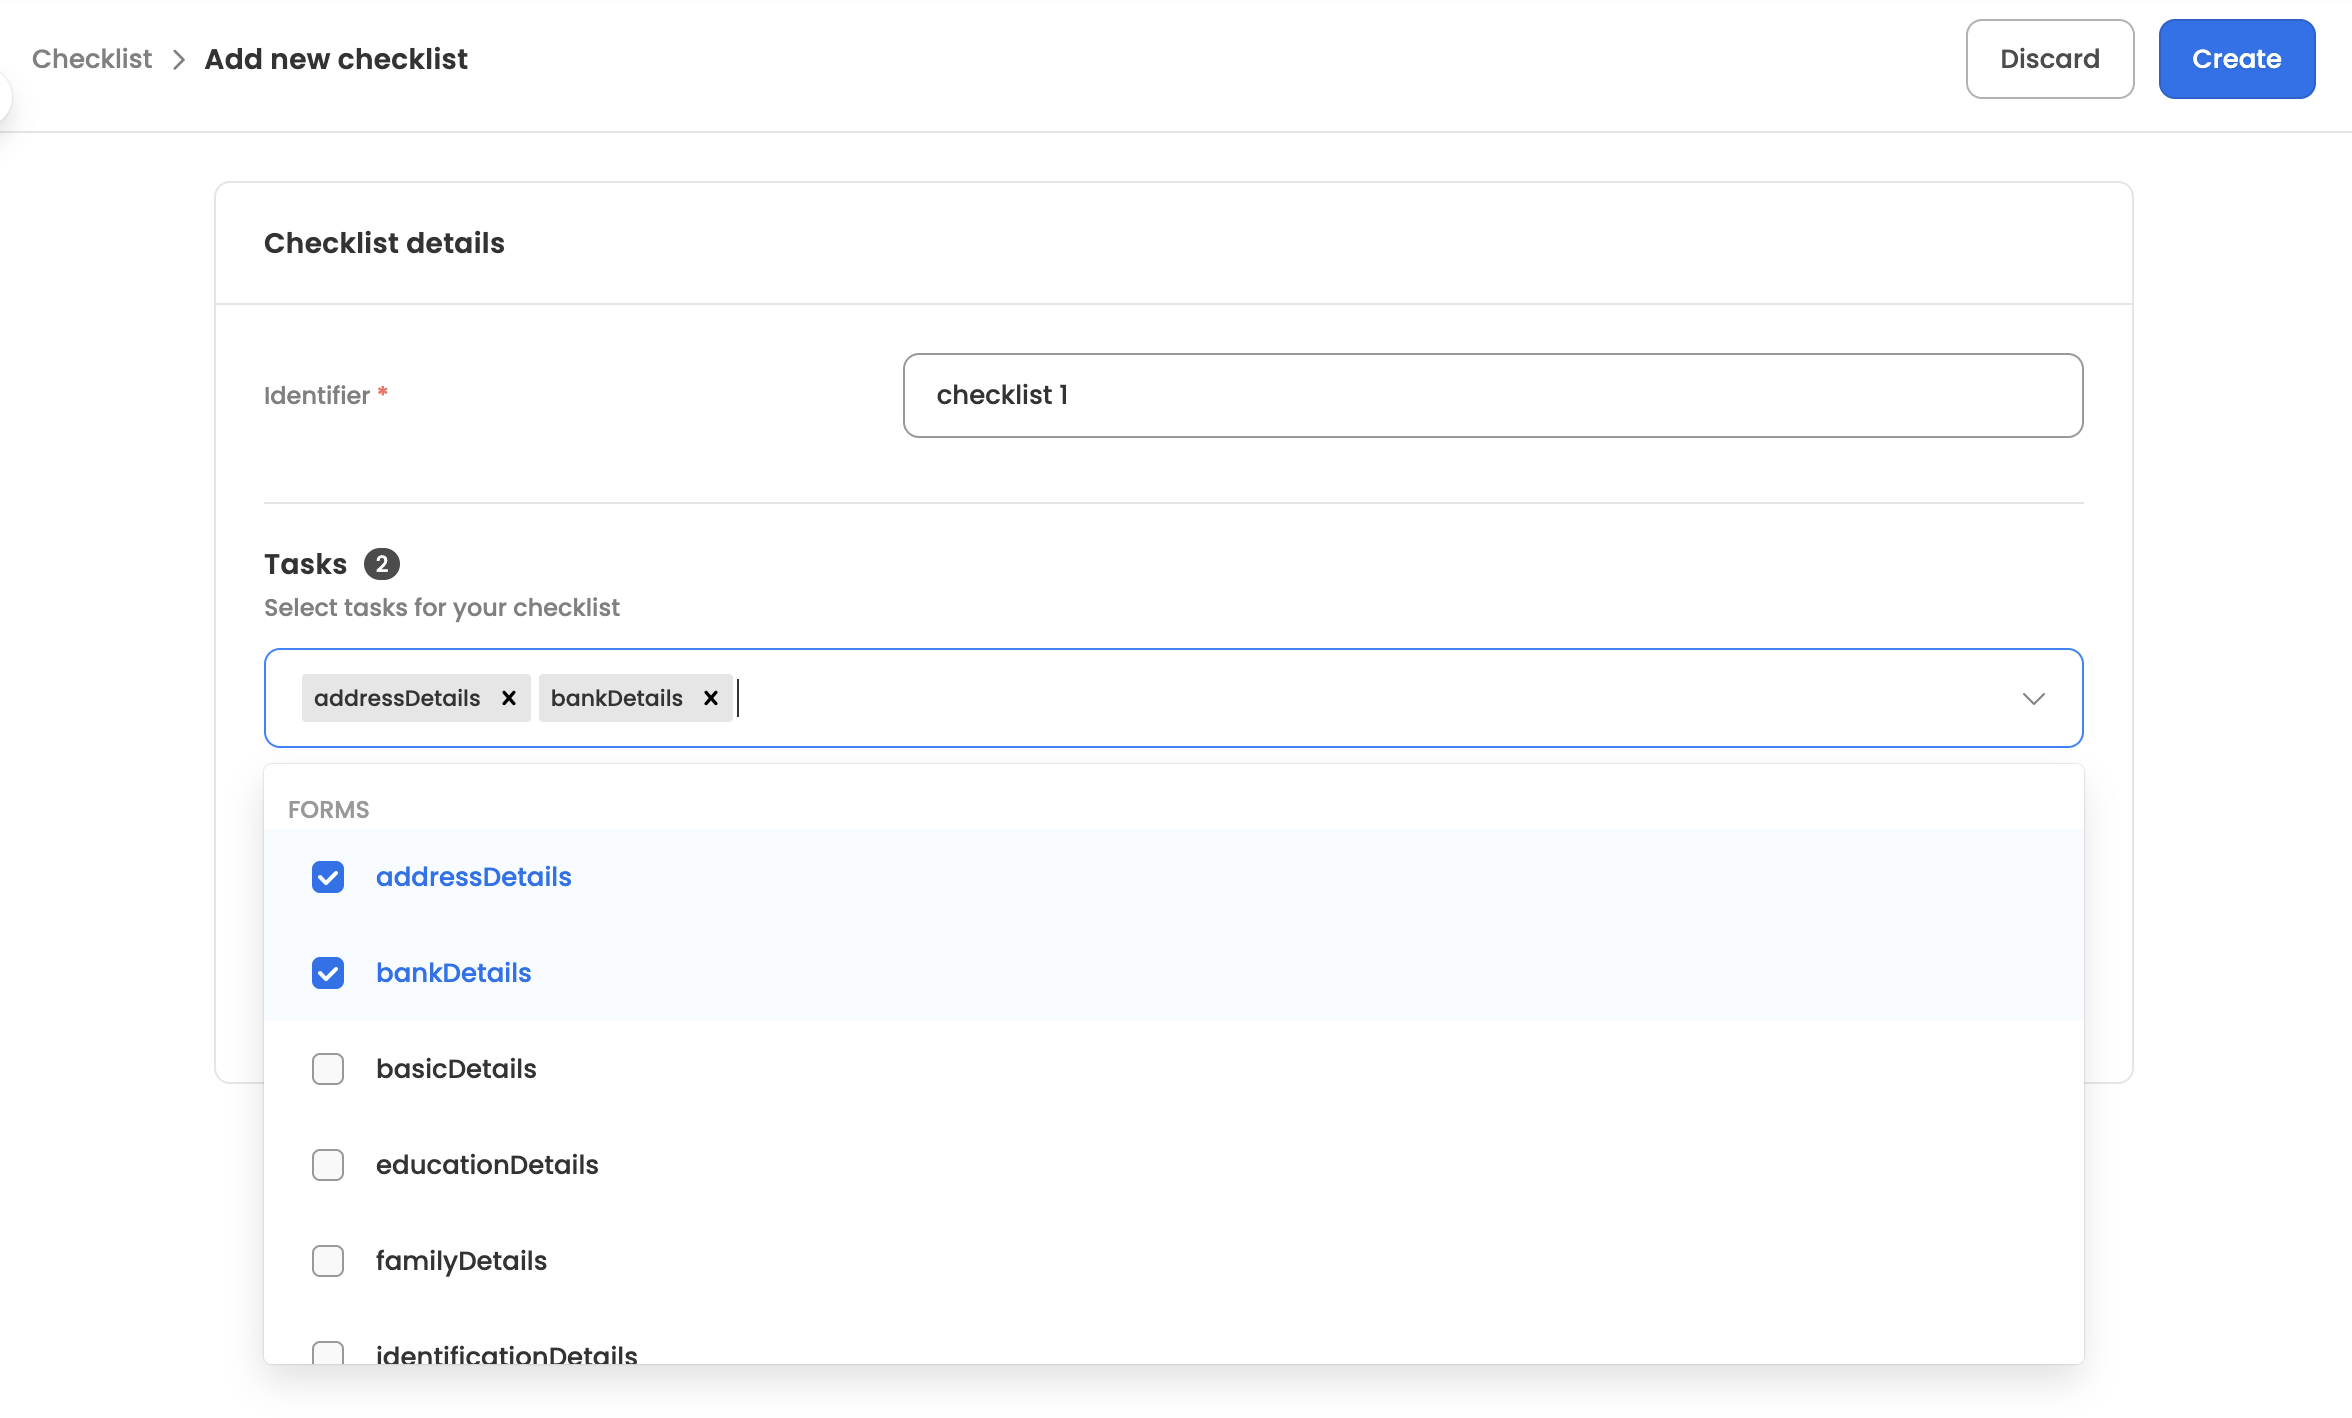
Tasks: Select the tasks to include in the checklist. Tasks are grouped by type — such as Forms, Notifications, and Workflows — and you can select multiple tasks across groups. A count next to the Tasks heading shows how many are currently selected.
Order and manage tasks
The tasks you select appear below the Tasks field as an ordered list. This is the order candidates will see them in, so arrange them the way you want candidates to work through the checklist.
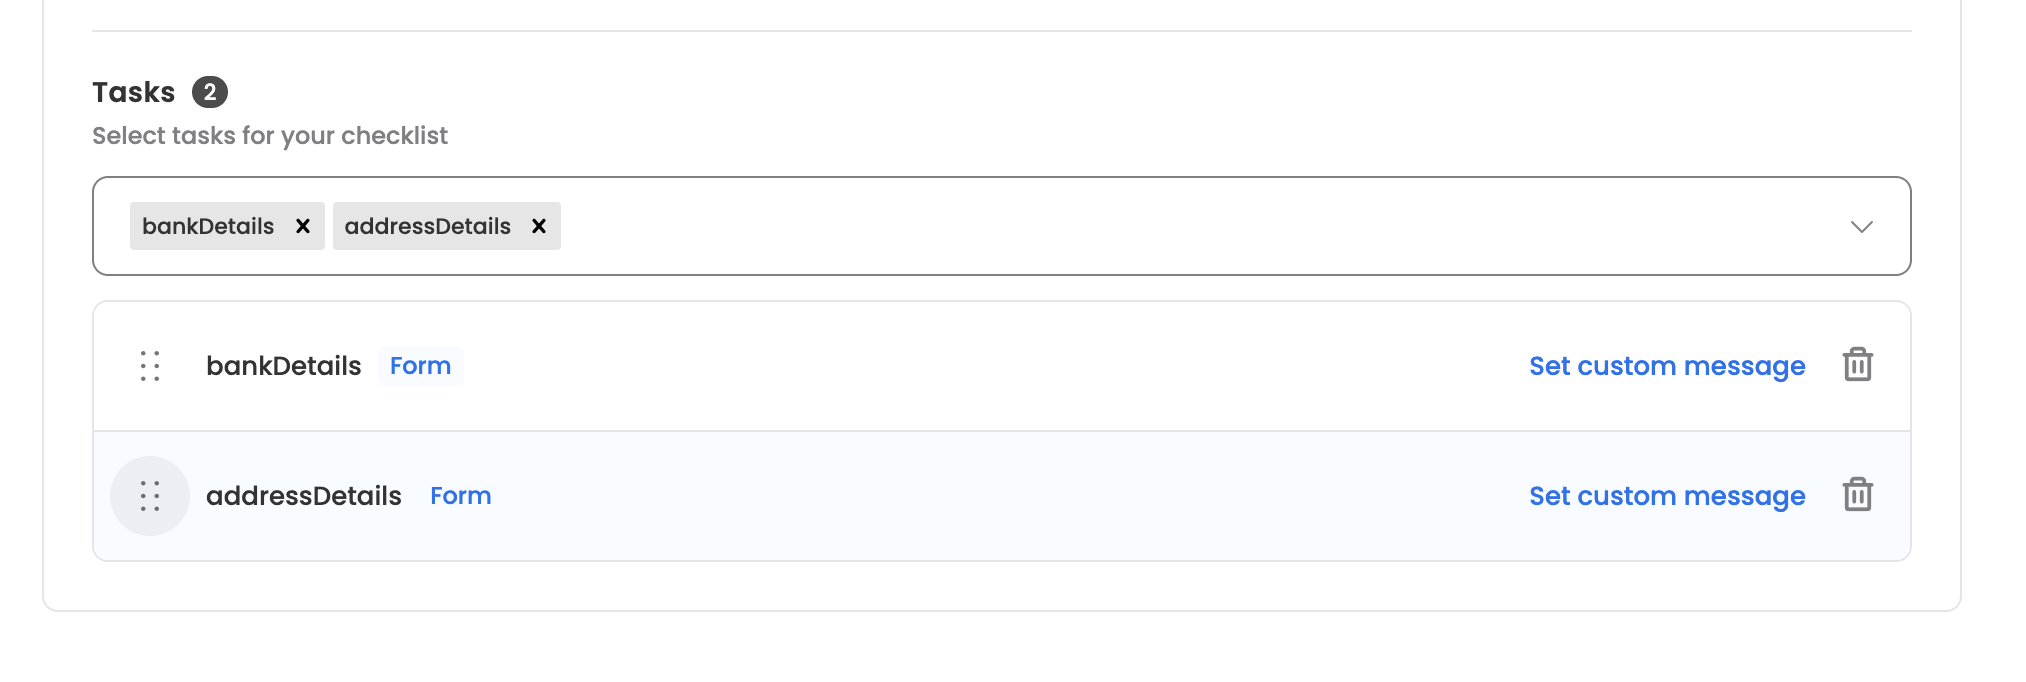
- Reorder: Drag a task by its handle to move it up or down.
- Task type: Each task shows a badge indicating its type (for example, Form, Notification, or Workflow).
- Remove: Click the trash icon on a task to remove it from the checklist.
Set a custom message (form tasks)
For form tasks, you can show candidates a tailored message depending on the status of their submission. Click Set custom message on a form task to open the custom message panel.
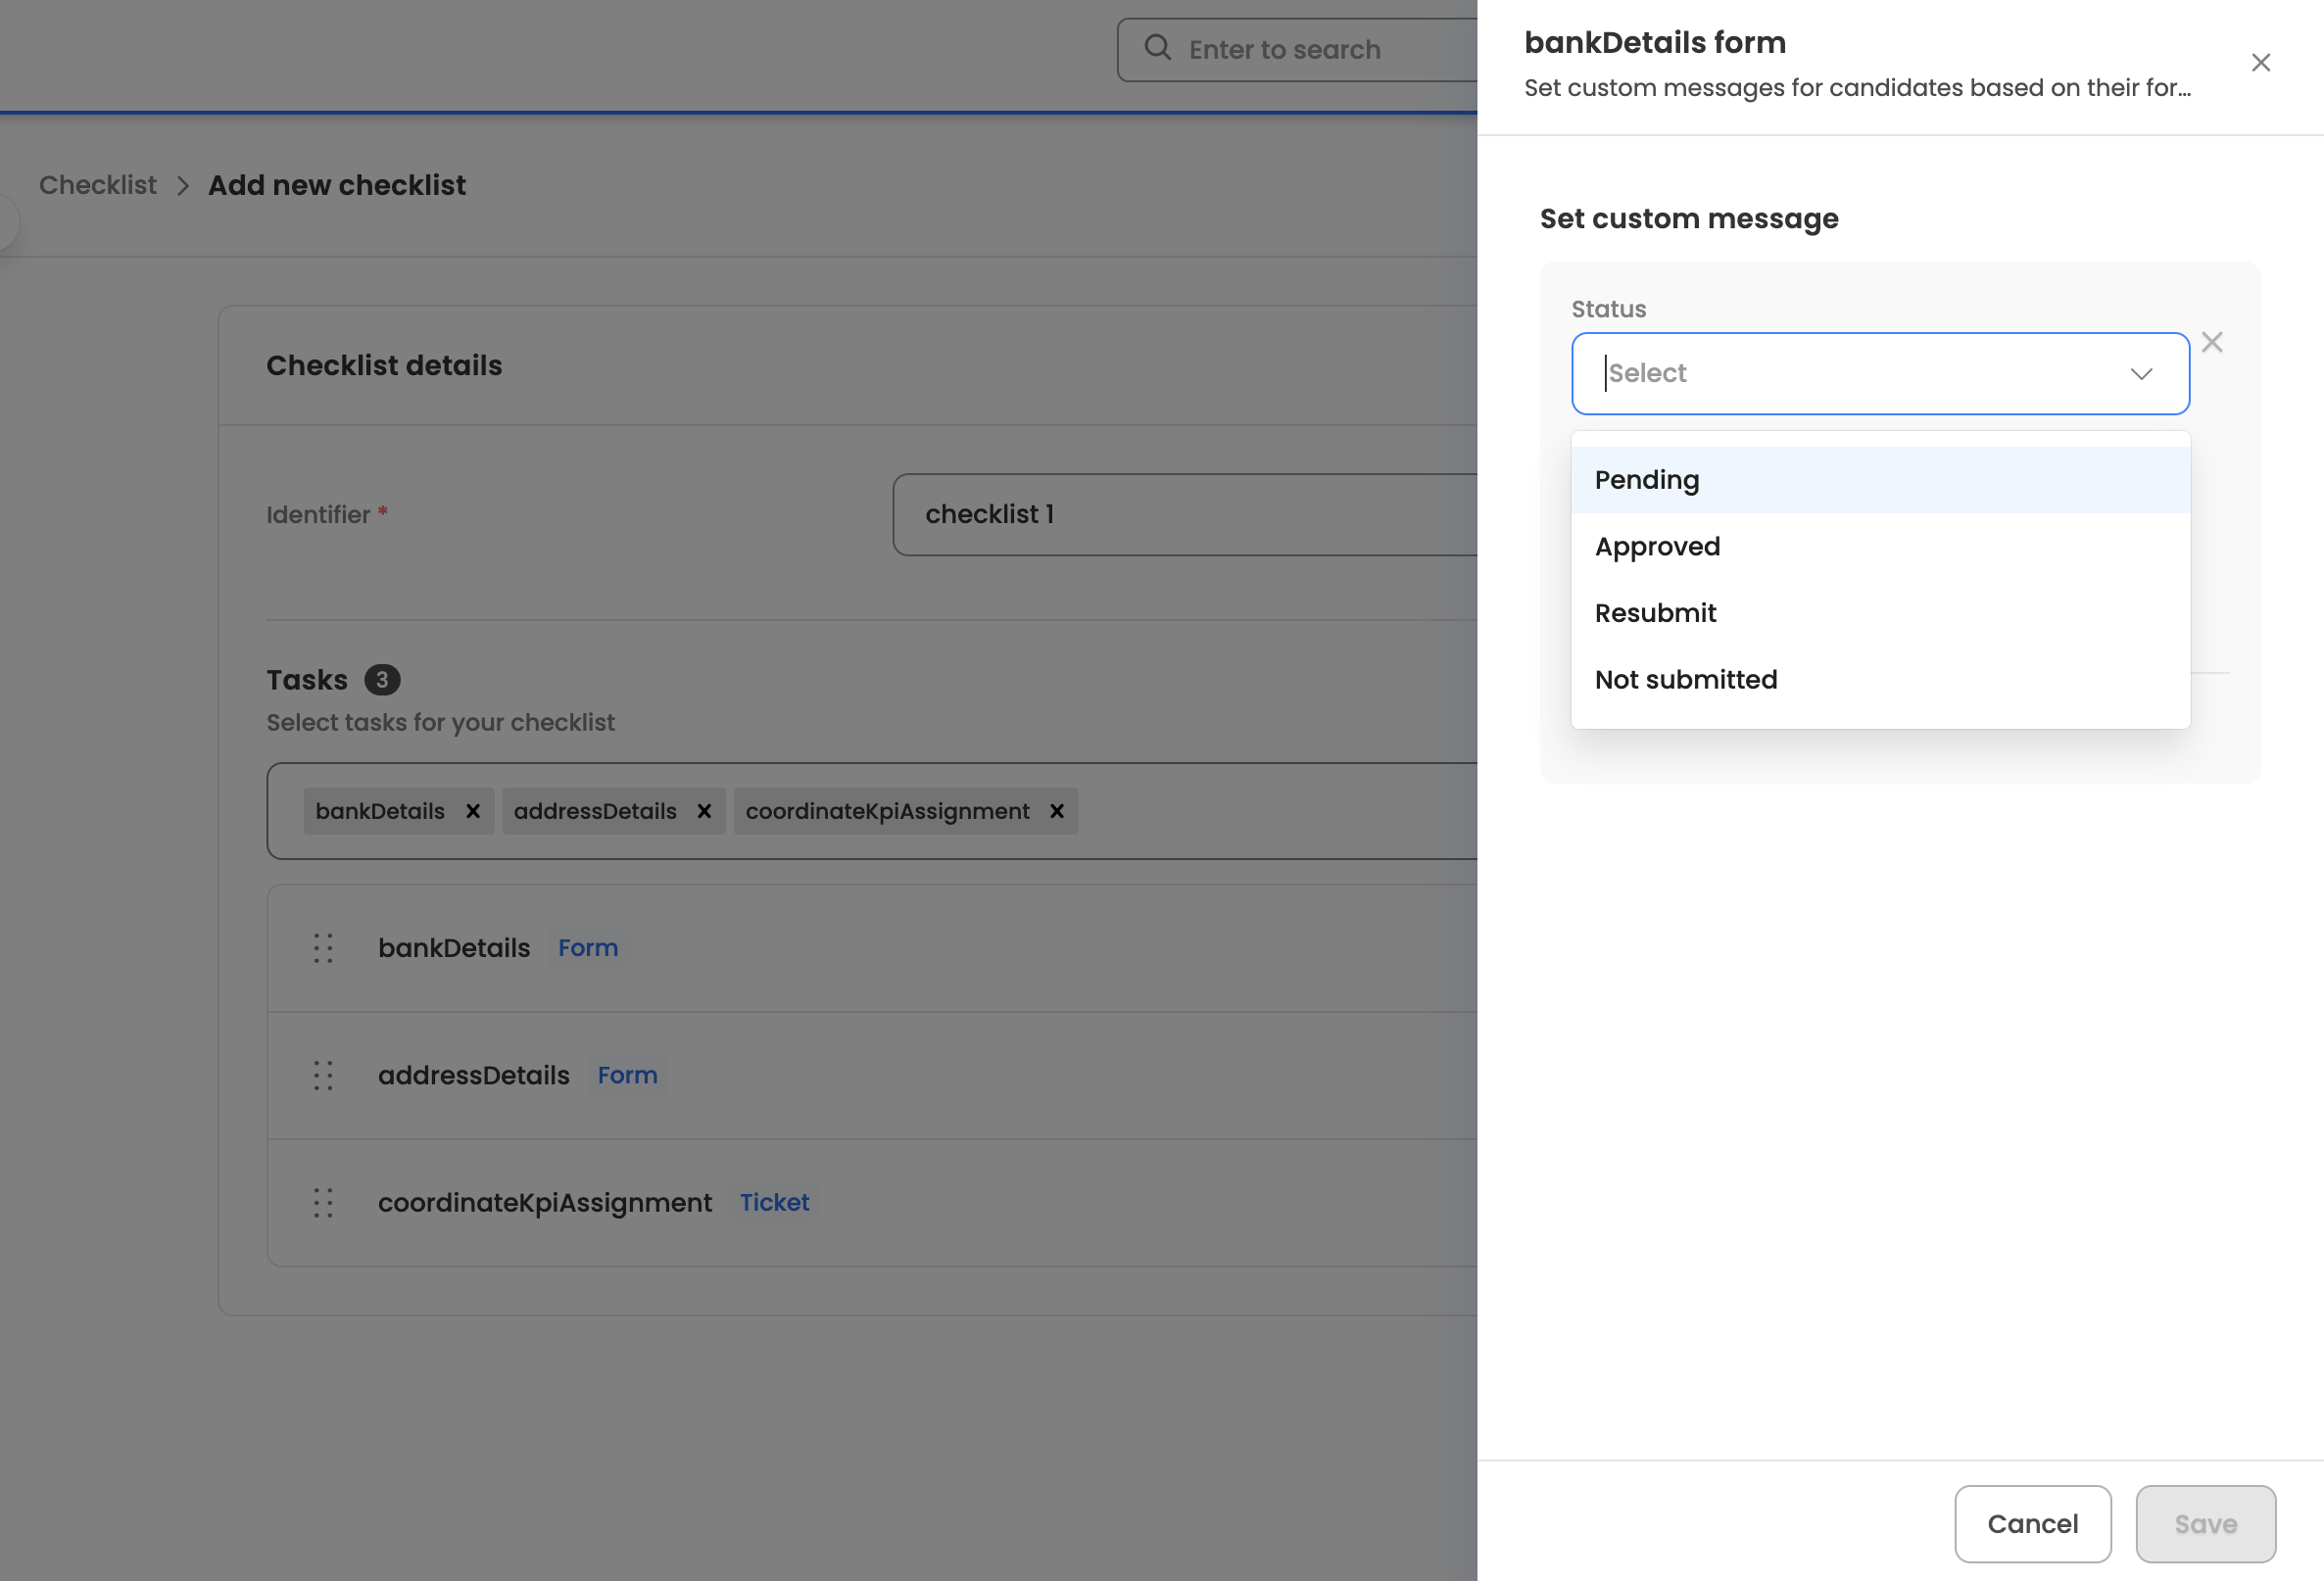
In the panel, add one row per form status:
- Status: Select the form status the message applies to. Available statuses are Pending, Approved, Resubmit, and Not submitted. Each status can be used only once per form.
- Custom message: Enter the message candidates see for that status (required for each row you add).
Use Add more to add another status/message row (up to one per available status). Click Save to apply the messages to the task, or Cancel to discard them. At least one complete status-and-message row is required to save.
Once you're done configuring the checklist, click Create to save it. (When editing an existing checklist, the button reads Save changes.) Use Discard to leave without saving.
Managing existing checklists
The configured checklists are visible in the Checklist table with the following columns: Identifier, Updated by, Updated on, and Status. You can search the table and sort by any column.
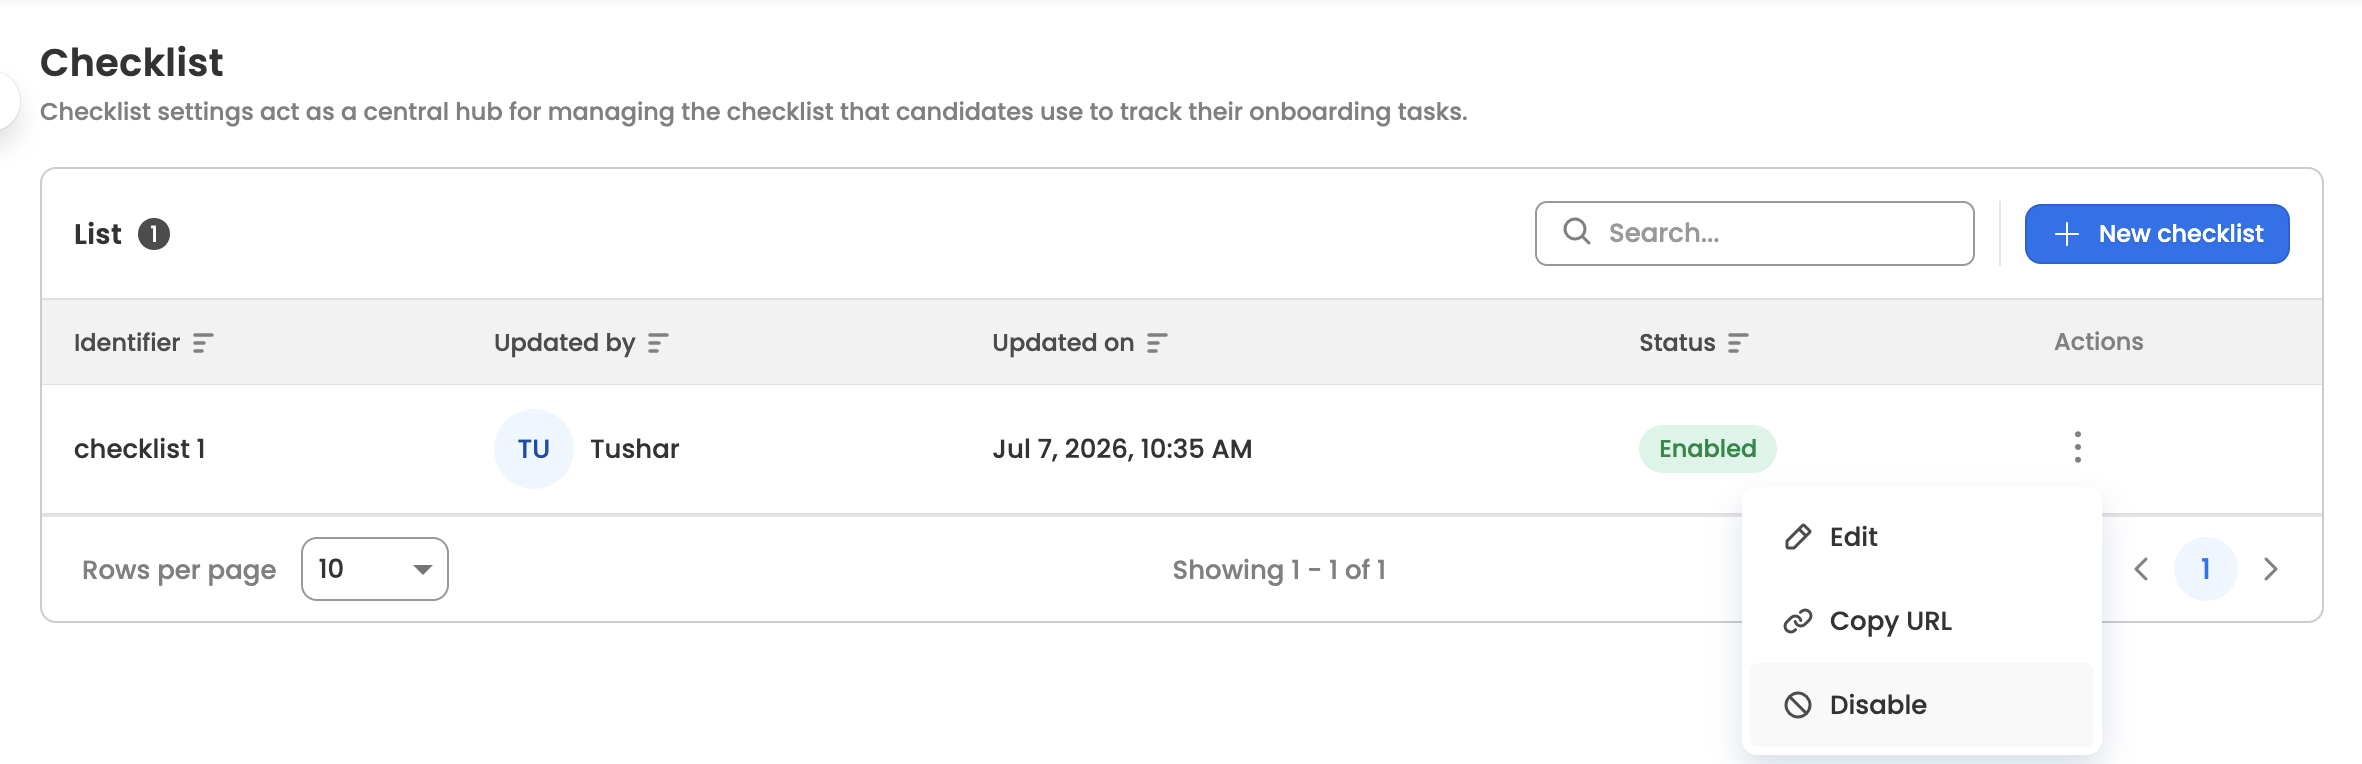
A checklist's Status can be one of:
- Enabled: The checklist is active.
- Disabled: The checklist is inactive.
Click any row to open the checklist in a read-only view. From there, use Edit to switch into edit mode and make changes.
Here are the actions available for each checklist from the three-dot menu:
- Edit: Modify the configured checklist. (The identifier stays fixed; you can change the tasks, their order, and their custom messages.)
- Copy URL: Copy the checklist's shareable link to your clipboard so you can distribute it to candidates.
- Enable/Disable: Disable an active checklist, or enable a disabled checklist.
Updated 3 months ago