
Notification Settings
Notification settings hold the things that are set up once and reused across notifications: who can do what, the webviews notifications can link to, and your WhatsApp templates.
To open them, select Settings at the bottom of the Notifications side menu. Notification admins can open settings. With access control on, other users need the matching permission, such as Manage webviews for notifications or Manage permissions.
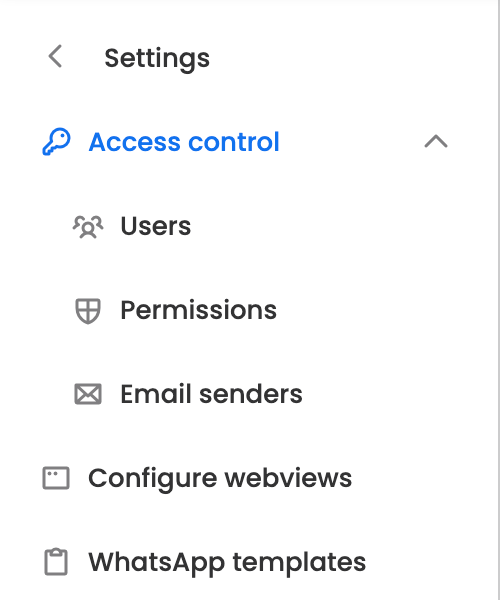
The Notification settings menu
| Setting | Use it to |
|---|---|
| Access control | Manage users, permission sets and email sender access |
| Configure webviews | Set up the webviews notifications can open as buttons |
| WhatsApp templates | Create WhatsApp templates and track their approval |
You see the settings your access allows. Access control only appears when Advanced RBAC is turned on for your account, and Email senders within it only for users who can manage sender access.
Settings opens on Access control → Users when access control is on, and on Configure webviews otherwise.
Access control
Users, Permissions and Email senders decide what each notification agent can do, which employees they can notify, and which addresses they can send email from. See Dashboard Roles.
Configure webviews
A webview is a web page that opens inside the assistant, such as a form, a payslip or a workflow. Once a webview is set up here, anyone creating a bot notification can add it as a button under Actions → Webviews.
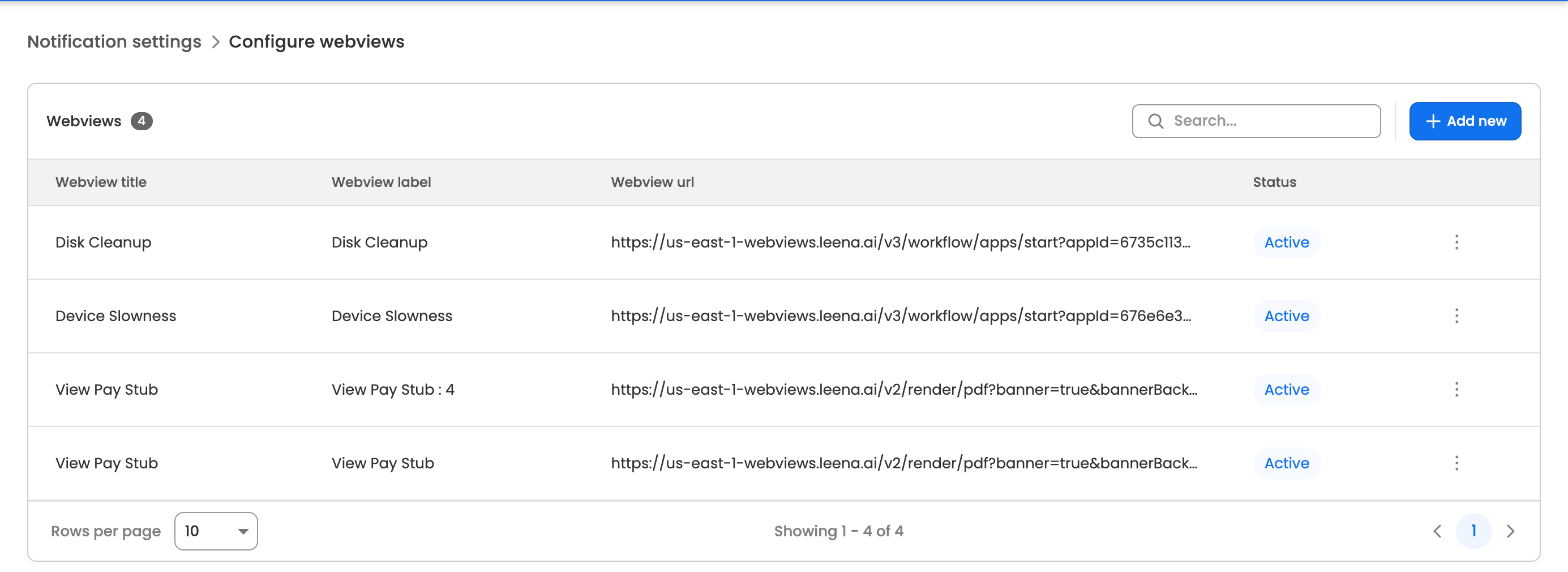
Configure webviews
Add a webview
- Select Add new.
- Fill in:
- Webview title: the text on the button employees see. Up to 20 characters, without special characters.
- Webview label: a name to tell the webview apart in lists. Up to 20 characters, without special characters.
- Webview URL: the full address of the page.
- Save.
The new webview is Active and can be picked in notifications straight away.
Turn a webview off
Open the ⋮ menu on its row and select Deactivate. It's marked Deactivated and can no longer be added to new notifications. Select Activate to turn it back on.
WhatsApp templates
WhatsApp only lets businesses start a conversation with a template approved by Meta, so every WhatsApp notification uses one. This page lists your templates and lets you create new ones and send them for approval.
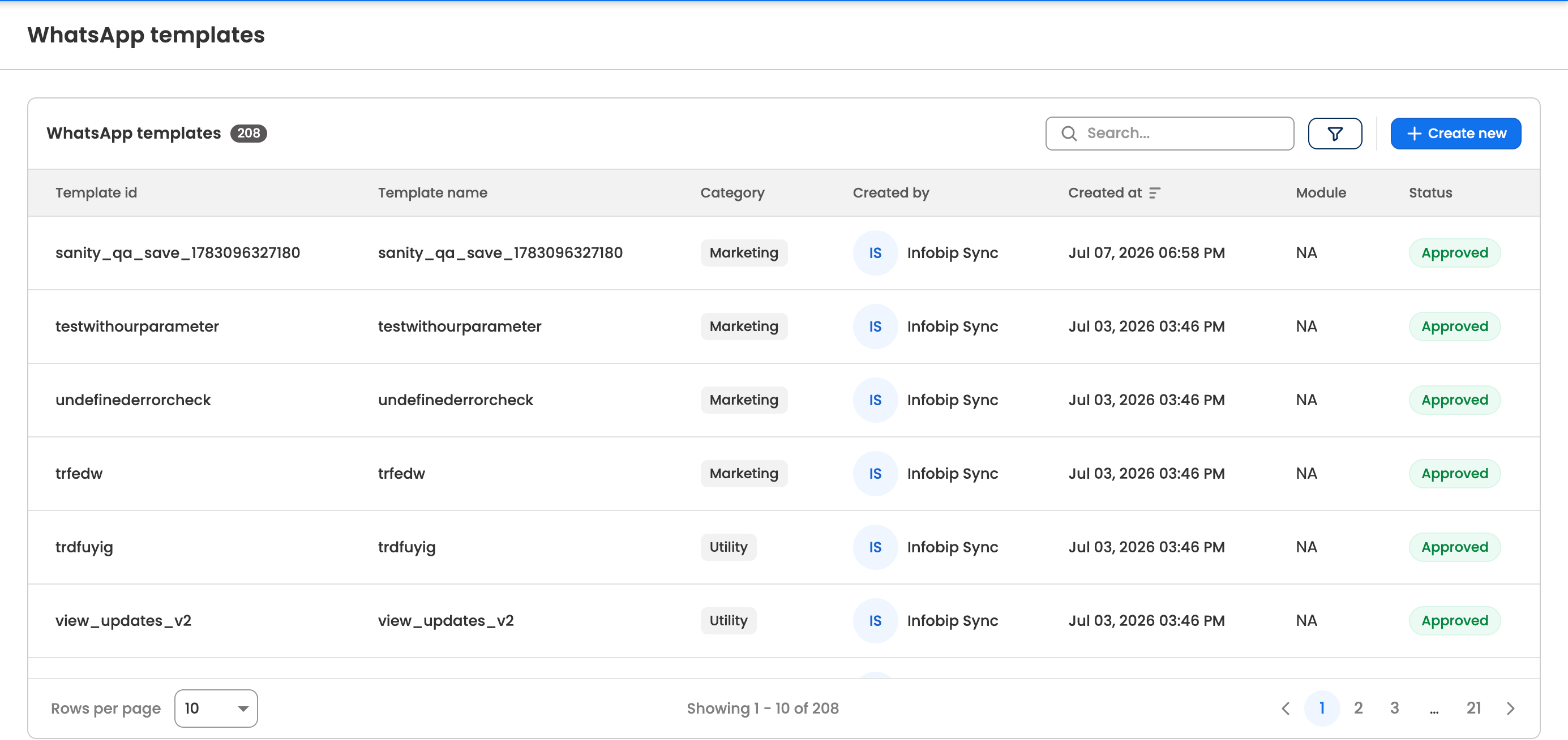
WhatsApp templates
| Column | What it shows |
|---|---|
| Template ID | The template's identifier |
| Template name | The template's name |
| Category | Marketing, Utility or Authentication |
| Created by | Who created it. Templates created directly with your WhatsApp provider and synced in show the provider's sync, for example Infobip Sync. |
| Created at | When it was created |
| Module | The Leena AI modules it's tagged for, such as Notifications or Case Management, or NA |
| Status | Approved, Pending, Rejected, Paused or Inactive |
Use Search, or the filter button to filter by creation date, creator, module, category or status. Only Approved templates can be picked when creating a WhatsApp notification.
Create a template
Select Create new.
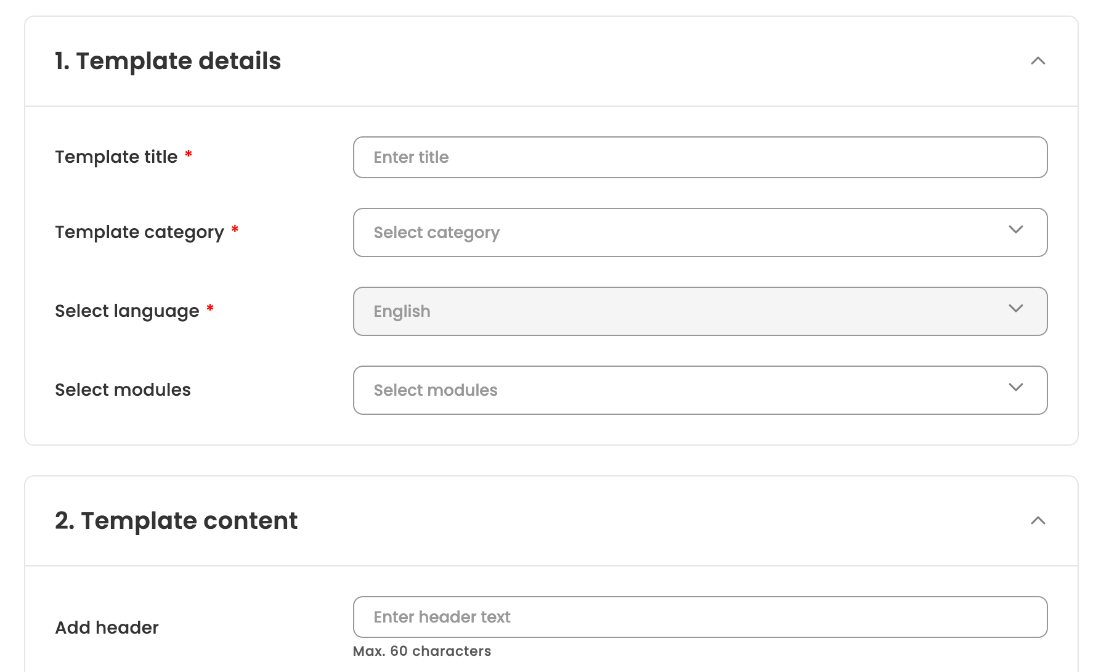
Creating a WhatsApp template
1. Template details
- Template title (required): lowercase letters, numbers and underscores only, and unique among your templates. For example,
policy_update_reminder. - Template category (required): Marketing, Utility or Authentication, following Meta's rules for what each category may contain.
- Select language (required): English or Hindi.
- Select modules: the Leena AI modules the template is for, such as Notifications. This helps you find the right template later.
2. Template content
- Add header: an optional line of text above the message, up to 60 characters. Headers aren't allowed in the Authentication category.
- Add body (required): the message itself, with formatting.
- Add footer: an optional line below the message, up to 60 characters.
- CTA: up to 10 buttons in total. Quick replies are buttons the employee taps to reply; each has a QR title and an optional Module Id. External links open a web page; you can add up to 2.
Personalize with variables. Type {{ in the header or body to insert a variable, such as the employee's name, from the list that appears. The header can hold at most one variable. When you save, variables are converted to the numbered placeholders WhatsApp expects, such as {{1}}. When you use the template in a notification, you map each placeholder to an employee profile field.
A preview shows the template as employees will see it. Select Save to create it, or Discard to throw it away.
After you save
The template is sent to Meta for review and starts as Pending. Once Meta approves it, its status changes to Approved and you can use it in notifications. If it's Rejected, check it against Meta's template guidelines, then create a corrected version.
Using a template in a notificationWhen you create a WhatsApp notification, search for an approved template and select it. Templates marked Mapping required have placeholders: choose the employee profile field for each one. The mapping is saved with the template, so it's ready the next time. See Creating Notifications.
Updated about 1 hour ago