
How to create a new Workflow
Every form-based application you build in Workflows Studio is called a Workflow. You create one from the Custom workflows list in the Leena AI dashboard.
Where to find it
- In the dashboard's left navigation, open Workflows and select Custom workflows.
- Click + Create custom workflow at the top right of the list.

Step 1 — Workflow configuration
Give the workflow a name and describe what it does. AI Colleagues use this information to decide when to invoke it as a tool.
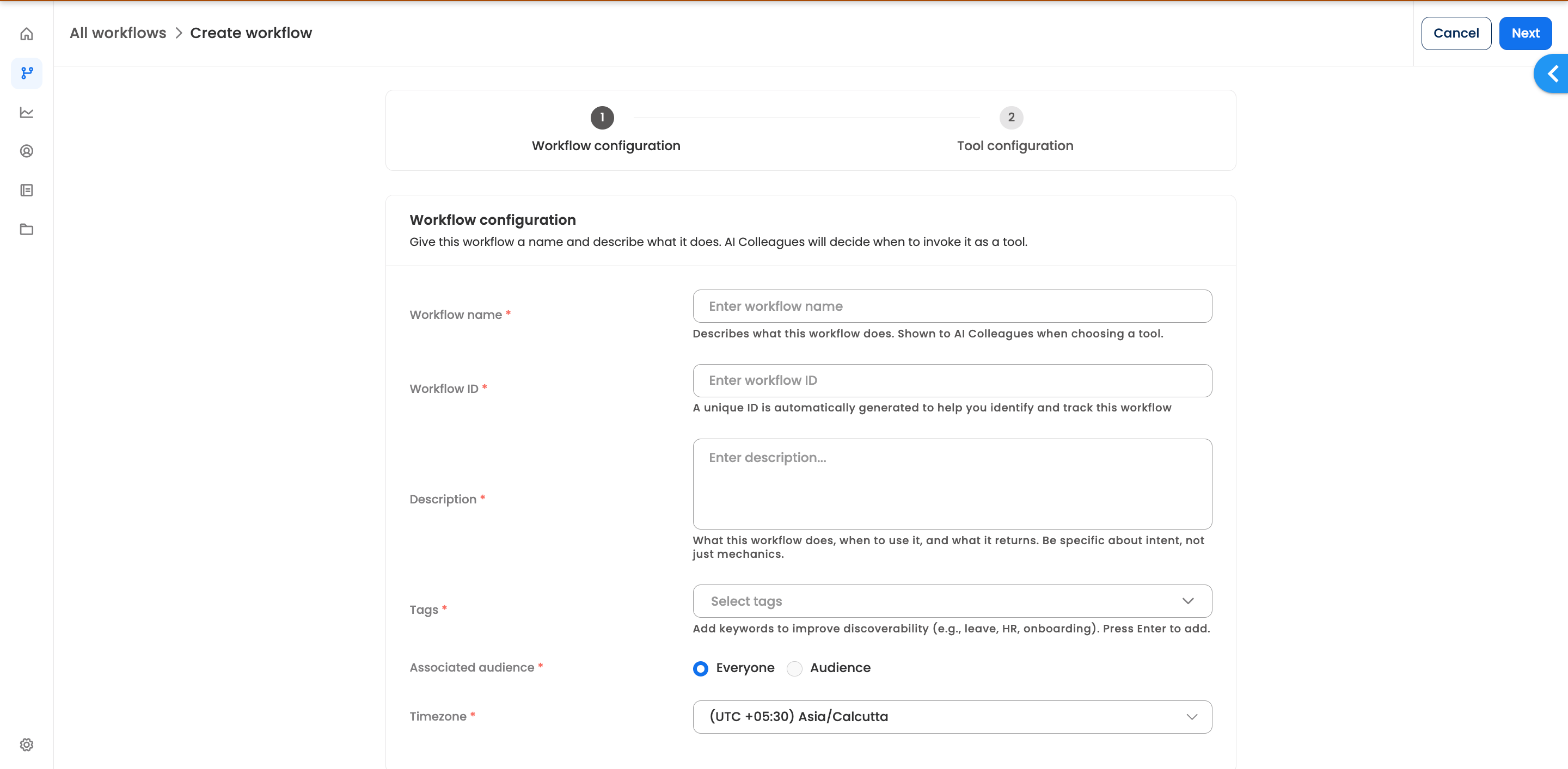
| Field | What it's for |
|---|---|
| Workflow name (required) | Describes what this workflow does. Shown to AI Colleagues when choosing a tool. |
| Workflow ID (required) | A unique ID, generated automatically, to help you identify and track this workflow. |
| Description (required) | What this workflow does, when to use it, and what it returns. Be specific about intent, not just mechanics. |
| Tags (required) | Keywords that improve discoverability (e.g., leave, HR, onboarding). |
| Associated audience (required) | Make the workflow available to Everyone, or restrict it to a specific Audience. |
| Timezone (required) | The timezone used for this workflow. |
Click Next to continue.
Step 2 — Tool configuration
Configure how AI Colleagues can invoke this workflow as a tool. See Tool configuration for the full field reference.
Click Create to finish. The new workflow opens directly in the builder, where you can set up its Forms, the Workflow canvas, Permissions and Settings.
After creating
- The workflow appears in the Custom workflows list. Use the search bar or the All Workflows / Unpublished / Active / Inactive / Draft changes filters to find it.
- To activate or deactivate it, open the row's menu (⋮) and use the Active toggle.
- The row menu also gives you Version history, Update old version, Clone workflow, Migrate, Edit Workflow settings and Copy workflow identifier.
Updated 5 days ago
Did this page help you?